<?xml version="1.0" encoding="utf-8"?><feed xmlns="http://www.w3.org/2005/Atom" ><generator uri="https://jekyllrb.com/" version="3.10.0">Jekyll</generator><link href="https://fabianhertwig.com/feed.xml" rel="self" type="application/atom+xml" /><link href="https://fabianhertwig.com/" rel="alternate" type="text/html" /><updated>2026-03-03T13:40:05+01:00</updated><id>https://fabianhertwig.com/feed.xml</id><title type="html">Fabian Hertwig’s Blog</title><subtitle>An AI engineer&apos;s notes on technology, cognition, and how systems—software and human—really work.</subtitle><author><name>Fabian Hertwig</name></author><entry><title type="html">How Photons Clone Themselves: From Laser Pointers to Shooting Down Drones</title><link href="https://fabianhertwig.com/blog/laser-deep-dive/" rel="alternate" type="text/html" title="How Photons Clone Themselves: From Laser Pointers to Shooting Down Drones" /><published>2026-02-17T11:00:00+01:00</published><updated>2026-02-17T11:00:00+01:00</updated><id>https://fabianhertwig.com/blog/laser-deep-dive</id><content type="html" xml:base="https://fabianhertwig.com/blog/laser-deep-dive/"><![CDATA[<p>A while ago I watched a video of a US Navy ship shooting down a drone with a laser. No missile, no bullet. A beam of light tracked the drone, held steady for a few seconds, and the thing caught fire mid-air and dropped into the ocean.</p>

<p><img src="/assets/images/laser-deep-dive/navy-laws.webp" alt="The Laser Weapon System (LaWS) aboard USS Ponce. This is what started the rabbit hole." />
<em>The Laser Weapon System (LaWS) aboard USS Ponce. This is what started the rabbit hole. Photo: U.S. Navy.</em></p>

<p>My first reaction: <em>how does light do that?</em></p>

<p>Light is the thing that comes out of a lamp. It’s what reads barcodes at the grocery store. My cat chases a laser pointer dot around the living room. How do you get from <em>that</em> to burning a military drone out of the sky?</p>

<p>And then the obvious follow-up: is it even the same thing? Is the physics behind a three-dollar laser pointer and a naval weapons system actually the same physics? Or are they just both called “laser” the way a toy car and a Formula 1 car are both called “car”?</p>

<p>Turns out: it really is the same physics. Every laser ever built (the pointer, the barcode scanner, the eye surgery machine, the drone-killer) works because of one quantum mechanical trick: <strong>a photon hits an excited atom, and two identical photons come out.</strong> Same wavelength, same direction, perfectly synchronized. The photon clones itself.</p>

<p>Einstein predicted this would happen in 1917 while he was trying to make some equations balance. He called it “stimulated emission,” thought it was a curious theoretical detail, and moved on. Nobody figured out what to do with it for 43 years.</p>

<p>I went down the rabbit hole on this, and it goes <em>deep</em>. The materials that make lasers possible (ruby crystals, rare earth elements, certain gas mixtures) have these properties basically by accident. People discovered them because they noticed strange glows under certain conditions and got curious enough to investigate. The whole field exists because some physicists looked at a faintly glowing crystal and thought <em>huh, that’s weird</em> instead of walking past it.</p>

<p>This post starts with a light bulb and ends with lasers that briefly outpower every power plant on Earth combined. It’s a long one. Let’s go.</p>

<h2 id="part-1-lets-start-with-a-light-bulb">Part 1: Let’s Start With a Light Bulb</h2>

<p><img src="/assets/images/laser-deep-dive/light-bulb.webp" alt="Incandescent light bulbs with their tungsten filaments glowing." />
<em>Photo: Joy Singh / <a href="https://www.pexels.com/photo/turned-on-pendant-lamps-2764942/">Pexels</a></em></p>

<p>You flip a switch. A light bulb turns on. Simple, right? But what’s actually happening inside that bulb is your first step into understanding why lasers are so weirdly special.</p>

<p>Inside an old-school incandescent light bulb, there’s a tungsten wire. When you flip the switch, electricity flows through that wire, and because tungsten has electrical resistance, the wire heats up. A lot. We’re talking about 2,500°C (4,500°F) kind of hot. And when things get that hot, something interesting happens at the atomic level.</p>

<h3 id="the-electron-shuffle-a-chemistry-refresher">The Electron Shuffle: A Chemistry Refresher</h3>

<p>Remember from chemistry class that electrons orbit atoms in specific energy levels? Think of these like the floors of a hotel. An electron can be on the ground floor, the second floor, the third floor, etc., but it can’t just hang out in the stairwell between floors. Those in-between spaces? Not allowed. Quantum mechanics says no.</p>

<p>Now, when you heat up tungsten to ridiculous temperatures, you’re basically pumping energy into the atoms. This energy causes electrons to get excited, and yes, that’s literally the physics term. An excited electron absorbs energy and jumps from a lower energy level to a higher one. It’s like someone giving our electron enough energy to take the elevator up several floors.</p>

<p>But here’s the thing: electrons are homebodies. They don’t want to be on the higher floors. The ground state, the lowest energy level, is where they’re most stable and most comfortable. So after a tiny, tiny fraction of a second (sometimes nanoseconds, sometimes microseconds) they fall back down to a lower energy level.</p>

<p>And here’s the crucial part: when an electron drops from a higher energy level to a lower one, it has to release the energy it gained. Energy can’t just disappear. And it releases that energy as a photon, a particle of light.</p>

<p>The energy difference between the two levels determines the photon’s wavelength, which we perceive as its color. Big energy difference means a high energy photon, which corresponds to blue or ultraviolet light. Small energy difference means a low energy photon, which gives you red or infrared light. The relationship is exact and mathematical: the photon’s energy equals Planck’s constant times its frequency, and frequency is related to wavelength by the speed of light. This is why each type of atom has its own characteristic spectrum, its own fingerprint of colors it can emit.</p>

<h3 id="why-regular-light-is-kind-of-messy">Why Regular Light is Kind of Messy</h3>

<p>So in your light bulb, you’ve got trillions upon trillions of tungsten atoms, all at different temperatures, with electrons constantly jumping up and falling back down. But here’s the critical insight: this process is completely chaotic and random.</p>

<p>Electrons are jumping to different energy levels randomly because the thermal energy doesn’t care which level an electron ends up in. It’s just chaos, heat being absorbed however it can be. They’re falling back down at random times because spontaneous emission is, well, spontaneous. There’s no trigger, no cause. An excited electron just has some probability of falling down each moment, and eventually it does. The photons are shooting out in completely random directions because there’s nothing to favor one direction over another. They go up, down, left, right, forward, backward, all 360 degrees worth of possibilities. And the photons are all different wavelengths because electrons are dropping between all sorts of different energy levels, not just one specific transition.</p>

<p>The result? Light that spreads out in all directions, with a broad spectrum of colors, which is why incandescent light looks yellowish-white rather than a pure color, and where all the light waves are completely out of sync with each other. The peaks of one wave don’t line up with the peaks of another. Each photon is doing its own thing, like a crowd of people all talking at once instead of singing in unison.</p>

<p>This type of light is called incoherent light. It’s messy, it’s chaotic, it’s random. And it’s perfectly fine for lighting up your room. The incoherence doesn’t matter when you just want to see where you’re walking.</p>

<p>But what if we wanted something different? What if we wanted all the photons to be the same wavelength, to travel in the exact same direction, and to be synchronized with all their waves lined up perfectly? That’s where lasers come in.</p>

<h2 id="part-2-what-makes-lasers-special-and-why-should-we-care">Part 2: What Makes Lasers Special? (And Why Should We Care?)</h2>

<p>Before we dive into how lasers work, let’s understand why anyone wanted to build one in the first place. What properties of laser light make them so useful that people spent years trying to figure out how to create them?</p>

<h3 id="the-four-key-properties">The Four Key Properties</h3>

<p>Laser light has four special characteristics that regular light doesn’t have, and each one enables different applications.</p>

<p>First, there’s monochromaticity, which means the laser is essentially one pure color. Not “reddish” or “bluish” but a single, precise wavelength. A sodium vapor street lamp might look yellow and seem like one color, but it’s actually emitting several different wavelengths in the yellow region. A laser, on the other hand, might emit light at exactly 632.8 nanometers, and nothing else. This precision is useful in surprising ways. If you’re measuring distances with light (which is what surveyors do, what satellites use to map the Earth’s surface, what scientists use in countless experiments) having exactly one wavelength means your measurements can be incredibly precise. You can calculate distances based on counting the number of wavelengths that fit in that distance, and if your wavelength is fuzzy, your measurement is fuzzy. In fiber optic communication, different wavelengths can carry different signals down the same fiber, but only if each laser is exactly one wavelength with no spread. And in medical applications, different tissues absorb different wavelengths differently, so you can use a laser to target specific structures. A laser tuned to be absorbed by blood vessels but not surrounding tissue can treat vascular problems without damaging healthy tissue.</p>

<p>Second is coherence, which means all the light waves are synchronized. Their peaks and troughs line up. This is like the difference between a stadium of people clapping randomly versus everyone clapping in perfect unison. The unified clapping is way more powerful and you can hear it much farther away. When light waves are coherent, they reinforce each other constructively. Where two peaks meet, they add up to an even bigger peak. This means the light doesn’t spread out and dissipate as quickly. Coherent light can travel much farther while maintaining its intensity. This coherence also enables interference patterns. When you combine two coherent light beams, they create interference fringes, areas where they add up constructively and areas where they cancel out destructively. This is the basis for holography, where you can record three-dimensional images, and interferometry, where you can measure tiny distances or detect gravitational waves by looking at how interference patterns shift.</p>

<p>Third is directionality. A laser beam stays tightly focused and travels in essentially one direction. A regular light bulb radiates light in all directions equally, it’s isotropic. Even if you put a reflector behind it to create a spotlight, most of the light still spreads out in a cone. A laser pointer, on the other hand, creates a beam that barely spreads at all. You can see the tiny dot on a wall across a room, and the beam is nearly the same width at the wall as it was when it left the pointer. This happens because all the photons are traveling in the same direction, parallel to each other. Actually, they’re not perfectly parallel, there’s always some small divergence, but it’s remarkably small compared to any other light source. This directionality is what makes laser pointers work. It’s why you can aim lasers at things and hit exactly what you’re aiming at. It’s why laser cutting works, you can focus all that energy onto a tiny spot. And it’s why you can send laser signals long distances through fiber optics or even through space without losing the signal.</p>

<p>Fourth is high intensity. Because lasers concentrate all their energy into one wavelength, traveling in one direction, in sync, you can achieve incredibly high power densities. Intensity isn’t just about total power, it’s about power per unit area. A 1-watt laser can cut through materials that a 100-watt light bulb couldn’t touch, because all that laser energy is concentrated into a spot that might be a fraction of a millimeter across, while the light bulb’s energy is spread over an entire room. If you focus a laser beam through a lens, you can achieve power densities high enough to vaporize almost any material. This is why laser cutting works. This is why you can use lasers for welding, for drilling tiny holes in materials, for surgery where you need to precisely remove tissue.</p>

<div style="background: white; border-radius: 8px; padding: 24px; margin: 32px 0; box-shadow: 0 2px 8px rgba(0,0,0,0.1);">
    <h3 style="margin-top: 0; font-size: 20px; font-weight: 600; color: #1a1a1a;">Coherent vs Incoherent Light</h3>
    <canvas id="coherence" width="800" height="300" style="display: block; width: 100%; border-radius: 4px; background: #ffffff;"></canvas>
    <p style="margin-top: 12px; font-size: 14px; color: #666; line-height: 1.5;">
        Left: Incoherent light from a bulb — waves out of phase, spreading in all directions. Right: Coherent laser light — waves perfectly synchronized, traveling together.
    </p>
</div>
<script>
(function() {
    const canvas = document.getElementById('coherence');
    const ctx = canvas.getContext('2d');
    let phase = 0;

    function draw() {
        ctx.clearRect(0, 0, 800, 300);
        phase += 0.05;

        ctx.fillStyle = '#1a1a1a';
        ctx.font = '14px sans-serif';
        ctx.fillText('Incoherent (Light Bulb)', 50, 30);

        const colors = ['#ff3b30', '#ff9500', '#ffcc00', '#34c759', '#007aff'];
        for (let i = 0; i < 5; i++) {
            ctx.strokeStyle = colors[i];
            ctx.lineWidth = 2;
            ctx.globalAlpha = 0.6;
            ctx.beginPath();
            const randomPhase = i * 1.3;
            const yOffset = 120 + i * 10;
            for (let x = 50; x < 350; x++) {
                const y = yOffset + Math.sin((x / 30) + phase + randomPhase) * 20;
                if (x === 50) ctx.moveTo(x, y);
                else ctx.lineTo(x, y);
            }
            ctx.stroke();
        }
        ctx.globalAlpha = 1;

        ctx.strokeStyle = '#8e8e93';
        ctx.lineWidth = 1;
        for (let angle = -30; angle <= 30; angle += 15) {
            const rad = (angle * Math.PI) / 180;
            ctx.beginPath();
            ctx.moveTo(350, 150);
            ctx.lineTo(350 + Math.cos(rad) * 30, 150 + Math.sin(rad) * 30);
            ctx.stroke();
        }

        ctx.fillStyle = '#1a1a1a';
        ctx.fillText('Coherent (Laser)', 500, 30);

        ctx.strokeStyle = '#ff3b30';
        ctx.lineWidth = 3;
        ctx.beginPath();
        for (let x = 450; x < 750; x++) {
            const y = 150 + Math.sin((x / 30) + phase) * 25;
            if (x === 450) ctx.moveTo(x, y);
            else ctx.lineTo(x, y);
        }
        ctx.stroke();

        ctx.strokeStyle = '#ff3b30';
        ctx.lineWidth = 2;
        ctx.beginPath();
        ctx.moveTo(750, 150);
        ctx.lineTo(780, 150);
        ctx.stroke();

        requestAnimationFrame(draw);
    }

    draw();
})();
</script>

<p>So now that we know what we’re trying to achieve (monochromatic, coherent, directional, intense light) the question becomes: how the heck do we make light do these weird things?</p>

<h2 id="part-3-the-quantum-mechanical-magic-the-physics-foundation">Part 3: The Quantum Mechanical Magic (The Physics Foundation)</h2>

<p>To understand how lasers work, we need to go deeper into what happens when light interacts with atoms. There are three key processes, and understanding them is the secret to understanding everything about lasers. This is the stuff Einstein figured out in 1917.</p>

<h3 id="the-three-sacred-processes">The Three Sacred Processes</h3>

<p>The first process is absorption. An atom is sitting there with its electron in a low energy state, just minding its own business. A photon comes along, traveling through space. Now, here’s the thing: the photon can’t just randomly interact with the atom. The photon has to have exactly the right amount of energy. If the photon’s energy matches the energy difference between the electron’s current level and some higher level, then the electron can absorb that photon and jump up to that higher energy level. The photon disappears (its energy is now stored in the excited electron) and the electron is now in a higher energy state. It’s like the electron used the photon as currency to buy a ticket to a higher floor.</p>

<p>If the photon’s energy doesn’t match any allowed transition, it just passes by without interacting. This is why glass is transparent to visible light, the energy levels in silicon dioxide atoms are spaced such that visible photons don’t have the right energy to cause transitions. The photons just pass through.</p>

<p>The second process is spontaneous emission. The excited electron is unstable up there on that higher energy level. It wants to fall back down. After some random amount of time (could be nanoseconds, could be microseconds, could be milliseconds depending on the specific transition and atom) it spontaneously falls back down to a lower energy level. When it does, it has to release the energy it’s been storing, and it releases it as a photon. That photon has energy equal to the difference between the two levels.</p>

<p>But here’s the key thing: this happens randomly. There’s no trigger, no external cause. It’s like radioactive decay, you can’t predict exactly when a specific excited electron will emit, you can only know the probability. And when it does emit, the direction is random. Up, down, sideways, any direction is equally likely. This is what’s happening in your light bulb. This is what’s happening in a neon sign, in a fluorescent tube, in any normal light source. Spontaneous emission gives you that chaotic, incoherent light.</p>

<p>The third process is stimulated emission, and this is where Einstein’s genius comes in. Imagine an electron is sitting in an excited state, just hanging out, waiting to eventually fall back down via spontaneous emission. Now imagine another photon comes along, a photon that has exactly the same energy as the photon that would be released if the electron dropped down.</p>

<p>Einstein’s mathematics showed that this incoming photon can actually trigger the electron to drop down immediately, before it would have spontaneously emitted. And here’s the absolutely crucial part: when the electron drops down via stimulated emission, it releases a new photon that is identical to the triggering photon in every way. Same wavelength? Yes. Same direction? Yes. Same phase, meaning its wave peaks and troughs line up with the original photon? Yes.</p>

<p>So one photon goes in, and two identical photons come out, both traveling in the same direction, perfectly synchronized. The photon cloned itself.</p>

<p>This is the entire secret of how lasers work. This is the process Einstein predicted. This is what we’re going to exploit.</p>

<h3 id="the-problem-population-inversion">The Problem: Population Inversion</h3>

<p>But here’s the thing: under normal circumstances, stimulated emission basically never happens. Why not?</p>

<p>Because most atoms, most of the time, have their electrons in the ground state. They’re not excited. So when a photon comes along, it’s much more likely to be absorbed by an electron jumping up than to cause stimulated emission from an already-excited electron.</p>

<p>Let’s say you have a million atoms, and you send a beam of light through them. If all the electrons are in the ground state, photons will be absorbed, electrons will be excited, and then those electrons will spontaneously emit in random directions. You don’t get amplification. You get absorption and then random re-emission.</p>

<p>For stimulated emission to dominate, you need more atoms with electrons in the excited state than in the ground state. This weird, unnatural condition is called population inversion. It’s called that because normally the lower state is more populated, but we need to invert that.</p>

<p>Population inversion doesn’t occur naturally. Left to themselves, atoms always have more electrons in lower states than higher states. That’s just thermodynamics, systems naturally settle into lower energy states.</p>

<p>To make a laser, you have to force population inversion to happen. You have to pump energy into the system faster than the excited electrons can fall back down. You have to fight against the natural tendency toward equilibrium.</p>

<p>This is the fundamental challenge of building a laser: creating and maintaining population inversion.</p>

<h2 id="part-4-the-first-laser-the-ruby-laser-story-high-level">Part 4: The First Laser (The Ruby Laser Story: High Level)</h2>

<p>Now that we understand the physics principles, let’s see how Theodore Maiman actually built the first laser in 1960. We’ll start with the high-level view, and then dive deeper into why his approach worked.</p>

<p>Maiman was working at Hughes Research Laboratories in California. Other researchers were trying to build lasers using gases, because the theory suggested gases might work better. But Maiman had a hunch about ruby. He knew ruby had the right kind of energy levels, and ruby crystals could be grown large and of high quality.</p>

<h3 id="the-apparatus">The Apparatus</h3>

<p><img src="/assets/images/laser-deep-dive/ruby-laser.webp" alt="Diagram of a ruby laser: the ruby rod sits inside a coiled flash lamp, with mirrors at both ends. The red beam emerges from the partially reflective mirror on the left." />
<em>A ruby laser. The pink rod is the ruby crystal, surrounded by a coiled xenon flash lamp. Image: <a href="https://commons.wikimedia.org/wiki/File:Ruby_laser.webp">Wikimedia Commons</a>, Public Domain.</em></p>

<p>Maiman’s laser was elegantly simple, at least in concept. He had a ruby rod about the size of a finger, roughly 1 cm in diameter and a few centimeters long. Ruby is aluminum oxide (Al₂O₃) with a small amount of chromium atoms mixed in, which gives it that characteristic red color. Both ends of the ruby rod were polished flat and parallel, then coated with silver to make them reflective. One end was coated to be about 100% reflective, the other about 95% reflective, letting 5% of the light through.</p>

<p>Wrapped around the ruby rod was a helical xenon flash lamp, essentially a very bright, intense camera flash that could produce a brilliant burst of white light for a few milliseconds. The flash lamp was coiled in a spiral around the ruby, so it could shine light into the ruby from all sides.</p>

<p>The whole thing was small enough to hold in your hands.</p>

<h3 id="how-it-actually-works-the-step-by-step-dance">How It Actually Works: The Step-by-Step Dance</h3>

<p>When Maiman fired the flash lamp, here’s what happened:</p>

<p>The flash lamp produces a brilliant burst of white light, containing many wavelengths. This light shines into the ruby from all sides. The chromium atoms in the ruby absorb certain wavelengths, specifically the blue and green parts of the spectrum. Electrons in the chromium atoms jump from low energy states up to high energy states. This happens for billions and billions of chromium atoms throughout the ruby.</p>

<p>These excited electrons then quickly drop down to a special intermediate energy level and stay there for a relatively long time, milliseconds, which in atomic terms is an eternity. This accumulation of excited atoms is what creates population inversion.</p>

<p>Now the cascade begins. Eventually, one of those excited electrons spontaneously emits. It drops down to a lower energy state, releasing a red photon at 694.3 nanometers. This photon travels through the ruby in some random direction.</p>

<p>Most of these spontaneous photons are traveling at angles and just exit through the sides of the ruby rod. They’re lost, contributing nothing to the laser beam. But occasionally, just by chance, a spontaneous photon happens to be traveling along the axis of the ruby rod, parallel to the length.</p>

<p>This photon travels through the ruby, and as it does, it passes by other chromium atoms that have electrons in excited states. Each time it encounters such an atom, there’s a chance it triggers stimulated emission. When it does, now there are two photons, both traveling in the same direction, both perfectly in phase.</p>

<p>These two photons continue traveling through the ruby, potentially triggering more stimulated emission. Two becomes four, four becomes eight, eight becomes sixteen. The number of photons grows exponentially.</p>

<p>Eventually, these photons reach the mirror at the end of the ruby rod. The mirror reflects them back through the ruby in the opposite direction. As they travel back, they trigger even more stimulated emission. The number of photons builds up even more.</p>

<p>The photons bounce back and forth between the mirrors, and with each pass through the ruby, they trigger more and more stimulated emission. The light intensity builds up inside the optical cavity formed by the two mirrors.</p>

<p>But remember, one mirror is only 95% reflective. Each time the light hits this partially reflective mirror, 5% of it leaks through. At first, this leakage is negligible. But as the intensity builds up inside the cavity, that 5% leakage becomes substantial. That’s your laser beam.</p>

<div style="background: white; border-radius: 8px; padding: 24px; margin: 32px 0; box-shadow: 0 2px 8px rgba(0,0,0,0.1);">
    <h3 style="margin-top: 0; font-size: 20px; font-weight: 600; color: #1a1a1a;">Ruby Laser: The Optical Cavity</h3>
    <canvas id="rubyLaser" width="800" height="400" style="display: block; width: 100%; border-radius: 4px; background: #ffffff;"></canvas>
    <p style="margin-top: 12px; font-size: 14px; color: #666; line-height: 1.5;">
        Watch how photons bounce between mirrors. Most spontaneous emissions escape randomly (gray), but the few traveling along the axis (red) bounce back and forth, triggering more emissions. Notice the exponential growth.
    </p>
</div>
<script>
(function() {
    const canvas = document.getElementById('rubyLaser');
    const ctx = canvas.getContext('2d');

    class Photon {
        constructor(x, y, vx, vy, isLasing) {
            this.x = x; this.y = y; this.vx = vx; this.vy = vy;
            this.isLasing = isLasing; this.alpha = 1;
        }
        update() {
            this.x += this.vx; this.y += this.vy;
            if (!this.isLasing && (this.x < 50 || this.x > 750 || this.y < 50 || this.y > 350)) {
                this.alpha -= 0.02;
            }
        }
        draw(ctx) {
            if (this.alpha <= 0) return;
            ctx.save();
            ctx.globalAlpha = this.alpha;
            ctx.beginPath();
            ctx.arc(this.x, this.y, 3, 0, Math.PI * 2);
            ctx.fillStyle = this.isLasing ? '#ff3b30' : '#8e8e93';
            ctx.fill();
            ctx.restore();
        }
    }

    let photons = [];

    function drawSetup() {
        ctx.clearRect(0, 0, 800, 400);
        ctx.fillStyle = '#ffe5e5';
        ctx.fillRect(200, 150, 400, 100);
        ctx.strokeStyle = '#ff3b30';
        ctx.lineWidth = 2;
        ctx.strokeRect(200, 150, 400, 100);
        ctx.fillStyle = '#d1d1d6';
        ctx.fillRect(195, 140, 5, 120);
        ctx.fillRect(600, 140, 5, 120);
        ctx.strokeStyle = '#ffd700';
        ctx.lineWidth = 2;
        ctx.setLineDash([5, 5]);
        ctx.beginPath();
        ctx.arc(400, 200, 130, 0, Math.PI * 2);
        ctx.stroke();
        ctx.setLineDash([]);
        ctx.fillStyle = '#1a1a1a';
        ctx.font = '12px sans-serif';
        ctx.fillText('Mirror (100%)', 140, 205);
        ctx.fillText('Mirror (95%)', 610, 205);
        ctx.fillText('Ruby Rod', 350, 135);
    }

    function animate() {
        drawSetup();

        if (Math.random() < 0.15) {
            const x = 200 + Math.random() * 400;
            const y = 150 + Math.random() * 100;
            const angle = Math.random() * Math.PI * 2;
            const speed = 2;
            if (Math.random() < 0.95) {
                photons.push(new Photon(x, y, Math.cos(angle) * speed, Math.sin(angle) * speed, false));
            } else {
                photons.push(new Photon(x, 200, speed, 0, true));
            }
        }

        photons = photons.filter(p => {
            p.update();
            if (p.isLasing && p.y > 150 && p.y < 250) {
                if (p.x <= 200 && p.vx < 0) {
                    p.vx = -p.vx;
                    if (Math.random() < 0.3) photons.push(new Photon(p.x + 10, 200, 2, 0, true));
                }
                if (p.x >= 600 && p.vx > 0) {
                    if (Math.random() < 0.95) p.vx = -p.vx;
                    else p.isLasing = false;
                    if (Math.random() < 0.3) photons.push(new Photon(p.x - 10, 200, -2, 0, true));
                }
            }
            p.draw(ctx);
            return p.alpha > 0 && p.x > -50 && p.x < 850;
        });

        requestAnimationFrame(animate);
    }

    animate();
})();
</script>

<p>The laser beam that emerges is monochromatic (694.3 nm red light), directional (traveling along the axis of the rod), coherent (all triggered by stimulated emission from photons that were already in phase), and intense (amplified by many passes through the ruby).</p>

<h3 id="the-numbers-are-insane">The Numbers Are Insane</h3>

<p>The statistics behind what’s happening are genuinely absurd. When an electron spontaneously emits a photon, it can go in any direction. If we think about it three-dimensionally, there are all possible directions in 3D space, technically 4π steradians of solid angle. For a photon to travel along the axis of the ruby rod and enter the optical cavity mode, it needs to be within a very small solid angle, determined by the diameter of the rod and the length.</p>

<p>For a typical ruby laser, maybe only 1 in 10,000 photons that spontaneously emit happen to be traveling in the right direction to contribute to the laser beam. The other 9,999 out of 10,000 just fly out the sides of the ruby and are lost.</p>

<p>Think about this: it’s like trying to fill a swimming pool by throwing water balloons in random directions and hoping one lands in the pool. It seems impossibly wasteful.</p>

<p>But here’s why it works anyway: once you have even a few photons traveling in the right direction and bouncing between the mirrors, stimulated emission takes over. Stimulated emission, unlike spontaneous emission, is directional. The new photon travels in the same direction as the triggering photon. This is the magic trick.</p>

<p>So you start with maybe just 1 photon going in the right direction. Through stimulated emission, that becomes 2, then 4, then 8, then 16. The growth is exponential. Even though you start with very few photons going the right way, they multiply so quickly that soon they completely dominate over the spontaneous emission happening in random directions.</p>

<p>The gain per pass through the ruby is important. If you have strong population inversion, one photon might trigger enough stimulated emission to create 1.5 photons per centimeter it travels. After traveling through a few centimeters of ruby, you’ve doubled your number of photons. After the photons bounce back and forth ten times, you’ve multiplied your initial photon count by an enormous factor.</p>

<p>The optical cavity is essential for this. Without the mirrors, the photons would just pass through once and exit. They wouldn’t have multiple chances to trigger stimulated emission. With the mirrors, the photons can bounce back and forth hundreds or thousands of times before they finally leak out through the partially reflective mirror, and each pass gives them opportunities to multiply.</p>

<p>So yes, the initial probability is low. Yes, most spontaneously emitted photons are wasted. But exponential growth is extraordinarily powerful, and the optical cavity gives the photons time to multiply into a torrent of synchronized light.</p>

<h2 id="part-5-why-can-some-materials-do-this-the-secret-of-laser-media">Part 5: Why Can Some Materials Do This? (The Secret of Laser Media)</h2>

<p>Now that we’ve seen how a laser works at a high level, a natural question arises: why does ruby work as a laser medium? Why does a helium-neon gas mixture work? Why does a CO₂ molecule work? What makes certain materials special, while most materials can’t be used to make lasers at all?</p>

<p>The answer lies in the structure of their energy levels, and specifically in something called metastable states.</p>

<h3 id="the-metastable-state-natures-battery">The Metastable State: Nature’s Battery</h3>

<p>Remember, for a laser to work, you need population inversion. You need lots of atoms with electrons in an excited state. But normally, excited electrons fall back down really quickly via spontaneous emission, sometimes in nanoseconds. If excited electrons only stayed excited for nanoseconds, you’d need to pump energy into the system absurdly fast just to keep up with the electrons falling back down. You’d be like someone trying to fill a bathtub with the drain wide open.</p>

<p>This is where metastable states save the day. A metastable state is an excited energy level where an electron can stay for a relatively long time before falling back down. “Relatively long” in quantum mechanics might mean milliseconds instead of nanoseconds, but that’s a million times longer. It’s like the difference between water draining from a bathtub in one second versus 11 days. Suddenly, you can fill the bathtub faster than it drains.</p>

<h3 id="why-do-metastable-states-exist">Why Do Metastable States Exist?</h3>

<p>This is where quantum mechanics gets interesting. Not all transitions between energy levels are equally likely. Some transitions happen very quickly, and others happen very slowly. This has to do with quantum mechanical selection rules.</p>

<p>When an electron emits a photon and drops to a lower energy level, the most common mechanism is electric dipole radiation. For this to happen efficiently, certain quantum mechanical conditions need to be met. The electron’s orbital angular momentum needs to change by exactly one unit (ΔL = ±1), and there are rules about the magnetic quantum number and spin as well.</p>

<p>If a transition satisfies all these selection rules, it’s called an “allowed” transition, and it happens quickly, nanoseconds or faster. If a transition violates these selection rules, it’s called a “forbidden” transition. Now, “forbidden” doesn’t mean impossible, quantum mechanics is probabilistic, not deterministic, but it means the probability per unit time is much, much lower. A forbidden transition might take milliseconds or even seconds instead of nanoseconds.</p>

<p>These forbidden transitions create metastable states. The electron is in an excited state, but the only way down violates selection rules, so the electron gets stuck there for a while.</p>

<p>Different atoms and molecules have different arrangements of energy levels. In most materials, all the downward transitions are allowed, so electrons fall back down quickly, and you can’t build up population inversion. But in certain materials, ruby, helium-neon, CO₂, rare earth ions, and others, the energy level structure happens to have states where the downward transitions are forbidden or discouraged. These materials can support metastable states.</p>

<p>Finding materials with the right energy level structure is part science, part luck. Researchers calculate energy levels using quantum mechanics, measure them experimentally, and test which materials might work as laser media. Not every material works. In fact, most don’t. The material needs the right combination of properties: energy levels that can be easily pumped, a metastable state with a long enough lifetime, a lasing transition that emits at a useful wavelength, and the material needs to be transparent to both the pump light and the laser light.</p>

<h3 id="how-ruby-works-a-three-level-system">How Ruby Works: A Three-Level System</h3>

<p>Let’s look more closely at ruby to understand how metastable states work in practice. Ruby is aluminum oxide (Al₂O₃) (essentially sapphire) with about 0.05% of the aluminum atoms replaced by chromium atoms (Cr³⁺). The term “doped” means that small amounts of one element are mixed into the crystal structure of another material. In this case, chromium is doped into aluminum oxide. The chromium atoms are the ones that actually produce the laser light.</p>

<p>Here’s how the energy levels work in chromium:</p>

<p>The chromium ion has a ground state where the electrons are in their lowest energy configuration, happy and stable. It has several high energy levels that electrons can be excited to, these are called the pump bands because they’re where the pump light sends the electrons. And crucially, it has a metastable state sitting in between the ground state and the pump bands.</p>

<p>When you shine bright light from the flash lamp onto the ruby, the chromium ions absorb photons in the blue and green parts of the spectrum. Why blue and green? Because the energy of blue and green photons happens to match the energy difference between the ground state and the pump bands. The electrons jump from the ground state up to those high energy pump bands. So far so good, you’re pumping energy into the system.</p>

<p>Now here’s the clever part: those high energy pump band states are not metastable. Electrons in those pump bands very quickly (in picoseconds) drop down to the metastable state. But this transition doesn’t emit light. Instead, the energy is transferred to vibrations in the crystal lattice, the atoms in the ruby crystal start vibrating more. This is heat. The crystal gets a little warmer, but the electron has moved from the pump band to the metastable state.</p>

<p>And now the electron sits there in the metastable state. It can stay there for milliseconds, which is an eternity on atomic timescales. This is plenty of time for you to pump more and more chromium ions into this metastable state. The flash lamp keeps firing, more electrons jump to pump bands, they drop to the metastable state, and the population in the metastable state builds up.</p>

<p>Eventually, you can get more chromium ions with electrons in the metastable state than in the ground state. You’ve achieved population inversion between the metastable state and the ground state.</p>

<p>Now, when one electron spontaneously drops from the metastable state to the ground state, it emits a red photon at 694.3 nanometers. That photon travels through the crystal, and if it encounters another chromium ion with an electron in the metastable state, it can trigger stimulated emission. Now you have two identical red photons. Those two photons can trigger more stimulated emission. The process cascades, and you get your laser.</p>

<p>This is called a three-level system: ground state, pump bands at high energy, and metastable state at intermediate energy. The key is that you pump to the high levels, electrons quickly relax to the metastable state without emitting light, and then they lase from the metastable state down to the ground state.</p>

<div style="background: white; border-radius: 8px; padding: 24px; margin: 32px 0; box-shadow: 0 2px 8px rgba(0,0,0,0.1);">
    <h3 style="margin-top: 0; font-size: 20px; font-weight: 600; color: #1a1a1a;">Energy Levels: Metastable States</h3>
    <canvas id="energyLevels" width="800" height="400" style="display: block; width: 100%; border-radius: 4px; background: #ffffff;"></canvas>
    <p style="margin-top: 12px; font-size: 14px; color: #666; line-height: 1.5;">
        Electrons (blue dots) absorb pump light and jump to high energy states, quickly drop to the metastable state (middle line), then eventually lase back to ground state (bottom). The metastable state is where electrons accumulate.
    </p>
</div>
<script>
(function() {
    const canvas = document.getElementById('energyLevels');
    const ctx = canvas.getContext('2d');

    class Electron {
        constructor() {
            this.x = 200 + Math.random() * 400;
            this.targetLevel = 0;
            this.currentLevel = 0;
            this.y = this.getLevelY(0);
            this.waitTime = Math.random() * 100;
        }
        getLevelY(level) {
            if (level === 0) return 320;
            if (level === 1) return 220;
            if (level === 2) return 120;
            return 320;
        }
        update() {
            this.waitTime--;
            const targetY = this.getLevelY(this.targetLevel);
            if (Math.abs(this.y - targetY) > 1) {
                this.y += (targetY - this.y) * 0.1;
            } else {
                this.y = targetY;
                this.currentLevel = this.targetLevel;
            }
            if (this.waitTime <= 0) {
                if (this.currentLevel === 0) {
                    if (Math.random() < 0.02) { this.targetLevel = 2; this.waitTime = 5; }
                } else if (this.currentLevel === 2) {
                    this.targetLevel = 1; this.waitTime = 100 + Math.random() * 100;
                } else if (this.currentLevel === 1) {
                    this.targetLevel = 0; this.waitTime = 50 + Math.random() * 50;
                }
            }
        }
        draw(ctx) {
            ctx.beginPath();
            ctx.arc(this.x, this.y, 4, 0, Math.PI * 2);
            ctx.fillStyle = '#007aff';
            ctx.fill();
        }
    }

    const electrons = Array.from({length: 30}, () => new Electron());

    function drawLevels() {
        ctx.clearRect(0, 0, 800, 400);

        const levels = [
            {y: 120, label: 'Pump Band (High Energy)', color: '#5856d6'},
            {y: 220, label: 'Metastable State', color: '#ff9500'},
            {y: 320, label: 'Ground State', color: '#34c759'}
        ];

        levels.forEach(level => {
            ctx.strokeStyle = level.color;
            ctx.lineWidth = 2;
            ctx.beginPath();
            ctx.moveTo(150, level.y);
            ctx.lineTo(650, level.y);
            ctx.stroke();
            ctx.fillStyle = '#1a1a1a';
            ctx.font = '13px sans-serif';
            ctx.fillText(level.label, 660, level.y + 5);
        });

        ctx.strokeStyle = '#8e8e93';
        ctx.lineWidth = 1;
        ctx.setLineDash([3, 3]);

        ctx.beginPath();
        ctx.moveTo(100, 320);
        ctx.lineTo(100, 120);
        ctx.stroke();
        ctx.fillStyle = '#8e8e93';
        ctx.font = '11px sans-serif';
        ctx.fillText('Pump', 70, 220);

        ctx.beginPath();
        ctx.moveTo(120, 120);
        ctx.lineTo(120, 220);
        ctx.stroke();
        ctx.fillText('Fast', 90, 170);

        ctx.strokeStyle = '#ff3b30';
        ctx.lineWidth = 2;
        ctx.beginPath();
        ctx.moveTo(700, 220);
        ctx.lineTo(700, 320);
        ctx.stroke();
        ctx.fillStyle = '#ff3b30';
        ctx.fillText('Laser', 710, 270);

        ctx.setLineDash([]);

        electrons.forEach(e => { e.update(); e.draw(ctx); });
    }

    function animate() {
        drawLevels();
        requestAnimationFrame(animate);
    }

    animate();
})();
</script>

<h3 id="other-laser-media-different-tricks-same-principle">Other Laser Media: Different Tricks, Same Principle</h3>

<p>Different laser materials use different energy level schemes, but they all rely on having some kind of metastable state or equivalent.</p>

<p>In a helium-neon laser, helium atoms are excited by an electrical discharge, high voltage causes electrons to flow through the gas, colliding with and exciting the helium atoms. The excited helium atoms have energy levels that happen to closely match certain excited levels in neon. When an excited helium atom collides with a neon atom, it can transfer its energy through a collision, leaving the neon atom in an excited state. These excited neon states are metastable. Population inversion builds up in the neon, and the neon lases.</p>

<p>In a CO₂ laser, nitrogen molecules are excited by the electrical discharge. The excited nitrogen molecules are very stable in certain vibrational states and hold onto their energy for a long time. When they collide with CO₂ molecules, they transfer energy to a specific vibrational mode of the CO₂ molecule, the molecule vibrates in a way where the three atoms move asymmetrically. This vibrational mode is metastable. The CO₂ molecules build up population inversion and lase in the infrared.</p>

<p>In semiconductor lasers, the physics is a bit different because you’re dealing with bands of energy levels rather than discrete atomic levels, but the principle is the same: you create conditions where there are more electrons in higher energy states ready to emit photons than there are in lower energy states ready to absorb them.</p>

<p>In fiber lasers, rare earth ions like ytterbium or erbium are embedded in glass, again, this is called doping, where small amounts of these rare earth elements are mixed into the glass material. These ions have metastable states. You pump them with other lasers, electrons move to metastable states, population inversion builds up, and they lase.</p>

<p>The unifying principle is always: you need metastable states or something equivalent so that you can build up population inversion faster than spontaneous emission depletes it. Without metastable states, building a laser becomes extraordinarily difficult or impossible.</p>

<h2 id="part-6-where-does-the-energy-come-from-conservation-laws-still-apply">Part 6: Where Does the Energy Come From? (Conservation Laws Still Apply)</h2>

<p>If a laser beam is incredibly powerful and intense, where is all that energy coming from? Energy can’t be created from nothing, so what’s the source?</p>

<p>The answer is straightforward but important to understand: all the energy in the laser beam comes from whatever is pumping the laser. You’re not creating energy. You’re converting energy from one form to another and concentrating it.</p>

<h3 id="energy-bookkeeping">Energy Bookkeeping</h3>

<p>Let’s trace the energy flow in a ruby laser:</p>

<p>You have a flash lamp powered by electricity. Let’s say you put in 1000 joules of electrical energy into the flash lamp capacitor. The flash lamp converts that electrical energy into light, though not with perfect efficiency. Maybe 50% becomes light and 50% becomes heat in the flash lamp itself. So now you have 500 joules of light energy radiating from the flash lamp in all directions.</p>

<p>This light shines on the ruby rod. The ruby absorbs some of this light, specifically the blue and green wavelengths that match its absorption bands. But not all the light is absorbed. Some reflects off the surface, some passes through without being absorbed, some is the wrong wavelength for the chromium atoms to absorb. Maybe only 100 joules actually get absorbed by chromium ions in the ruby.</p>

<p>Those 100 joules of absorbed energy excite chromium ions, pumping electrons up to high energy pump band states. Those electrons then drop to the metastable state, giving off the extra energy as heat, the vibrations in the crystal lattice. Then eventually, through stimulated emission, the electrons drop from the metastable state to the ground state, emitting red photons.</p>

<p>But here’s the thing: the red photons emitted have less energy than the blue and green photons that were absorbed. The energy of a photon is proportional to its frequency, and blue light has higher frequency than red light. The energy difference went into heat when the electrons dropped from the pump bands to the metastable state. So maybe only 30 joules actually come out as red laser light.</p>

<p>And of those 30 joules, not all of it comes out as the useful laser beam. Some photons spontaneously emit in random directions and escape from the sides of the rod. Some energy is absorbed by impurities or defects in the ruby. Some energy is lost in the mirrors, which aren’t perfectly reflective. Maybe you get 10 joules out as an actual laser pulse.</p>

<p>So you put in 1000 joules of electricity, and you get 10 joules of laser light. That’s 1% efficiency. The other 990 joules became heat in various parts of the system.</p>

<p>Early ruby lasers were indeed about 1% efficient. Modern fiber lasers have gotten this up to 70-80% efficiency through better designs and materials, which is remarkable, but the principle is the same: you’re not creating energy, you’re converting it from one form (electrical or optical pump energy) to another (laser light), and some is always lost as heat.</p>

<h3 id="what-lasers-actually-do-energy-concentration">What Lasers Actually Do: Energy Concentration</h3>

<p>So what is the special thing a laser does? It’s not creating energy from nothing. What it’s doing is concentrating energy spatially, temporally, and spectrally.</p>

<p>Think about it this way: the flash lamp radiates light in all directions. That light is spread out over the entire surface area of the ruby rod and the surrounding space. The light is also spread out over time, the flash lamp might fire for a few milliseconds. And the light is spread out over many wavelengths: blue, green, yellow, all the colors the flash lamp produces, each carrying some of the energy.</p>

<p>The laser takes energy that was spread out in space, time, and wavelength, and concentrates it. The output laser beam is traveling in essentially one direction, not spreading out in all directions like the flash lamp. It’s one wavelength, not spread across the spectrum. And it can be concentrated in time, some lasers produce pulses that are only nanoseconds or even femtoseconds long, which means all that energy is released in an incredibly short duration.</p>

<p>This concentration is what gives lasers their power. A 1-watt laser doesn’t produce more total power than a 1-watt light bulb. Both are converting 1 watt of input energy into light. But the laser concentrates that power into a tiny spot, into a brief duration, into one pure wavelength. That concentration is what allows it to do things like cut through metal.</p>

<p>It’s analogous to how a magnifying glass works. A magnifying glass doesn’t create heat energy from nothing. It takes the sun’s light that would normally be spread over a large area and concentrates it onto a tiny spot. That concentration of the same total energy is what can start a fire, even though no new energy was created.</p>

<p>The laser does something similar, but instead of using a lens to spatially concentrate already-existing light, it uses the physics of stimulated emission to create light that’s already concentrated, monochromatic, directional, and coherent from the moment it’s generated.</p>

<h2 id="part-7-the-heat-problem-and-why-doesnt-the-laser-melt">Part 7: The Heat Problem (And Why Doesn’t the Laser Melt?)</h2>

<p>Another important question: if photons are bouncing back and forth inside the cavity, building up intensity, why doesn’t the laser medium just get incredibly hot or even melt?</p>

<p>The answer has several parts.</p>

<h3 id="energy-flow-in-the-laser">Energy Flow in the Laser</h3>

<p>First, let’s track where heat is actually generated. You’re pumping energy into the laser medium, whether that’s flash lamp light, electrical discharge, or pump laser light. This energy excites atoms or ions or molecules into higher energy states.</p>

<p>Some of this pump energy goes directly into heat through a process called quantum defect heating. Remember the ruby laser: electrons jump to high pump bands when they absorb blue-green photons, then drop to the metastable state, releasing the difference as heat through vibrations in the crystal lattice. Then they lase from the metastable state, producing red photons. You’re putting in blue-green photons (higher energy) and getting out red photons (lower energy). The difference becomes heat in the material.</p>

<p>Then, not all the excited atoms undergo stimulated emission contributing to the laser beam. Some undergo spontaneous emission, releasing photons in random directions that don’t contribute to the laser beam. These photons are eventually absorbed somewhere in the system and become heat.</p>

<p>The mirrors aren’t perfect. Each time a photon hits a mirror, a tiny fraction is absorbed rather than reflected. This absorption heats up the mirror coatings.</p>

<p>So yes, the laser is constantly generating heat as it operates. Running a laser does heat up the laser medium and the surrounding components. This is a real engineering challenge.</p>

<h3 id="cooling-and-thermal-management">Cooling and Thermal Management</h3>

<p>For low-power lasers, like a small helium-neon laser or a laser pointer with a semiconductor laser, the heat generation is small enough that it can be dissipated to the surrounding air through natural convection and radiation. The device might get warm to the touch, but not dangerously hot.</p>

<p>For high-power lasers, cooling becomes critical. Ruby lasers and other pulsed solid-state lasers often use water cooling. The flash lamp and the ruby rod are both cooled by flowing water through channels in the housing. You can only fire the laser in short pulses, and then you have to wait for the heat to dissipate before firing again. Fire too quickly, and the rod will overheat and potentially crack.</p>

<p>CO₂ lasers often have gas flowing continuously through the tube. Fresh, cool gas is constantly supplied at one end, and hot gas is removed at the other end. This convective flow carries away the heat deposited in the gas by the electrical discharge.</p>

<p>For industrial fiber lasers producing kilowatts of continuous power, thermal management is a major part of the design. But fiber lasers have a big advantage here, which we’ll discuss in detail later: their thin geometry means they have a huge surface-area-to-volume ratio, so heat can escape efficiently from the core to the surface.</p>

<h3 id="why-the-intense-light-doesnt-cause-direct-heating">Why the Intense Light Doesn’t Cause Direct Heating</h3>

<p>Now, about the intense light bouncing around inside the cavity: yes, there are billions of photons inside the cavity, but they’re generally not being absorbed by the laser medium in a way that creates heat. That’s the whole point.</p>

<p>Photons at the laser wavelength are essentially transparent to the laser medium when population inversion exists. If a photon encounters an atom with an electron in the ground state, it could potentially be absorbed, but remember, we’ve achieved population inversion, so most atoms have electrons in the excited state, not the ground state. If a photon encounters an atom with an electron in the excited state, it causes stimulated emission, releasing another identical photon. The photon isn’t absorbed and converted to heat; instead, it’s cloned.</p>

<p>So the laser photons bouncing back and forth aren’t directly heating up the medium. They’re either triggering stimulated emission (which adds more photons rather than removing them and converting them to heat) or they’re passing through without interaction.</p>

<p>The heat comes primarily from the pumping process (the quantum defect heating where higher energy pump photons are converted to lower energy laser photons with the difference becoming heat) and from non-ideal efficiencies throughout the system, not from the laser light itself being absorbed by the medium.</p>

<p>That said, in very high-power lasers, there can be issues. If any impurities or defects in the laser medium absorb even a tiny fraction of the laser light, that spot can heat up dramatically and potentially damage the material. This is why high-power laser materials need to be extremely pure and defect-free. Even a tiny impurity that absorbs one part per million of the circulating laser power can create a hot spot that grows and damages the crystal.</p>

<h3 id="the-optical-damage-threshold">The Optical Damage Threshold</h3>

<p>There’s also a fundamental limit to how intense light can get before it starts to damage materials through nonlinear effects. At extremely high intensities, the electric field of the light itself becomes so strong that it can rip electrons away from atoms, creating a plasma. This is called optical breakdown, and it permanently damages the material.</p>

<p>So there is an ultimate limit to how much power you can build up inside a laser cavity before you start causing damage. But for most lasers operating under normal conditions, the intensity inside the cavity is well below this damage threshold. The engineering challenge is managing the heat from the pumping inefficiencies, not from the circulating laser light itself.</p>

<h2 id="part-8-the-evolution-of-lasers-chronological-journey-down-the-iceberg">Part 8: The Evolution of Lasers (Chronological Journey Down the Iceberg)</h2>

<p>After Maiman’s ruby laser proved the concept in 1960, researchers realized they could apply the same principles using different materials and different pumping methods. Each new type of laser opened up new applications and solved different problems.</p>

<h3 id="helium-neon-laser-1961">Helium-Neon Laser (1961)</h3>

<p>Just a year after the ruby laser, Ali Javan, William Bennett, and Donald Herriott at Bell Labs created the first gas laser using a mixture of helium and neon. This was a major breakthrough because it was the first continuous wave laser, meaning it produced a steady beam rather than pulses.</p>

<p>Instead of a solid crystal, they used a glass tube filled with helium and neon gas at low pressure. Instead of using a flash lamp for pumping, they ran a high voltage through the gas, creating an electrical discharge. If you’ve ever seen a neon sign, you know what this looks like, the gas glows as the electricity flows through it.</p>

<p>The discharge excites helium atoms by giving their electrons enough energy to jump to higher energy levels through collisions with the flowing electrons. These excited helium atoms then collide with neon atoms. Due to a fortunate coincidence, certain excited energy levels in helium have almost exactly the same energy as certain excited levels in neon. When an excited helium atom collides with a ground-state neon atom, the energy can transfer from the helium to the neon through what’s called collisional energy transfer, leaving the neon atom in an excited state.</p>

<p>These excited neon states are metastable, so the neon atoms accumulate in these excited states, creating population inversion. The neon atoms then undergo stimulated emission, producing red light at 632.8 nanometers, which is the characteristic color of helium-neon lasers.</p>

<p><img src="/assets/images/laser-deep-dive/hene-laser.webp" alt="A helium-neon laser in operation, glowing orange-red in a darkened lab." />
<em>A helium-neon laser. The orange glow in the tube is the gas discharge; the actual laser beam is the thin red line exiting to the left. Photo: <a href="https://commons.wikimedia.org/wiki/File:Henelaser.webp">Wikimedia Commons</a>, CC BY-SA 3.0.</em></p>

<p>Helium-neon lasers became the workhorses of many applications because they were relatively cheap, reliable, and produced a stable, continuous beam. For decades, the laser pointer in every physics lecture hall and the barcode scanner in every grocery store used HeNe lasers. They’re still used today for alignment tasks in laboratories and in surveying equipment, though they’re increasingly being replaced by semiconductor lasers which are even cheaper and more compact.</p>

<h3 id="co-laser-1964">CO₂ Laser (1964)</h3>

<p>Kumar Patel at Bell Labs developed the carbon dioxide laser, and it turned out to be incredibly powerful and efficient compared to earlier lasers. This laser uses a gas mixture of carbon dioxide, nitrogen, and helium.</p>

<p>The nitrogen molecules in the mixture are excited by an electrical discharge, similar to the HeNe laser. Nitrogen molecules have vibrational modes (the two nitrogen atoms can vibrate like they’re connected by a spring) that can store energy. When nitrogen molecules are excited into a particular vibrational mode, they hold onto that energy for a very long time because there’s no easy way for the molecule to release the energy. The transition that would allow the nitrogen to de-excite is quantum mechanically discouraged.</p>

<p>When these excited nitrogen molecules collide with CO₂ molecules, they can transfer their energy to a specific vibrational mode of the CO₂ molecule. The CO₂ molecule can vibrate in several different ways, the two oxygen atoms can move symmetrically outward and inward (symmetric stretch), they can move asymmetrically with one moving out while the other moves in (asymmetric stretch), or the molecule can bend. The nitrogen excites the CO₂ into the asymmetric stretch mode, and this mode is metastable enough to build up population inversion.</p>

<p>The CO₂ molecules then lase when they drop from the asymmetric stretch mode to lower vibrational states, producing infrared light at 10,600 nanometers. You can’t see this with your eyes (it’s far into the infrared) but it’s incredibly useful for industrial applications.</p>

<p>CO₂ lasers can be extraordinarily efficient. They can convert 20% or more of the input electrical energy into laser light, which is far better than most other laser types at the time. They can also produce enormous amounts of power. Industrial CO₂ lasers can output tens of kilowatts continuously, and the most powerful ones can exceed 100 kilowatts.</p>

<p>The infrared wavelength is strongly absorbed by most organic materials and many metals, making it ideal for cutting and welding. If you’ve ever seen a laser cutter at a makerspace slicing through plywood or acrylic, there’s a good chance it’s a CO₂ laser. Industrial CO₂ lasers cut through steel plates inches thick. They’re used extensively in manufacturing, in the automotive industry, in aerospace, anywhere precision cutting is needed. A 10-kilowatt CO₂ laser (which would fit in a room about the size of a garage) can cut through 25mm of steel. That’s an inch of solid steel, sliced like butter.</p>

<p><img src="/assets/images/laser-deep-dive/laser-cutting.webp" alt="A laser cutting machine slicing through a metal sheet, throwing off bright sparks." />
<em>An industrial laser cutting through metal. Photo: <a href="https://commons.wikimedia.org/wiki/File:Laser_cutting_machine.webp">Wikimedia Commons</a>, CC BY-SA 3.0.</em></p>

<h3 id="dye-lasers-1966">Dye Lasers (1966)</h3>

<p>Peter Sorokin and J. R. Lankard at IBM, working independently from F. P. Schäfer in Germany, created lasers using organic dye molecules dissolved in liquid solvents. This was a completely different approach from solid crystals or gases.</p>

<p>A dye laser uses a solution of organic dye molecules. These are complex molecules with lots of carbon rings, similar in structure to the colorful dyes used in fabric or ink, in fact, some laser dyes are related to textile dyes. The dye gives the solution a vivid color because it absorbs certain wavelengths of light. This dye solution flows through a glass cell, continuously circulated by a pump to prevent overheating in one spot.</p>

<p>You pump the dye optically, either with another laser or with a flash lamp, shining intense light into the cell. The dye molecules absorb the pump light, exciting electrons to higher energy states. What makes organic dye molecules special is their complex molecular structure. They have many closely-spaced energy levels, almost forming a quasi-continuum rather than discrete levels. When excited electrons fall back down, they can emit photons over a range of wavelengths rather than just one specific wavelength.</p>

<p>Here’s what makes dye lasers unique and valuable: by placing wavelength-selective optical elements in the laser cavity (specifically, diffraction gratings or prisms that reflect different wavelengths at different angles) you can select which wavelength gets amplified. By rotating the grating, you can tune the laser’s output wavelength. Want blue light? Rotate the grating one way. Want yellow? Rotate it another way. You can smoothly tune across a range of wavelengths, typically spanning 30-50 nanometers for a given dye.</p>

<p>Different dyes cover different wavelength ranges. Rhodamine 6G, one of the most common laser dyes, can be tuned from about 560 to 640 nanometers, covering yellow-orange-red. Coumarin dyes cover blue-green wavelengths. By switching dyes and adjusting the cavity, you can access wavelengths from the near-ultraviolet all the way to the near-infrared.</p>

<p>This tunability revolutionized spectroscopy, the study of how light interacts with matter. Researchers could tune the laser to exactly the wavelength needed to probe specific molecular transitions, allowing them to study energy levels, chemical bonds, and molecular dynamics with unprecedented precision. Dye lasers were used extensively in chemistry and physics research, in medical diagnostics, and even in isotope separation for nuclear applications. Though they’ve been largely superseded by tunable solid-state lasers and optical parametric oscillators which are more convenient and don’t require flowing liquid dyes, dye lasers were crucial for several decades and are still used in some specialized applications.</p>

<h3 id="semiconductor-lasers-1962-1970s">Semiconductor Lasers (1962-1970s)</h3>

<p>This is where lasers became small, cheap, and ubiquitous. Robert Hall at General Electric created the first semiconductor laser in 1962, just two years after the ruby laser, but it took another decade of development before they became practical for everyday use.</p>

<p>A semiconductor laser, also called a laser diode, uses a semiconductor material, typically gallium arsenide or related compounds like indium phosphide or gallium nitride. You create a p-n junction, which is the same basic structure used in regular diodes and transistors. On one side of the junction, the semiconductor is doped (meaning impurities are intentionally added) to have excess electrons (n-type), and on the other side, it’s doped to have excess holes, which are the absence of electrons that act like positive charge carriers (p-type).</p>

<p>When you apply electrical current in the forward direction across this junction, electrons from the n-type side and holes from the p-type side are pushed toward the junction. At the junction, electrons and holes meet and recombine. When an electron falls into a hole, it drops from a higher energy state in the conduction band to a lower energy state in the valence band, and the energy difference is released as a photon.</p>

<p>At low current, this process just produces incoherent light, which is how an LED works. But at high enough current density, something remarkable happens. The junction region becomes filled with electrons waiting to recombine and holes waiting to be filled. This creates population inversion between the conduction band and valence band. Now when a photon is emitted, it can trigger stimulated emission from other electron-hole pairs in the junction.</p>

<p>The semiconductor chip itself forms the optical cavity. The end faces of the chip are cleaved along natural crystal planes, creating smooth, flat surfaces. The difference in refractive index between the semiconductor (which has a high refractive index, typically around 3.5) and the air outside creates a partial reflection at these surfaces, not as strong as a metal mirror, but typically around 30% reflective, which is enough. Photons bounce back and forth between these end faces, building up intensity through stimulated emission, until laser light emerges.</p>

<p>Early semiconductor lasers had to be cooled to cryogenic temperatures (liquid nitrogen, 77 Kelvin) to work, which made them impractical. The problem was that at room temperature, too many carriers were thermally excited, making it hard to maintain population inversion. But through the 1960s and 1970s, researchers developed better materials and structures. They created double heterostructure designs, where layers of different semiconductor materials with different band gaps are stacked together. These structures confine the electrons, holes, and light to a tiny active region only a few hundred nanometers thick. This dramatically improved efficiency and reduced the threshold current needed to achieve lasing, eventually allowing the lasers to work at room temperature with practical current levels.</p>

<p>By the 1980s, semiconductor lasers were cheap enough and practical enough for consumer applications. They’re incredibly compact, the entire laser chip is typically smaller than a grain of rice, sometimes just a few hundred micrometers on a side. They’re efficient, often converting 30-50% of electrical energy to light, and can run on battery power. They can be modulated on and off extremely quickly, at gigahertz frequencies, which means you can encode billions of bits per second by rapidly switching the laser.</p>

<p>Semiconductor lasers gave us CD players and DVD players, where the laser reads the microscopic pits encoded on the spinning disk. They gave us fiber optic communication, where laser diodes send pulses of light carrying data through fiber cables at incredible speeds. They’re in laser printers, in barcode scanners, in laser pointers, in computer mice, in range-finding sensors for autonomous vehicles. They’re everywhere. The semiconductor laser is probably the most important laser technology in terms of everyday impact on modern life.</p>

<p><img src="/assets/images/laser-deep-dive/fiber-cables.webp" alt="Fiber optic cables plugged into networking equipment in a data center." />
<em>Semiconductor lasers at work: each of these fiber optic cables carries data as pulses of laser light. Photo: Brett Sayles / <a href="https://www.pexels.com/photo/close-up-photo-of-cables-plugged-into-the-server-2420212/">Pexels</a></em></p>

<h3 id="excimer-lasers-1970s">Excimer Lasers (1970s)</h3>

<p>These ultraviolet lasers use excited dimers (hence the name “excimer,” a contraction of “excited dimer”) which are molecules that only exist in excited states and fall apart when they emit light.</p>

<p>Typical excimers are combinations of a noble gas and a halogen: argon fluoride (ArF), krypton fluoride (KrF), or xenon chloride (XeCl). In the ground state, these atoms don’t bond to each other. A noble gas like argon doesn’t normally form chemical bonds, and it certainly doesn’t bond with a fluorine atom. But when they’re both excited, they can temporarily bond to form an excimer molecule.</p>

<p>You create these excimers by sending a pulsed electrical discharge through a gas mixture at high pressure. The discharge creates excited atoms and ions, which then bond to form excimer molecules. These excited molecules are inherently unstable. They quickly emit a photon and dissociate back into separate atoms.</p>

<p>Because the lower state doesn’t exist as a stable molecule (the atoms simply don’t bond in the ground state) you automatically have population inversion. All the excimers are in the excited state, and there’s essentially no ground state population to absorb photons. This makes excimer lasers very efficient at achieving population inversion.</p>

<p>Excimer lasers produce ultraviolet light at specific wavelengths depending on which excimer you use: ArF at 193 nanometers, KrF at 248 nanometers, XeCl at 308 nanometers. These ultraviolet wavelengths are absorbed very strongly by most materials and have enough energy to break chemical bonds directly.</p>

<p>This property makes excimer lasers ideal for precise material removal, a process called photoablation. The ultraviolet photons are absorbed in a very thin layer at the surface, and they break chemical bonds, essentially vaporizing the material atom by atom. The most famous application is LASIK eye surgery, where an excimer laser removes microscopic amounts of corneal tissue to reshape the eye and correct vision. The laser can remove tissue with incredible precision, a single pulse might remove only 0.25 micrometers of material, and the process is so precise that it doesn’t damage the surrounding tissue.</p>

<p>Excimer lasers are also crucial in semiconductor manufacturing. They’re used in photolithography, the process of creating the intricate patterns on computer chips. The short ultraviolet wavelength allows for extremely fine features to be patterned, the smaller the wavelength, the smaller the features you can create. Modern computer chips with transistors just nanometers in size are manufactured using excimer lasers.</p>

<h2 id="part-9-the-deep-end-fiber-lasers-modern-magic">Part 9: The Deep End: Fiber Lasers (Modern Magic)</h2>

<p><img src="/assets/images/laser-deep-dive/fiber-optic-strands.webp" alt="Fiber optic strands with light glowing at their tips." />
<em>Photo: <a href="https://www.pexels.com/photo/fiber-optic-light-3363556/">Pexels</a></em></p>

<p>Now we’re getting into truly advanced technology. Fiber lasers emerged as practical devices in the 1990s and 2000s as researchers figured out how to build high-power lasers using optical fibers as the gain medium. These represent some of the most sophisticated and powerful lasers available today.</p>

<h3 id="what-is-a-fiber-laser">What is a Fiber Laser?</h3>

<p>The core concept is elegant: instead of having a separate laser crystal or gas tube, and then coupling the laser beam into an optical fiber for transmission to where you need it, what if the fiber itself was the laser?</p>

<p>A fiber laser uses an optical fiber as the gain medium, the optical cavity, and the beam delivery system all in one. The fiber itself does everything.</p>

<h3 id="the-special-fiber">The Special Fiber</h3>

<p>Take an optical fiber, a thin strand of glass about 125 micrometers in diameter, about the thickness of a human hair. But this isn’t ordinary glass. The core of the fiber, the central region where light travels, is doped with rare earth elements, meaning small amounts of rare earth ions are mixed into the glass during manufacturing.</p>

<p>The most common rare earth dopant is ytterbium. Ytterbium ions (Yb³⁺) have the right kind of energy level structure to work as a laser medium. They have a ground state and a metastable excited state, and the energy difference corresponds to near-infrared light around 1030 to 1100 nanometers.</p>

<p>Erbium (Er³⁺) is another common choice, especially for telecommunications, because erbium lases at 1550 nanometers, which happens to be the wavelength where silica optical fibers have the lowest loss, light can travel the farthest through the fiber at this wavelength. Thulium (Tm³⁺) and holmium (Ho³⁺) are used for longer wavelengths around 2000 nanometers, which are useful for materials processing and medical applications.</p>

<p>The rare earth ions are the active laser medium, analogous to how chromium ions were the active medium in ruby. But instead of a rigid rod-shaped crystal a few centimeters long, the laser medium is now a flexible fiber that can be meters or even hundreds of meters long, coiled up to fit in a compact package.</p>

<h3 id="pumping-the-fiber">Pumping the Fiber</h3>

<p>You pump a fiber laser using semiconductor laser diodes, the technology I described earlier that’s now cheap and efficient thanks to decades of development. These pump lasers are relatively inexpensive compared to other pumping methods.</p>

<p>The pump lasers emit light at a shorter wavelength than the fiber laser output. For ytterbium-doped fiber, the pump lasers typically emit at 915 or 975 nanometers (which corresponds to absorption bands of ytterbium), and the fiber laser outputs at 1030-1100 nanometers.</p>

<p>You couple these pump lasers into the fiber using special optical components. The pump light travels along the fiber, and as it propagates, the rare earth ions absorb the pump light. Their electrons jump to excited states. As you keep pumping energy in, you build up population inversion along the entire length of the fiber.</p>

<p>Because the fiber can be very long (sometimes 10 meters, 50 meters, or even more) you have a lot of length for the pump light to be absorbed and for population inversion to build up. This is one of the advantages of fiber lasers: you can scale up the power by making the fiber longer, giving you more gain medium.</p>

<h3 id="the-optical-cavity-fiber-bragg-gratings">The Optical Cavity: Fiber Bragg Gratings</h3>

<p>At each end of the active fiber, you need mirrors to create the optical cavity. But you can’t just glue metal mirrors onto the end of a fiber. Instead, you write Fiber Bragg Gratings directly into the fiber using a clever technique.</p>

<p>A Fiber Bragg Grating (FBG) is a periodic variation in the refractive index of the fiber core. Imagine making the glass slightly denser in some places and less dense in others, in a regular repeating pattern, like stripes running perpendicular to the fiber axis. You create this pattern by exposing the fiber to ultraviolet light through a special mask or using interfering UV beams. The UV light causes a permanent change in the glass structure, slightly altering its refractive index.</p>

<p>This periodic pattern acts as a highly wavelength-selective mirror through a process called Bragg reflection. Light at the Bragg wavelength (determined by the spacing of the periodic pattern) reflects back strongly because reflections from each period of the grating interfere constructively. Light at other wavelengths passes through with minimal reflection because the reflections interfere destructively.</p>

<p>You write one FBG to be highly reflective (99.9% or more) at the laser wavelength and another FBG to be partially reflective (maybe 90% reflective, 10% transmitting). These FBGs, written directly into the fiber as permanent modifications to the glass structure, act as the mirrors for your laser cavity.</p>

<p>The beautiful thing is that this is all integrated into the fiber. There are no separate optical elements to align. The entire laser (gain medium with rare earth ions, optical cavity defined by FBGs, everything) is built into a single piece of fiber that you can coil up.</p>

<h3 id="how-amplification-works">How Amplification Works</h3>

<p>Once you have population inversion in the ytterbium-doped fiber and the optical cavity defined by the FBGs at each end, the lasing process begins. Some spontaneous emission occurs from the excited ytterbium ions, and photons traveling along the fiber between the FBGs start to build up.</p>

<p>These photons travel along the fiber core, which acts as a waveguide keeping them confined. As they propagate, they pass by excited ytterbium ions and trigger stimulated emission. The light is amplified as it travels through the fiber. It reaches the FBG at one end, which reflects it back. The light travels back through the fiber in the opposite direction, gets amplified again by triggering more stimulated emission, reaches the other FBG, which partially reflects and partially transmits.</p>

<p>The transmitted portion that leaks through the partially reflective FBG is your output laser beam. The reflected portion continues bouncing back and forth, continuously building up intensity until a steady state is reached where the gain from stimulated emission equals the losses from the output coupler and various other small loss mechanisms.</p>

<h3 id="why-fiber-lasers-are-extraordinary">Why Fiber Lasers Are Extraordinary</h3>

<p>Fiber lasers have several remarkable advantages over traditional bulk lasers, advantages that come directly from their unique geometry and integrated design.</p>

<p>The first major advantage is exceptional heat dissipation. In a traditional rod-shaped laser crystal, heat is generated throughout the volume of the rod when atoms are pumped and when quantum defect heating occurs. This heat has to conduct outward to the surface of the rod to be removed. The rod has a relatively small surface-area-to-volume ratio, which limits how efficiently heat can be extracted. If you try to pump too much power into a bulk crystal, the center heats up more than the edges, creating temperature gradients that cause optical distortions through thermal lensing, and can even crack the crystal from thermal stress.</p>

<p>A fiber, on the other hand, is extremely thin, typically 125 micrometers in diameter. It has an enormous surface-area-to-volume ratio. Heat generated anywhere in the fiber core can quickly conduct the short distance to the surface and dissipate into the surrounding environment. You can coil the fiber and actively cool it very efficiently. This means you can pump much more power into a fiber laser per unit length without overheating problems.</p>

<p>Modern fiber lasers routinely produce multiple kilowatts of continuous power. Industrial fiber lasers are commercially available with output powers of 10 kW, 20 kW, 30 kW, and experimental systems have exceeded 100 kW. To put that in perspective, a 20-kilowatt fiber laser outputs enough power to boil 30 kettles of water every second, except all that power is concentrated into a spot the size of a grain of sand. That’s enough concentrated power to cut through thick steel plates like butter, weld heavy components, or process materials at high speeds. Yet the fiber itself can be kept cool enough that you could touch the outside of the cladding (though the laser beam emerging from it would certainly be extremely dangerous).</p>

<p>The second major advantage is exceptional beam quality. Because the light is guided by the fiber’s waveguide structure, fiber lasers can maintain excellent beam quality. If you use a single-mode fiber, where the core is small enough that only one spatial mode can propagate, the laser output is fundamentally limited to a nearly perfect Gaussian beam with excellent focusability. This beam can be focused through a lens to a tiny spot, concentrating all that power into an incredibly small area.</p>

<p>Traditional high-power bulk lasers often suffer from thermal lensing, where heat-induced refractive index variations distort the beam, and from other aberrations that degrade beam quality as you scale up the power. Fiber lasers don’t have this problem because the light is confined to the small fiber core the entire time, and the excellent cooling keeps the fiber from developing thermal gradients.</p>

<p>The third advantage is remarkable efficiency. Fiber lasers are among the most efficient lasers ever built. They can convert 70% to 80% of the pump power (from the laser diodes) into laser output. Compare this to CO₂ lasers at around 20% efficiency or early ruby lasers at 1% efficiency. This high efficiency means less electricity is wasted as heat, cooling requirements are reduced, and operating costs are significantly lower over the lifetime of the laser.</p>

<p>The fourth advantage is robustness and reliability. Traditional bulk lasers have free-space optics (mirrors, lenses, laser crystals) that need precise alignment. If the laser gets bumped, if temperature changes cause thermal expansion, or if vibrations occur, the alignment can drift and the laser performance degrades or fails entirely. This requires frequent realignment and maintenance.</p>

<p>A fiber laser has no free-space optics to misalign. Everything is built into the fiber with FBGs written directly into the glass. The laser is inherently mechanically stable. It can handle vibration, temperature changes, and harsh industrial environments without performance degradation. Fiber lasers installed in factories can run 24 hours a day, 7 days a week for years with minimal maintenance, often just replacing pump diodes as they age.</p>

<p>And finally, fiber lasers are surprisingly compact for their power output. A multi-kilowatt fiber laser can fit in an enclosure the size of a small refrigerator, whereas a CO₂ laser with similar power might fill an entire room with its gas handling system, high voltage power supplies, cooling systems, and beam delivery optics.</p>

<h3 id="advanced-fiber-laser-architectures">Advanced Fiber Laser Architectures</h3>

<p>Once you understand the basic fiber laser, there are several sophisticated variations that push performance even further and enable new applications.</p>

<p>One common architecture is the Master Oscillator Power Amplifier, abbreviated MOPA. Instead of trying to generate all your power in a single laser cavity, you split the system into stages. The master oscillator is a low-power, high-quality fiber laser that generates a clean seed beam with excellent beam quality, narrow linewidth, and well-controlled spectral properties. This seed beam typically outputs milliwatts to watts of power.</p>

<p>This seed beam is then sent through one or more amplifier stages. An amplifier stage is simply a length of rare-earth-doped fiber that’s pumped by laser diodes, but without FBG mirrors forming a cavity. It doesn’t oscillate or lase on its own. Instead, the seed beam passes through, and as it does, it triggers stimulated emission in the pumped fiber, amplifying the signal.</p>

<p>You can chain multiple amplifier stages together. The first stage might amplify the seed from milliwatts to watts, the second stage from watts to hundreds of watts, and subsequent stages can boost it to kilowatts or even tens of kilowatts. Each stage increases the power while maintaining the beam quality and spectral properties of the master oscillator.</p>

<p>This MOPA architecture gives you much more control over the laser characteristics. You can control the pulse shape, duration, and repetition rate by modulating the master oscillator. You can achieve very high peak powers in pulsed operation. You can maintain excellent beam quality throughout the amplification process. And you can scale to high average powers by adding more amplifier stages.</p>

<p>Another important technique is cladding pumping. In the simple fiber laser I described earlier, both the pump light and the laser light travel through the core of the fiber. But there’s a clever variation that makes pumping much more practical: you launch the pump light into the cladding, the layer of glass surrounding the core.</p>

<p>The way this works requires a special double-clad fiber design. The fiber has a small core (maybe 10-20 micrometers diameter) doped with rare earth ions, surrounded by a larger cladding (maybe 125-400 micrometers diameter), and then an outer cladding with even lower refractive index. The inner cladding acts as a waveguide for the pump light, keeping it confined through total internal reflection.</p>

<p>As the pump light propagates through the cladding, bouncing around at various angles, it periodically passes through the doped core. Each time it passes through the core, some pump light is absorbed by the rare earth ions. Over the length of the fiber, all the pump light gets absorbed even though it’s traveling in the larger cladding rather than the core.</p>

<p>The advantage of cladding pumping is enormous. The cladding is much larger than the core, perhaps 100 times larger in cross-sectional area. It’s much easier to couple pump light into a larger area. You can use less expensive, lower brightness pump diodes. You can combine the output from many pump diodes, coupling them all into the cladding from different angles or from different points along the fiber.</p>

<p>Meanwhile, the laser light still travels only in the small core and comes out with excellent beam quality determined by the small core, even though the pumping happens in the much larger cladding. Cladding-pumped fiber lasers are the standard architecture for high-power applications because they allow efficient use of many pump diodes to achieve very high pump powers.</p>

<p>Finally, there are ultrafast fiber lasers. By carefully designing the fiber laser cavity and adding elements that favor short pulses, such as saturable absorbers that preferentially transmit high-intensity light, or through nonlinear effects in the fiber itself, you can create fiber lasers that emit incredibly short pulses of light. These pulses can be femtoseconds in duration. A femtosecond is one quadrillionth of a second, written as 10⁻¹⁵ seconds. To put this in perspective, there are more femtoseconds in one second than there are seconds in 30 million years. Light travels only 300 nanometers in a femtosecond, about the wavelength of ultraviolet light, roughly 1/300th the thickness of a human hair.</p>

<p>These ultrafast pulses have remarkable properties. Because each pulse is so short in time, but still contains a reasonable amount of energy (microjoules to millijoules), the peak power during the pulse is enormous, megawatts to gigawatts, even though the average power might only be watts. When such a short, intense pulse hits a material, the material doesn’t have time to heat up. The energy is deposited and the pulse is gone before heat can conduct away from the absorption region. This allows for incredibly clean, precise material removal without a heat-affected zone.</p>

<p>Ultrafast fiber lasers are used for precision micromachining, cutting or engraving intricate patterns in metals, ceramics, glass, or polymers with minimal thermal damage. They’re used in medical applications for delicate surgery where you want to remove tissue without heating the surrounding area. They’re used in scientific research to study ultrafast phenomena like the dynamics of chemical reactions, electron motion in materials, or the behavior of molecules on femtosecond timescales.</p>

<h2 id="part-10-even-deeper-because-the-rabbit-hole-continues">Part 10: Even Deeper (Because the Rabbit Hole Continues)</h2>

<p>Just when you think fiber lasers represent the peak of laser technology, there are even more exotic approaches that push the boundaries of what’s possible.</p>

<h3 id="coherent-beam-combining">Coherent Beam Combining</h3>

<p>What if you want even more power than a single fiber laser can provide? There are fundamental limits to how much power you can extract from a single fiber before nonlinear optical effects distort the beam or before the intensity becomes high enough to damage the fiber itself. The solution is to combine multiple fiber lasers.</p>

<p>In coherent beam combining, you take multiple fiber lasers and carefully control their relative phases so they’re all perfectly synchronized. Then you combine their beams using special optics. If the phases are matched correctly, the beams interfere constructively when they’re combined, and the electric fields add up in amplitude rather than just in power.</p>

<p>Here’s why this is remarkable: if you have ten fiber lasers, each producing one kilowatt of power, and you just combined them incoherently (phases random), you’d get ten kilowatts total. But if you combine them perfectly coherently with all phases aligned, the electric field amplitudes add up, so the electric field is ten times larger. Since intensity is proportional to the square of the electric field, you get one hundred times the intensity, not just ten times. Ten lasers can give you the intensity of a hundred-kilowatt laser in a focused spot.</p>

<p>Of course, achieving perfect coherent combining is extraordinarily difficult. You need to keep the phases of all the lasers matched to within a small fraction of a wavelength (less than a micrometer) despite vibrations, temperature changes, air currents, and other environmental disturbances. This requires sophisticated electronic feedback systems that continuously measure the relative phases using interferometry and adjust them in real time using phase modulators or by adjusting the current to the lasers.</p>

<p>Researchers have demonstrated coherent combining of dozens of fiber lasers, achieving combined output powers of many kilowatts with excellent beam quality. This is an active area of research, with potential applications in directed energy weapons, long-range power beaming, industrial materials processing, and scientific instruments requiring extremely high intensities.</p>

<p>There’s also spectral beam combining, which is a different approach that’s easier to implement but doesn’t give you the intensity enhancement. You take multiple fiber lasers operating at slightly different wavelengths (maybe spaced a few nanometers apart) and use a diffraction grating to combine them spatially. Each wavelength comes in from a slightly different angle, and the diffraction grating bends them all into the same output direction. The powers simply add up, so ten one-kilowatt lasers give you ten kilowatts total. You don’t get the coherent intensity boost, but you also don’t need to control phases, making it much easier to implement for high power levels.</p>

<h3 id="free-electron-lasers">Free Electron Lasers</h3>

<p>These represent the absolute extreme of laser technology. They don’t use atoms or molecules as the gain medium at all. Instead, the electrons themselves, moving at relativistic speeds, emit the light.</p>

<p>A free electron laser (FEL) starts with a particle accelerator, like the kinds used in physics research. You accelerate electrons to extremely high energies, approaching the speed of light, giving them enormous kinetic energy. At these speeds, relativistic effects become important, the electrons gain mass and time dilates for them relative to the stationary laboratory.</p>

<p>These high-energy electrons are then sent through a device called an undulator. An undulator is a long series of alternating magnets creating a periodic magnetic field. The magnets are arranged so that the field alternates direction: north-south, south-north, north-south, and so on, typically with a period of a few centimeters.</p>

<p>As the relativistic electrons pass through this alternating magnetic field, the Lorentz force causes them to oscillate back and forth, wiggling in a sinusoidal path. When charged particles accelerate (and changing direction is acceleration) they emit electromagnetic radiation. That’s just classical electromagnetism, known since the 1800s.</p>

<p>So the wiggling electrons emit radiation. But here’s where it gets clever: the spacing of the magnets, the strength of the magnetic field, and the energy of the electrons are all carefully tuned so that the radiation emitted from each wiggle interferes constructively. The radiation builds up coherently along the path of the electrons as they traverse the undulator.</p>

<p>Moreover, the radiation that’s been emitted can interact back with the electrons through what’s called the ponderomotive force. This causes the electrons to bunch up into microbunches separated by one wavelength of the emitted light. These bunches of electrons then radiate coherently, in phase with each other, like a phased array antenna. The radiation becomes even more intense.</p>

<p>This is stimulated emission, but from free electrons rather than bound electrons in atoms. The process is called self-amplified spontaneous emission (SASE) when the bunching happens spontaneously from noise, or a seeded free electron laser when you inject an external laser to trigger and control the bunching process.</p>

<p>Free electron lasers can produce light at almost any wavelength. By adjusting the electron energy and the undulator period, you can tune the output from microwaves to X-rays. This tunability is unique, no other laser technology can cover such a wide range.</p>

<p>The most powerful and scientifically important FELs produce X-rays, creating the brightest X-ray beams in the world by many orders of magnitude. These X-ray free electron lasers (XFELs) are used at national laboratories for cutting-edge science. They can produce X-ray pulses so intense and so brief (femtoseconds) that they can image individual molecules before the X-rays destroy them. They’re used to watch chemical reactions happen in real time, to study materials at the atomic scale, to determine the structure of proteins, and to probe matter under extreme conditions like those in the cores of planets.</p>

<p>Of course, free electron lasers are absolutely enormous. They require particle accelerators hundreds of meters to kilometers long, arrays of powerful magnets, massive power supplies, and infrastructure that costs hundreds of millions to billions of dollars. The Linac Coherent Light Source at SLAC National Accelerator Laboratory uses a 3-kilometer-long accelerator. These are not something you’ll find in a factory or hospital. But for fundamental research at the frontiers of science, they’re invaluable.</p>

<h3 id="x-ray-lasers-from-high-harmonic-generation">X-Ray Lasers from High Harmonic Generation</h3>

<p>Another way to produce X-ray laser light without building a kilometer-long accelerator is through high harmonic generation (HHG). You take an ultrafast laser with very intense pulses (peak intensities of 10¹⁴ to 10¹⁵ watts per square centimeter) and focus it into a gas of atoms.</p>

<p>The electric field of the focused laser is so strong that it’s comparable to the electric field that binds electrons to nuclei in atoms. This field distorts the atomic potential, temporarily suppressing the barrier that keeps electrons bound. An electron can tunnel out of the atom, essentially escaping through the barrier while the laser field is pulling it one way.</p>

<p>Then, half a cycle later, the laser field reverses direction and starts pulling the electron back toward the ion it came from. The electron accelerates in the laser field, gaining kinetic energy. When it crashes back into its parent ion, it recombines, and all that kinetic energy plus the ionization energy is released as a single high-energy photon.</p>

<p>Because the electron can be accelerated to high kinetic energies by the laser field before recombining, the emitted photons can have energies far exceeding the photon energy of the driving laser. If the driving laser is infrared, the emitted photons can be in the extreme ultraviolet or soft X-ray region. These photons are harmonics of the original laser frequency, odd multiples like the 11th harmonic, 13th, 15th, going up to the 100th harmonic or higher.</p>

<p>The remarkable thing is that this process naturally generates coherent radiation because the electron dynamics are driven by the coherent laser field. The emitted high-frequency light maintains phase coherence and can be collimated into a beam.</p>

<p>This process allows you to generate coherent extreme ultraviolet and soft X-ray light using a tabletop system. It’s not as powerful or as versatile as a free electron laser, but it’s vastly cheaper and smaller. High harmonic generation sources are used in research labs around the world for time-resolved spectroscopy, studying ultrafast dynamics in materials, attosecond science where processes are studied on timescales of 10⁻¹⁸ seconds, and imaging with nanometer resolution.</p>

<h3 id="the-future">The Future</h3>

<p>Laser technology continues to advance in multiple directions. Researchers are developing quantum cascade lasers that use engineered quantum wells with artificial energy level structures designed for specific wavelengths, particularly in the mid-infrared where few other lasers operate. There are topological lasers that use concepts from topological physics to create lasers that are immune to defects and can maintain single-mode operation robustly. There are lasers using new materials like perovskites, which might enable new wavelengths and applications, or two-dimensional materials like graphene that might enable ultra-compact integrated photonic circuits.</p>

<p>Power levels continue to increase. Researchers have built lasers with peak powers exceeding a petawatt, that’s 10¹⁵ watts, more than a thousand times the entire electrical generating capacity of the world, concentrated into a femtosecond pulse. These ultra-high-intensity lasers create electric fields strong enough to accelerate particles to relativistic energies, to create matter-antimatter pairs from pure energy through quantum vacuum fluctuations, and to test fundamental physics in extreme conditions.</p>

<p>Efficiency continues to improve. Beam quality continues to improve. New wavelengths become accessible. New applications emerge in fields we haven’t even thought of yet.</p>

<p>From Einstein’s 1917 theoretical prediction to today’s fiber lasers cutting through steel and free electron lasers imaging molecules at the atomic scale, the laser has come an almost unimaginable distance in just over a century.</p>

<h2 id="conclusion-the-exponential-trick">Conclusion: The Exponential Trick</h2>

<p>Right now, at this exact moment, there are hundreds of millions of lasers operating around the world. In your devices, in factories, in hospitals, in data centers, cutting steel, correcting vision, carrying the internet through fiber optic cables. Every single one of them works because photons can clone themselves.</p>

<p>But here’s what really gets me about lasers:</p>

<p>They’re all using the exact same quantum mechanical trick (stimulated emission) but the ways we’ve figured out how to trigger it are wildly different. You can make a laser by flashing bright light at a pink crystal. Or by running electricity through a gas. Or by dissolving colorful dye molecules in liquid. Or by injecting current into a semiconductor chip smaller than a grain of rice. Or by doping rare earth ions into a thin glass fiber. They look nothing alike. They’re built from completely different materials using completely different methods. But at the quantum level, they’re all doing the same thing: convincing atoms to make synchronized copies of photons.</p>

<p>It’s like discovering that the same magic spell works whether you cast it with ruby, neon, organic molecules, or ytterbium ions. The universe doesn’t care about the implementation details. If you can create population inversion and trap the light, stimulated emission will happen. Because that’s just how quantum mechanics works.</p>

<p>And then there’s the exponential part, which is both beautiful and terrifying.</p>

<p>One photon becomes two. Two become four. Four become eight. Exponential growth is always consequential in physics. It’s what makes nuclear chain reactions possible, one neutron splits an atom, releases more neutrons, each splits more atoms. It’s what makes epidemics spread. It’s what makes compound interest powerful. Exponentials don’t mess around.</p>

<p>In a laser, you’re harnessing exponential amplification of light. You start with almost nothing (a few random photons going in the right direction) and within nanoseconds you have trillions of synchronized photons carrying kilowatts of power. That’s the same mathematical process that makes atomic bombs work, except instead of neutrons splitting atoms, you have photons cloning themselves.</p>

<p>We’ve become so good at controlling this exponential process that we can build lasers with peak powers exceeding a petawatt, more power than every power plant on Earth combined, compressed into a femtosecond. We can focus that power to create conditions that only exist in the cores of stars. We’re using it to attempt to ignite fusion reactions. The National Ignition Facility uses 192 lasers to compress hydrogen fuel, and they’ve achieved fusion ignition, the first time humans have created a fusion reaction that produces more energy than it consumes.</p>

<p><img src="/assets/images/laser-deep-dive/nif-target-chamber.webp" alt="Inside the National Ignition Facility target chamber. A technician stands on a platform for scale, dwarfed by the massive spherical chamber lined with laser beam ports." />
<em>Inside the National Ignition Facility target chamber. Each of those circular ports delivers a laser beam. The technician gives you a sense of scale. Photo: Lawrence Livermore National Laboratory.</em></p>

<p>Exponential amplification of light. It sounds almost innocent until you realize what it means.</p>

<p>Einstein discovered this process in 1917 while trying to make some equations balance. Forty-three years later, someone figured out how to make it happen on purpose. And now we’re using it for everything from reading barcodes to potentially powering civilization.</p>

<p>From abstract quantum mechanics to cutting through steel to maybe, just maybe, unlimited clean energy.</p>

<p>Not bad for some synchronized photons.</p>

<hr />

<p><em>Want to go even deeper? Explore: quantum cascade lasers, optical parametric oscillators, Raman lasers, terahertz lasers, quantum dot lasers, polariton lasers, superradiant lasers, and more. The rabbit hole truly never ends.</em></p>]]></content><author><name>Fabian Hertwig</name></author><category term="blog" /><category term="Physics" /><category term="Lasers" /><category term="Quantum Mechanics" /><category term="Engineering" /><summary type="html"><![CDATA[Every laser ever built works because photons can clone themselves. A deep dive into how we get from a light bulb to burning drones out of the sky, starting with Einstein's 1917 prediction that nobody knew what to do with for 43 years.]]></summary></entry><entry><title type="html">Your Phone is a Fake Berry Bush: Why You Keep Scrolling</title><link href="https://fabianhertwig.com/blog/slot-machine-brain/" rel="alternate" type="text/html" title="Your Phone is a Fake Berry Bush: Why You Keep Scrolling" /><published>2026-01-02T17:00:00+01:00</published><updated>2026-01-02T17:00:00+01:00</updated><id>https://fabianhertwig.com/blog/slot-machine-brain</id><content type="html" xml:base="https://fabianhertwig.com/blog/slot-machine-brain/"><![CDATA[<p>I’m on the couch, watching a show I’m genuinely enjoying. Good plot, good acting, no complaints. And then I notice my phone is in my hand. I’m looking at it. I don’t remember picking it up.</p>

<p>Here’s the strange part: I don’t actually want to check anything. No message I’m waiting for, no notification that pulled me in. I just… opened it. Automatically. Like a reflex. I catch myself staring at the home screen, thumb hovering, with no idea what I intended to do.</p>

<p>It’s even weirder when you see it from outside. I’ll be talking with someone, mid-sentence, and they pull out their phone and start scrolling. They don’t seem to notice they’ve done it. I don’t think they’re being rude on purpose. It’s more like their hand just… moved.</p>

<p>I got curious about why this happens. I dug into the research, and I have good news and bad news.</p>

<p>The bad news: you’re not going to willpower your way out of this. The systems driving that behavior are ancient, powerful, and mostly invisible to conscious thought.</p>

<p>The good news: once you understand <em>why</em> your brain does this, you can stop blaming yourself and start designing around it. This isn’t a character flaw. It’s evolutionary biology colliding with teams of engineers who’ve figured out exactly how to exploit it.</p>

<p>But I also wonder: if these systems are this powerful, could they be used for good? Could I get addicted to deep work, or learning, or working out, the way I’m addicted to my phone?</p>

<hr />

<h1 id="part-1-the-exploitation-playbook">Part 1: The Exploitation Playbook</h1>

<p><img src="/assets/images/brain-slot-machines/phone-slot-machine.jpg" alt="Your phone is a slot machine" class="align-center" /></p>

<p>Open TikTok. Swipe. Meh. Swipe. Meh. Swipe. Okay, that was kind of funny. Swipe. Meh. Swipe. Meh. Swipe. Meh. Swipe. Oh wow, that’s actually amazing.</p>

<p>You just experienced the reward pattern that makes slot machines work. And it’s not an accident.</p>

<p>Consider what TikTok is actually doing. Most videos are mediocre, some are good, and occasionally one is perfect for you. You can’t predict which swipe will pay off: <strong>variable rewards</strong>. The next video is one thumb movement away, no searching, no deciding, no effort: <strong>no friction</strong>. The feed never ends, so there’s no natural place to quit: <strong>no stopping point</strong>. And that video that was <em>almost</em> funny, that post that was <em>almost</em> interesting? Each one feels like progress toward the jackpot: <strong>near-misses</strong>.</p>

<p>This isn’t just TikTok. Instagram Reels, YouTube Shorts, Twitter feeds, Tinder: same formula. Dating apps turn human connection into a swipe-based slot machine. Even browsing Netflix or YouTube’s homepage is a kind of foraging through mediocre thumbnails hoping to strike gold. The pattern is everywhere once you see it.</p>

<p>Why does it work so well? The answer starts with a psychologist, some pigeons, and casinos that figured out the formula before the science existed.</p>

<hr />

<h1 id="part-2-the-science-of-why-it-works">Part 2: The Science of Why It Works</h1>

<h2 id="skinners-pigeons">Skinner’s Pigeons</h2>

<p class="text-center"><img src="/assets/images/brain-slot-machines/Photograph-of-B-F-Skinner-Working-with-a-pigeon-in-an-early-operant-chamber-at-Indiana.png" alt="B.F. Skinner working with a pigeon in an operant chamber at Indiana University, circa 1947" class="align-center" />
<em>Photo courtesy of the B.F. Skinner Foundation</em></p>

<p>In the 1950s, B.F. Skinner was studying how animals learn. He put pigeons in boxes with a lever they could peck. Peck the lever, get food.</p>

<p>As Skinner later told it, he stumbled onto something unexpected while running low on food pellets. When rewards came predictably (every peck, or every tenth peck) the pigeons behaved predictably too. They’d peck, eat, take breaks. Sensible birds.</p>

<p>But when rewards came randomly? Sometimes on the third peck, sometimes on the twentieth, sometimes twice in a row? The pigeons became obsessive, pecking with manic persistence, far more than under any predictable schedule. Skinner had discovered <strong>variable ratio reinforcement</strong>: random rewards for repeated actions.</p>

<p>In 1957, Skinner and his colleague C.B. Ferster published <em>Schedules of Reinforcement</em>, which formalized these findings through rigorous experimentation. But when Skinner wrote about gambling in 1953, he noted something interesting: “the efficacy of such schedules in generating high rates has long been known to the proprietors of gambling establishments.”</p>

<p>The casinos had figured it out empirically before the science caught up.</p>

<h2 id="how-casinos-engineered-addiction">How Casinos Engineered Addiction</h2>

<p>How did casino owners discover the optimal formula for addiction without running controlled experiments on pigeons? To answer that, we need to go back before slot machines existed at all.</p>

<p>In 1891, Sittman and Pitt of Brooklyn, New York built a gambling machine that used five spinning drums, each holding ten playing cards. It was essentially mechanized poker. Players would insert a nickel, pull a lever, and hope the drums landed on a good poker hand. There was no automatic payout; you’d show your result to the bartender and collect your prize (usually free drinks or cigars). The machine was wildly popular. Within a few years, nearly every bar in New York had one.</p>

<p>But notice what this machine <em>didn’t</em> have: drama. All five drums stopped at roughly the same time. You either got a good hand or you didn’t. There was no “almost.”</p>

<p>A few years later, Charles Fey, a Bavarian immigrant working as a mechanic in San Francisco, saw an opportunity. He’d been tinkering with coin-operated machines for years, and in the late 1890s he built something different: the Liberty Bell.</p>

<p>Fey’s design made three changes. First, he replaced the five poker drums with three simpler reels, each showing just five symbols: horseshoes, diamonds, spades, hearts, and liberty bells. Fewer combinations meant automatic payouts became possible.</p>

<p>Second, and more importantly, he made the reels stop sequentially. The first reel lands: cherry. The second reel lands: cherry. The third reel is still spinning… then it lands: lemon. <em>You were so close.</em></p>

<p>This delay was the innovation that mattered. Fey had accidentally built the near-miss into the machine’s physical structure. Earlier color-wheel machines revealed results all at once, so you could calculate your odds from what you saw. With three sequential reels showing just a fraction of the thousand possible combinations (10 × 10 × 10), players had no way to calculate the payout percentage. More importantly, the sequential stopping created suspense and that feeling of “almost winning” the poker machines lacked.</p>

<p>The Liberty Bell was enormously successful. Because gambling was illegal in California, Fey couldn’t patent his device, and competitors immediately began copying it. Within a decade, slot machines were everywhere.</p>

<p class="text-center"><img src="/assets/images/brain-slot-machines/Liberty_bell.jpg" alt="The original Liberty Bell slot machine, invented by Charles Fey in the 1890s" class="align-center" />
<em>Photo: Wikimedia Commons</em></p>

<p>But the real engineering came later. In the early 1980s, when computerized slots began replacing mechanical reels, designers gained precise control over probabilities. They developed a technique called “virtual reel mapping,” where the physical symbols you see spinning don’t correspond to the actual odds. A jackpot symbol might appear on the physical reel as often as any other, but in the computer’s virtual reel (which determines outcomes), it appears far less frequently.</p>

<p>More insidiously, designers began using “clustering,” deliberately placing blank stops next to jackpot symbols on the virtual reel. The result: when you lose, you frequently see the jackpot symbol <em>just above</em> or <em>just below</em> the payline. A near-miss. Your brain registers it as “almost,” even though the computer had already determined you’d lost the instant you pulled the lever.</p>

<p>This wasn’t subtle. In 1988, a case came before the Nevada Gaming Commission challenging one manufacturer’s algorithms for generating an artificially high rate of near-misses. The commission ruled that certain techniques were “unacceptable,” but notably, virtual reel mapping that creates near-misses above and below the payline remains legal to this day.</p>

<p>The casinos didn’t need Skinner’s research to design addictive machines. They had something better: direct feedback on what keeps people pulling the lever, refined over a century. What Fey stumbled onto with sequential reels, modern designers have turned into a science.</p>

<h2 id="the-near-miss-trick">The Near-Miss Trick</h2>

<p>In 2009, Luke Clark and colleagues at Cambridge put volunteers in brain scanners and had them play slot machines. When someone won, their reward circuits lit up, specifically the ventral striatum, the same region that responds to food and sex. When someone <em>almost</em> won (cherry-cherry-lemon), their reward circuits also lit up. Almost as much as for a real win.</p>

<p>Your brain treats “I almost got it!” as genuine progress. This would be sensible if slot machines were skill-based games where getting close meant you were improving. But they’re not. The outcome is determined the instant you pull the lever. Cherry-cherry-lemon tells you nothing about what the next spin will bring.</p>

<p>Yet your brain thinks: “I was so close! Next time!”</p>

<p>A 2001 study by psychologists Jeffrey Kassinove and Mitchell Schare tested near-miss rates of 15%, 30%, and 45% on participants playing a simulated slot machine. The 30% condition produced the greatest persistence, with participants continuing to play significantly longer than in either the 15% or 45% conditions. Modern slot machines are engineered with this in mind.</p>

<p>Now think about your feed. That video that was <em>almost</em> funny. That profile on Tinder that was <em>almost</em> your type. That thread that was <em>almost</em> insightful. Each near-miss keeps you swiping, because your brain registers it as progress toward the jackpot.</p>

<h2 id="schultzs-monkeys">Schultz’s Monkeys</h2>

<p>Skinner showed <em>what</em> kept animals hooked. But it took another few decades to understand <em>how</em> the brain actually processes these rewards.</p>

<p>In the 1990s, Wolfram Schultz at Cambridge was studying monkeys. He wanted to understand dopamine, the neurotransmitter everyone assumed was the “pleasure chemical.” The thinking: you eat something delicious, dopamine releases, you feel pleasure. Simple.</p>

<p>Schultz designed an experiment to test this. A monkey reaches into a box, finds a treat. He recorded what the dopamine neurons were doing. At first, the neurons fired when the monkey got the treat. If dopamine equals pleasure, this confirmed the theory.</p>

<p>But then he noticed something that didn’t fit. After the monkey learned that the box always contained a treat, the dopamine response <em>shifted</em>. Now the neurons fired when the monkey <em>saw</em> the box, not when it got the treat. The actual reward barely registered anymore.</p>

<p>And when the monkey expected a treat but didn’t get one? The dopamine neurons went <em>below</em> baseline, a negative signal. When it expected nothing but got a treat anyway? A huge spike.</p>

<p>Schultz realized he wasn’t looking at a pleasure signal. He was looking at a <strong>prediction error</strong> signal. In a 1997 paper that changed the field, he showed that dopamine tracks the gap between what you expected and what you got:</p>

<ul>
  <li>Better than expected → dopamine spike</li>
  <li>As expected → nothing</li>
  <li>Worse than expected → dopamine dip</li>
</ul>

<p>This explains why your tenth bite of cake is less exciting than your first, even though the taste is identical. The first bite exceeded prediction. The tenth matched it. Same cake, different signal.</p>

<p>And it explains why variable rewards are so compelling. When you can’t predict whether the next swipe will be good or bad, every swipe generates potential prediction error. Your dopamine system stays engaged, perpetually anticipating the possibility of surprise.</p>

<h2 id="berridges-rats">Berridge’s Rats</h2>

<p>Around the same time Schultz was studying monkeys, Kent Berridge at the University of Michigan was studying rats and sweet tastes. Normal rats, when you give them sugar water, make a characteristic facial expression, a “yum” face that looks remarkably similar across mammals, including human babies.</p>

<p>Berridge tried something extreme: he destroyed most of the dopamine system in these rats. If dopamine was the pleasure chemical, these rats shouldn’t enjoy sugar anymore.</p>

<p>But they still liked sugar. When it touched their tongues, they made the same “yum” face. The pleasure was intact. What was gone was any motivation to seek it out. They’d walk right past a pile of sugar and starve to death. If you put sugar in their mouths, they’d happily consume it. They just wouldn’t go get it.</p>

<p>Berridge had discovered that <strong>wanting</strong> and <strong>liking</strong> are separate systems. Dopamine doesn’t make you enjoy things. It makes you <em>want</em> things, what Berridge calls “incentive salience,” the feeling that something is worth pursuing. Actual enjoyment comes from different, smaller neural circuits involving opioids.</p>

<p>This separation is what makes certain behaviors so insidious. You can want something intensely while barely enjoying it when you get it.</p>

<p><img src="/assets/images/brain-slot-machines/hand-phone-want-like.jpg" alt="Wanting vs liking: the pull feels exciting, but the payoff is often disappointing" class="align-center" /></p>

<p>Think about checking your phone. You feel a pull to check it. That’s wanting, dopamine signaling that something potentially rewarding might be there. You check. Mostly nothing interesting. You don’t particularly enjoy the experience. But a few minutes later, you feel the pull again. The wanting returns, even though the liking never showed up.</p>

<p>Or think about eating chips from a bag. You’re not savoring each chip. They’re fine. But you keep reaching for the next one, and the next one, and suddenly the bag is empty and you feel vaguely sick. The wanting drove the behavior. The liking was barely involved.</p>

<p>Berridge has described addiction as “a starved want in an unstarved brain,” the wanting mechanism running at full intensity while the liking mechanism provides no corresponding satisfaction. App designers don’t need you to enjoy their product. They just need you to keep wanting to check it.</p>

<h2 id="the-foraging-brain">The Foraging Brain</h2>

<p>Why does your brain fall for this? Because these systems weren’t designed for the modern world. They were designed for finding food when you don’t know where it is.</p>

<p>The idea that our dopamine systems are essentially foraging circuits comes from optimal foraging theory, developed by ecologists Eric Charnov and Robert MacArthur in the 1960s. Researchers at Xerox PARC later applied this framework to human information-seeking behavior. And ethologist Niko Tinbergen’s work on “supernormal stimuli” helps explain why digital environments are so compelling: artificially exaggerated triggers hijack instincts more effectively than the natural stimuli those instincts evolved for.</p>

<p><img src="/assets/images/brain-slot-machines/savanna.jpg" alt="The foraging environment: unpredictable rewards scattered across the landscape" class="align-center" /></p>

<p>Imagine you’re a proto-human on the African savanna. Food is scattered unpredictably across the landscape. Some bushes have berries, most don’t. Some areas have tubers, but you have to dig to find out. Some paths lead to watering holes where you might catch prey, or you might waste hours finding nothing.</p>

<p>Most of your attempts fail. And they have to fail. If food were easy to find, it would already be gone. Your survival depends on persistence through endless disappointment.</p>

<p>The dopamine system evolved to solve this problem. It rewards the search, not just the find. It makes the <em>possibility</em> of finding something almost as motivating as actually finding it. Your ancestors who kept exploring (one more bush, one more trail, one more dig) occasionally hit jackpots: a carcass, a honeycomb, a patch of ripe fruit. Those who gave up too easily starved.</p>

<p>But there’s a second adaptation that’s crucial to understanding why these systems are so exploitable. If every failed attempt felt as bad as a successful find felt good, you’d be too demoralized to continue after three empty bushes. So the brain evolved an asymmetry: wins register strongly, losses barely register at all.</p>

<p>Finding food creates an intense, memorable spike. Not finding food is just… neutral. Not painful. Just nothing. You shrug it off and keep searching.</p>

<p>This asymmetry is exactly what gambling exploits. You lose ten times, and each loss barely registers. Then you win once, and the spike feels significant. Your brain does bad accounting: the one win looms larger than the ten losses. You keep playing.</p>

<p>These systems are ancient. Dopamine-based reward circuits aren’t unique to humans; they exist in insects, fish, even worms. When you feel the compulsive urge to check your phone, you’re fighting hundreds of millions of years of optimization.</p>

<p>But the foraging environment had built-in limits. You had to walk miles. You could only carry so much back to camp. You could only eat so much before you were full. The search eventually ended.</p>

<p>Modern technology has removed all these limits. “Rewards” are infinite. Effort is negligible, just moving your thumb. There’s no upper bound, no natural stopping point. Your brain cannot tell the difference between “I found food that will keep my family alive” and “I found an entertaining video.” Both trigger the same ancient system. Both feel like something. One matters. The other just consumed twenty minutes of your life.</p>

<hr />

<h1 id="part-3-whats-new">Part 3: What’s New</h1>

<p>Skinner’s research is from the 1950s. Schultz’s key papers came out in 1997. You might wonder: have we learned anything new? We have, and it makes the picture more concerning.</p>

<p>TikTok’s algorithm isn’t Skinner’s random reinforcement schedule, and it’s not a slot machine’s fixed probabilities. It’s something more sophisticated: the slot machine is learning you.</p>

<p>Classic variable reinforcement is random. The pigeon gets food on an unpredictable schedule, but the schedule isn’t personalized. A slot machine pays out based on fixed probabilities that apply to everyone equally.</p>

<p>TikTok’s For You page is different. It’s watching which videos make you pause, which ones you watch to the end, which ones you rewatch, which ones you skip past immediately. It’s building a model of your specific dopamine triggers and then optimizing for them. This is variable rewards calibrated to <em>your</em> prediction error system.</p>

<p>This is why people describe the For You page as eerily accurate, like the app knows them better than they know themselves. It’s not just showing you random content hoping something lands. It’s testing, learning, and refining what works for you specifically.</p>

<p>Research on TikTok has identified something called the “flow experience,” a state of absorption where you lose track of time and become fully immersed in the content stream. A 2024 study found that the key predictor of problematic use isn’t just variable rewards; it’s this trance-like concentration where minutes slip into hours without awareness. Users consistently underestimate time spent on TikTok more than on other platforms.</p>

<p>This isn’t academic speculation anymore. In October 2024, thirteen U.S. states and D.C. sued TikTok, alleging that its algorithm is “designed to promote excessive, compulsive, and addictive use” in children. Whether or not the case succeeds, the fact that it exists signals something: the mechanisms we’ve been discussing have moved from psychology journals into courtrooms.</p>

<hr />

<h1 id="part-4-breaking-free">Part 4: Breaking Free</h1>

<p>So what do you do with this knowledge?</p>

<p>The first thing to understand: willpower is not the answer. You’re not going to think your way out of systems that operate below conscious awareness and have been optimized for hundreds of millions of years.</p>

<p>But you can change the environment.</p>

<h2 id="understanding-your-triggers">Understanding Your Triggers</h2>

<p>Cognitive Behavioral Therapy (CBT) helps people identify the thoughts and situations that trigger problematic behaviors. Rather than suppressing urges through willpower, CBT focuses on noticing patterns: what happens right before the behavior? What internal state are you in? What are you trying to avoid or achieve?</p>

<p>In trials with smartphone-addicted adolescents, 12-week CBT programs significantly reduced addiction scores. The most helpful module, according to participants, was called “Recognize the Triggers,” which taught people to notice <em>why</em> they were reaching for their phone in the first place.</p>

<p>The insight is that phone checking isn’t random. It’s triggered by specific internal states: boredom, loneliness, anxiety, the desire to escape an uncomfortable task, the need for stimulation. If you can notice <em>why</em> you’re reaching for the phone, you create a moment of choice that wasn’t there before.</p>

<p>Some questions to ask yourself in that moment: Am I feeling bored? What am I avoiding? Am I feeling lonely? What connection am I actually seeking? Am I feeling anxious? What would actually address the anxiety? And perhaps most useful, given what we know about wanting versus liking: will I actually enjoy this, or am I just responding to a pull?</p>

<p>That last question is worth developing into a practice. Before you check your phone, predict: “Will I feel better after 10 minutes of scrolling?” Then afterward, notice whether your prediction was accurate. Building this awareness helps reveal the gap between the pull and the payoff, the wanting that persists even when liking never shows up.</p>

<h2 id="environmental-design">Environmental Design</h2>

<p>The more effective approach is changing the environment so the behavior becomes harder in the first place. You won’t out-think systems optimized for millions of years. But you can redesign choice architecture so checking your phone requires more effort than not checking it.</p>

<p>The simplest intervention: turn off notifications. Every notification is a trigger, every buzz is your phone asking for attention. Most apps default to aggressive notification settings because their metric is engagement, not your wellbeing. Turn off notifications for everything except calls and messages from actual humans, and you’ve eliminated hundreds of daily triggers.</p>

<p>The next step is removing apps from your home screen. If you have to search for an app to open it, you’ve added a few seconds of friction. That small delay creates a moment where you can ask “Do I actually want to do this?” Having Instagram’s icon staring at you every time you unlock your phone is a cue that triggers wanting. Remove the cue and you remove the trigger.</p>

<p>For deeper focus, put your phone in another room entirely. A 2017 study from UT Austin found that participants with their phones in another room significantly outperformed those with phones on the desk, even when the phones were face-down and silent. Just having the phone nearby seemed to occupy cognitive resources. Part of your brain was dedicated to <em>not</em> checking it, and that effort cost something. (A 2024 meta-analysis of 33 studies found smaller effects than the original study, suggesting this may vary by individual, but even a small effect compounds over time.)</p>

<p>A more aggressive intervention is grayscale mode. A 2024 study by Dekker and Baumgartner found that participants used their phones about 20 minutes less per day with grayscale displays. The mechanism is simple: colorful visuals trigger dopamine responses. App icons and notification badges use bright, saturated colors specifically because those colors grab attention. Remove the colors, and the phone becomes less visually compelling. Some users find grayscale hard to maintain long-term, but even using it intermittently (say, after 9pm) can help.</p>

<p>Other friction techniques include logging out of apps after each use (having to re-enter a password creates a pause that’s often enough to break the automatic behavior) and using browser versions instead of apps (the mobile web version of Twitter or Instagram is clunkier, slower, and less optimized for addiction, which is a feature, not a bug).</p>

<p>For some people, friction isn’t enough. Deleting the apps entirely is the only thing that works. If you find yourself reinstalling apps you’ve deleted, that’s useful information about how strong the pull is.</p>

<h2 id="making-losses-visible">Making Losses Visible</h2>

<p>Remember the foraging asymmetry: wins register strongly, losses fade. One way to counter this is to make the losses visible.</p>

<p>Screen time tracking does this automatically. Seeing “4 hours 23 minutes on TikTok” at the end of the day is information your brain would otherwise ignore. You might not remember the scrolling (each mediocre video faded from memory as soon as it passed) but you’ll notice the number.</p>

<p>Some people find journaling useful: after a scrolling session, write down what you actually got from it. Often the answer is “nothing” or “I feel worse.” Recording this counters the brain’s tendency to remember the occasional good video and forget the hundred forgettable ones.</p>

<hr />

<h1 id="part-5-using-it-for-good">Part 5: Using It For Good</h1>

<p>If these mechanisms are so powerful, can they be used for good? Can you get addicted to working out, or to learning, or to doing deep work? Imagine if school were as compelling as TikTok. Imagine if you felt the same pull toward your workout that you feel toward your phone.</p>

<p>People have tried. The results are instructive.</p>

<h2 id="what-duolingo-got-wrong">What Duolingo Got Wrong</h2>

<p>Duolingo is the most famous attempt at making learning addictive. If you haven’t used it: the app teaches languages through short exercises, mostly translation. Complete a lesson and earn XP. The amount varies unpredictably: bonus XP for a “perfect lesson” or daily challenges. Leaderboards let you compete against strangers for weekly rankings, and streaks track consecutive days practiced. Miss a day and the streak resets.</p>

<p>The notifications are remarkably persistent. Duo, the green owl mascot, sends messages like “These reminders don’t seem to be working. We’ll stop sending them for now.” (guilt trip) or “You made Duo sad” with an image of the owl looking dejected. According to Duolingo’s own reports, passive-aggressive notifications outperform friendly ones.</p>

<p>And it works, for engagement. Duolingo’s 2024 investor reports show daily active users at 34% of monthly active users, with over 10 million maintaining year-long streaks.</p>

<p>But many people use Duolingo for years and still can’t hold a conversation. Applied linguist Matt Kessler has studied this gap: Duolingo is effective for <em>receptive</em> skills (reading, listening, vocabulary) but users consistently struggle with <em>productive</em> skills like speaking and writing. One user described arriving in Sweden after hundreds of hours on Duolingo, able to read magazine articles but unable to order a coffee.</p>

<p>The problem isn’t just gamification. It’s that Duolingo’s core learning method (translation between languages) trains you to <em>convert</em> rather than to <em>think</em> in the new language. And because streaks reward showing up rather than improving, users optimize for the wrong thing. Someone with a 500-day streak might spend their daily five minutes on an easy lesson they’ve already mastered, just to preserve the streak, when watching a three-minute video in the target language would be more useful.</p>

<p>Duolingo made people addicted to <em>using the app</em>, not to <em>learning</em>. The engagement and the outcome became decoupled.</p>

<h2 id="what-about-tiktok-for-learning">What About “TikTok for Learning”?</h2>

<p>You’ve probably seen ads for apps like Headway, Imprint, or Blinkist: “TikTok for books” or “TikTok for smart people.” Headway offers swipeable book summaries with streaks and gamified challenges. Imprint presents ideas through tap-through visual slides. Users report replacing doomscrolling with these apps.</p>

<p>But notice what they’re doing: they’ve applied TikTok-style engagement to <em>consumption</em>, not <em>skill-building</em>. You’re not learning to speak Spanish or play piano. You’re consuming summaries of productivity books. The engagement mechanics work, but the output is passive absorption, not active skill. It’s watching workout videos instead of working out.</p>

<p>Nobody has applied this level of design sophistication to the hard problem: making skill <em>acquisition</em> feel as compelling as scrolling.</p>

<h2 id="the-gamification-trap">The Gamification Trap</h2>

<p>Could you just add variable rewards to beneficial tasks? Imagine an app where you complete small work tasks, and sometimes you get a reward and sometimes you don’t, unpredictably. Would that drive motivation?</p>

<p>A 1999 meta-analysis by Edward Deci and colleagues examined 128 studies on this question. The finding was counterintuitive: when people expect rewards for an activity, their intrinsic motivation for that activity <em>decreases</em>. The effect size was substantial (d = -0.40 for performance-contingent rewards). This is the “overjustification effect,” replicated many times.</p>

<p>The mechanism is attribution. When you’re rewarded for doing something, you start to attribute your behavior to the reward rather than to genuine interest. “I’m doing this because I get points,” not “I’m doing this because I find it interesting.” When the rewards stop, motivation drops <em>below</em> where it started. The reward didn’t just fail to help; it actively undermined the original motivation.</p>

<p>This explains why naive gamification often produces a burst of engagement followed by a fade. Points and badges create short-term excitement, but they’re training you to care about the points, not about the activity. Once the novelty wears off, you’re left with less intrinsic motivation than you had before.</p>

<p>The exceptions are revealing. <em>Unexpected</em> rewards don’t undermine intrinsic motivation, because you can’t attribute your prior behavior to a reward you didn’t know was coming. And <em>informational</em> feedback (“you did really well on that”) can actually enhance motivation, because it provides genuine evidence of competence rather than external control.</p>

<p>This suggests variable rewards could work, but only if they’re genuinely unexpected and the tasks themselves build real skills. The moment people start expecting the rewards, the mechanism shifts from enhancement to undermining.</p>

<h2 id="the-flow-alternative">The Flow Alternative</h2>

<p>Maybe the goal shouldn’t be to make learning feel like TikTok. Maybe TikTok is the wrong model entirely.</p>

<p>Addiction implies compulsion despite harm or lack of benefit. You keep swiping even though you’re not enjoying it, even though you have other things to do, even though you’ll feel worse afterward. Wanting without liking.</p>

<p>But people who genuinely love learning or working out describe something different. They’re not compelled despite lack of benefit; they find the activity itself rewarding. Wanting and liking are aligned. They might be deeply engaged, but they’re not trapped.</p>

<p>Psychologist Mihaly Csikszentmihalyi spent decades studying this state, which he called “flow.” It occurs when three conditions are met: clear goals with immediate feedback, challenge matched to skill (hard enough to stretch you, not so hard you’re overwhelmed), and deep concentration. In flow, people lose track of time and feel intrinsically motivated to continue. Absorbing in a way that feels good, not compulsive.</p>

<p class="text-center"><img src="/assets/images/brain-slot-machines/Challenge_vs_skill.svg" alt="Csikszentmihalyi's flow model: the sweet spot between boredom and anxiety" class="align-center" />
<em>Diagram: Wikimedia Commons</em></p>

<p>The design principles for flow are different from the design principles for addiction.</p>

<p>First, challenge has to match skill. Too easy and you’re bored; too hard and you’re anxious. The sweet spot is where you’re stretched but capable. This is why personalized difficulty adjustment matters, and why one-size-fits-all content often fails.</p>

<p>Second, feedback needs to be immediate and informational: not “you earned 10 points” but “you got that right” or “here’s what you missed.” The feedback should tell you about your actual performance, not your standing in a game.</p>

<p>Third, real progress has to be visible. Anki does this well: you can see yourself remembering things you used to forget. Couch to 5K does this too: you can run distances that used to be impossible. The reward is the actual improvement, made salient.</p>

<p>Fourth, effective systems build toward production, not just consumption. Duolingo’s weakness is that it trains reception (reading, listening) but not production (speaking, writing). Real skill requires doing the thing, not just recognizing it.</p>

<p>Finally, based on the overjustification research, expected tangible rewards will undermine intrinsic motivation over time. If rewards are used at all, they should be unexpected, or replaced entirely by informational feedback about genuine progress.</p>

<h2 id="what-about-work-thats-just-work">What About Work That’s Just… Work?</h2>

<p>Flow assumes the activity can become intrinsically rewarding. But some work is genuinely tedious: IT support, data entry, answering the same questions repeatedly. You’re not going to achieve flow while resetting someone’s password for the hundredth time. Can anything from engagement science help?</p>

<p>Probably yes, but not through naive gamification. Adding points and leaderboards to IT support tickets would likely produce the Duolingo pattern: short-term boost, then fade, leaving workers <em>less</em> motivated than before.</p>

<p>What might actually help borrows from TikTok without the extractive parts.</p>

<p>One approach is introducing variability in the task itself, not just rewards. TikTok keeps you engaged partly through unpredictability. For repetitive work, mixing task types or varying the order could break monotony. An IT support queue that surfaces an interesting edge case between routine password resets gives you something to look forward to.</p>

<p>Another is reframing impact. “You closed 47 tickets” is a metric. “You helped 47 people get back to their work today” is a story. Research on meaningful work suggests that connecting tasks to their human consequences increases motivation, even for routine work.</p>

<p>Recognition helps too, but it has to be unexpected, not scheduled. A manager who occasionally notices good work, without a predictable pattern, provides unexpected positive feedback that enhances rather than undermines motivation. The key is that it’s genuinely informational (“that was a really clear explanation”) rather than controlling (“you earned 10 recognition points”).</p>

<p>Autonomy matters even when the task is fixed. Control over <em>how</em> you approach it increases engagement. Letting IT support staff develop their own scripts, templates, or workflows gives ownership over process even when they can’t control the work itself.</p>

<p>And finally, there’s progress toward mastery, even in routine work. Is your average resolution time dropping? Are users rating your explanations more highly? Making this visible transforms “doing the same thing over and over” into “getting better at something.”</p>

<p>None of this makes tedious work feel like TikTok. But it might make it less soul-crushing, and unlike naive gamification, these approaches are less likely to backfire.</p>

<h2 id="the-open-question">The Open Question</h2>

<p>Could these principles produce something as compelling as TikTok for genuinely beneficial activities? We don’t fully know, because nobody has tried with TikTok-level resources. The apps that work best (Anki, Couch to 5K) are relatively simple. The apps with TikTok-level engagement (Headway, Imprint) are optimized for consumption, not skill-building.</p>

<p>There may be a fundamental asymmetry. Extractive apps can make the reward arbitrarily easy: just keep swiping, and sometimes something good appears. Skill-building requires actual effort, and there may be no way around that. Flow is deeply rewarding, but you have to earn it.</p>

<p>Still, the gap between what exists and what’s possible feels large. What would a TikTok-level engineering effort look like if aimed at genuine skill acquisition? Personalized challenge-skill matching, immediate informational feedback, visible real progress, variability without expected rewards?</p>

<p>We might not get “addicted to working” in the slot-machine sense. But we might get something better: work that feels meaningful and produces visible results, in ways that make you want to keep doing it. Not compulsion despite lack of benefit, but genuine engagement with genuine payoff.</p>

<hr />

<h1 id="the-lever">The Lever</h1>

<p>The systems are ancient. The exploitation is modern. And now you know the difference.</p>

<p>You can’t rewire your dopamine system. Hundreds of millions of years of evolution aren’t going to yield to good intentions. But you can design your environment so the easy behaviors are the good ones and the extractive ones require effort. You can notice the gap between wanting and liking, between the pull and the payoff.</p>

<p>Can the same mechanisms be redirected toward things that actually benefit you? Not simply. Naive gamification (points, badges, streaks) tends to undermine the intrinsic motivation it’s trying to enhance. Duolingo can make you addicted to <em>using Duolingo</em> without making you fluent in Spanish.</p>

<p>But there’s a different state worth aiming for. Flow isn’t addiction. In flow, wanting and liking align: you’re deeply engaged <em>and</em> genuinely enjoying the activity <em>and</em> making real progress. The conditions for flow (challenge matched to skill, immediate feedback, clear goals) are different from slot-machine engagement. Harder to engineer, but they don’t leave you empty afterward.</p>

<p>The question isn’t whether to engage your brain’s reward systems. They’re engaged whether you choose it or not.</p>

<p>The question is who’s holding the lever, and whether what it’s pointing at is worth wanting.</p>

<hr />

<h1 id="sources-and-further-reading">Sources and Further Reading</h1>

<h2 id="foundational-neuroscience">Foundational Neuroscience</h2>
<ul>
  <li>Schultz, W., Dayan, P., &amp; Montague, P.R. (1997). “<a href="https://www.science.org/doi/10.1126/science.275.5306.1593">A neural substrate of prediction and reward</a>.” Science.</li>
  <li>Schultz, W. (1998). “<a href="https://journals.physiology.org/doi/full/10.1152/jn.1998.80.1.1">Predictive reward signal of dopamine neurons</a>.” Journal of Neurophysiology.</li>
  <li>Berridge, K.C. &amp; Robinson, T.E. (2016). “<a href="https://pmc.ncbi.nlm.nih.gov/articles/PMC5171207/">Liking, wanting, and the incentive-sensitization theory of addiction</a>.” American Psychologist.</li>
</ul>

<h2 id="on-variable-reinforcement-and-gambling">On Variable Reinforcement and Gambling</h2>
<ul>
  <li>Ferster, C.B. &amp; Skinner, B.F. (1957). <em>Schedules of Reinforcement</em>. Appleton-Century-Crofts.</li>
  <li>Clark, L. et al. (2009). “<a href="https://pmc.ncbi.nlm.nih.gov/articles/PMC2658737/">Gambling near-misses enhance motivation to gamble and recruit win-related brain circuitry</a>.” Neuron.</li>
  <li>Harrigan, K.A. (2008). “<a href="https://link.springer.com/article/10.1007/s11469-007-9066-8">Slot Machine Structural Characteristics: Creating Near Misses Using High Award Symbol Ratios</a>.” International Journal of Mental Health and Addiction.</li>
</ul>

<h2 id="on-smartphone-and-social-media-effects">On Smartphone and Social Media Effects</h2>
<ul>
  <li>Ward, A.F. et al. (2017). “<a href="https://www.journals.uchicago.edu/doi/full/10.1086/691462">Brain Drain: The Mere Presence of One’s Own Smartphone Reduces Available Cognitive Capacity</a>.” Journal of the Association for Consumer Research.</li>
  <li>Dekker, C.A. &amp; Baumgartner, S.E. (2024). “<a href="https://journals.sagepub.com/doi/10.1177/20501579231212062">Is life brighter when your phone is not? The efficacy of a grayscale smartphone intervention</a>.” Mobile Media &amp; Communication.</li>
</ul>

<h2 id="on-tiktok-and-modern-platforms">On TikTok and Modern Platforms</h2>
<ul>
  <li>“<a href="https://pmc.ncbi.nlm.nih.gov/articles/PMC11710882/">Does TikTok Addiction exist? A qualitative study</a>.” PMC (2024).</li>
  <li>Brown University. “<a href="https://sites.brown.edu/publichealthjournal/2021/12/13/tiktok/">What Makes TikTok so Addictive?</a>”</li>
</ul>

<h2 id="on-treatment-and-behavior-change">On Treatment and Behavior Change</h2>
<ul>
  <li>“<a href="https://www.jmir.org/2025/1/e59656">Interventions for Digital Addiction: Umbrella Review of Meta-Analyses</a>.” Journal of Medical Internet Research (2025).</li>
</ul>

<h2 id="ethical-design">Ethical Design</h2>
<ul>
  <li>Center for Humane Technology. “<a href="https://www.humanetech.com/">humanetech.com</a>”</li>
</ul>]]></content><author><name>Fabian Hertwig</name></author><category term="blog" /><category term="Psychology" /><category term="Neuroscience" /><category term="Technology" /><category term="Addiction" /><category term="Social Media" /><summary type="html"><![CDATA[The neuroscience behind phone addiction: how Skinner's pigeons, dopamine prediction errors, and the wanting-vs-liking distinction explain why you can't stop scrolling.]]></summary></entry><entry><title type="html">Code Surgery: How AI Assistants Make Precise Edits to Your Files</title><link href="https://fabianhertwig.com/blog/coding-assistants-file-edits/" rel="alternate" type="text/html" title="Code Surgery: How AI Assistants Make Precise Edits to Your Files" /><published>2025-04-26T08:00:00+02:00</published><updated>2025-04-26T08:00:00+02:00</updated><id>https://fabianhertwig.com/blog/coding-assistants-file-edits</id><content type="html" xml:base="https://fabianhertwig.com/blog/coding-assistants-file-edits/"><![CDATA[<p>Applying code changes generated by AI assistants directly to files is a core capability, yet it often proves surprisingly difficult. An assistant might propose a valid code modification, but fail when attempting to integrate it, reporting errors like “Cannot find matching context” and requiring manual intervention.</p>

<p>Many developers using AI coding assistants encounter this. While the AI understands the code’s intent, translating that understanding into precise, automated file modifications presents significant technical challenges.</p>

<h3 id="why-precise-file-editing-matters">Why Precise File Editing Matters</h3>

<p>Effective file editing is central to the value proposition of coding assistants. If these tools cannot reliably modify code files, their utility diminishes, reducing them to suggestion engines that require manual implementation. An assistant capable of dependable automated editing saves developers considerable time and cognitive load compared to one prone to failures.</p>

<p>The fundamental challenge lies in the indirect nature of the operation: Large Language Models (LLMs) lack direct file system access. They must describe intended changes via specialized tools or APIs, which then interpret these instructions and attempt execution. <strong>This handoff between the LLM’s representation and the file system state is a frequent source of complications.</strong></p>

<p>Users of tools like GitHub Copilot, Aider, or RooCode may have observed these struggles: edits failing to locate the correct insertion point, incorrect indentation, or the tool ultimately requesting manual application.</p>

<h3 id="what-you-will-learn">What You Will Learn</h3>

<p>This post examines the file editing mechanisms of several coding assistant systems: Codex, Aider, OpenHands, RooCode, and Cursor. For the open-source systems (Codex, Aider, OpenHands, RooCode), the insights presented here are derived from analyzing their respective codebases. For Cursor, which is closed-source, the insights come from public discussions and interviews with their team. We will explore their approaches, presented roughly in order of increasing complexity, while noting that their development involved parallel evolution and mutual influence.</p>

<p>For each system, we will analyze:</p>

<ol>
  <li>How it receives edit instructions from the AI.</li>
  <li>How it interprets and processes these instructions.</li>
  <li>How it applies the changes to files.</li>
  <li>How it handles errors and edge cases.</li>
  <li>How it provides feedback on the outcome.</li>
</ol>

<p>Understanding these mechanisms provides insight into the difficulties of automated code editing and the increasingly sophisticated solutions different systems employ.</p>

<h2 id="key-concepts-in-ai-code-editing">Key Concepts in AI Code Editing</h2>

<p>Before proceeding, let’s define some terms frequently used in this domain:</p>

<ul>
  <li><strong>Patch</strong>: A formal specification of changes (additions, deletions) for a file, often including metadata like file paths and context for application.</li>
  <li><strong>Diff</strong>: A format highlighting line-by-line differences between text versions, typically using <code class="language-plaintext highlighter-rouge">+</code> and <code class="language-plaintext highlighter-rouge">-</code> indicators, focusing on content changes.</li>
  <li><strong>Search/Replace Block</strong>: An editing instruction format using delimiters (e.g., <code class="language-plaintext highlighter-rouge">&lt;&lt;&lt;&lt;&lt;&lt;&lt; SEARCH</code>, <code class="language-plaintext highlighter-rouge">&gt;&gt;&gt;&gt;&gt;&gt;&gt; REPLACE</code>) to explicitly define text to find and its replacement.</li>
  <li><strong>Context Lines</strong>: Unmodified lines included in patches or diffs surrounding changes, used to accurately locate the modification point.</li>
  <li><strong>Hunk</strong>: A contiguous block of changes within a patch or diff, comprising context lines and modifications.</li>
  <li><strong>Fuzzy Matching</strong>: Algorithms (e.g., using Levenshtein distance) to find approximate matches for text strings, handling minor variations.</li>
  <li><strong>Indentation Preservation</strong>: Maintaining consistent whitespace prefixes (spaces, tabs) during file edits, critical for syntax and readability.</li>
  <li><strong>Fence</strong>: Delimiters (e.g., triple backticks ```) clearly marking the boundaries of code blocks in text or instructions.</li>
</ul>

<h2 id="the-file-editing-workflow">The File Editing Workflow</h2>

<p>Most AI code editing systems follow a general workflow:</p>

<div class="language-plaintext highlighter-rouge"><div class="highlight"><pre class="highlight"><code>LLM (generates change description) → Tool (interprets &amp; applies) → File System (state change) → Feedback (Tool reports outcome) → LLM (processes feedback)
</code></pre></div></div>

<p>While straightforward conceptually, several challenges arise in practice:</p>

<h3 id="challenge-1-locating-the-edit-target">Challenge 1: Locating the Edit Target</h3>

<p>The LLM often operates on a potentially outdated or incomplete view of the target file. Accurately finding the intended edit location becomes difficult when:</p>

<ul>
  <li>The file has been modified since the LLM last accessed it.</li>
  <li>The file contains multiple similar code sections.</li>
  <li>The file exceeds the LLM’s context window capacity.</li>
</ul>

<p>Context mismatches are common when the file state diverges. Robust systems provide detailed error feedback, enabling the LLM to adapt. Some may provide the current file state upon error.</p>

<h3 id="challenge-2-handling-multi-file-changes">Challenge 2: Handling Multi-File Changes</h3>

<p>Code modifications frequently span multiple files, introducing complexities:</p>

<ul>
  <li>Ensuring consistency across related edits.</li>
  <li>Managing dependencies between files.</li>
  <li>Applying changes in the correct sequence.</li>
</ul>

<p>Most systems address this by processing edits sequentially, file by file.</p>

<h3 id="challenge-3-maintaining-code-style">Challenge 3: Maintaining Code Style</h3>

<p>Developers require adherence to specific formatting conventions. Automated edits must preserve:</p>

<ul>
  <li>Indentation style (tabs vs. spaces, width).</li>
  <li>Line ending conventions.</li>
  <li>Comment formatting.</li>
  <li>Consistent spacing patterns.</li>
</ul>

<h3 id="challenge-4-managing-failures">Challenge 4: Managing Failures</h3>

<p>A robust editing system should handle failures gracefully:</p>

<ul>
  <li><strong>Provide clear explanations</strong> for the failure.</li>
  <li><strong>Offer diagnostic information</strong> to aid correction.</li>
  <li>Potentially <strong>attempt alternative strategies</strong> upon initial failure.</li>
</ul>

<h3 id="common-edit-description-formats">Common Edit Description Formats</h3>

<p>AI systems use various formats to communicate intended changes:</p>

<ol>
  <li><strong>Patches</strong>: Detailed add/delete instructions, often based on standard patch formats.</li>
  <li><strong>Diffs</strong>: Showing differences between original and desired states.</li>
  <li><strong>Search/Replace Blocks</strong>: Explicitly defining find/replace operations.</li>
  <li><strong>Line Operations</strong>: Specifying edits by line number (less common due to fragility).</li>
  <li><strong>AI-Assisted Application</strong>: Employing a secondary AI model specifically for applying complex changes.</li>
</ol>

<p>Let’s examine how specific systems implement these concepts.</p>

<h2 id="codex-a-straightforward-patch-based-system">Codex: A Straightforward Patch-Based System</h2>

<p>OpenAI’s Codex CLI utilizes a relatively simple, structured patch format. Its effectiveness stems partly from OpenAI’s ability to train its models specifically to generate this format reliably.</p>

<h3 id="the-codex-patch-format">The Codex Patch Format</h3>

<p>The LLM communicates changes using this structure:</p>

<div class="language-plaintext highlighter-rouge"><div class="highlight"><pre class="highlight"><code>*** Begin Patch
*** [Operation] File: [filepath]
@@ [text matching a line near the change]
  [context line (unchanged, starts with space)]
- [line to remove (starts with -)]
+ [line to add (starts with +)]
  [another context line]
*** End Patch
</code></pre></div></div>

<p>Key features:</p>

<ul>
  <li><code class="language-plaintext highlighter-rouge">Operation</code>: <code class="language-plaintext highlighter-rouge">Add File</code>, <code class="language-plaintext highlighter-rouge">Update File</code>, or <code class="language-plaintext highlighter-rouge">Delete File</code>.</li>
  <li><code class="language-plaintext highlighter-rouge">@@</code>: Followed by text content from a line near the edit (e.g., function/class definition) used for locating the change. <strong>Crucially, this avoids direct reliance on line numbers.</strong></li>
  <li>Context lines (start with space ` `): Must match existing file content and remain unchanged; used for precise anchoring.</li>
  <li><code class="language-plaintext highlighter-rouge">-</code> prefixed lines: Marked for deletion.</li>
  <li><code class="language-plaintext highlighter-rouge">+</code> prefixed lines: Marked for addition.</li>
</ul>

<p>Consider this example modifying a print statement:</p>

<div class="language-plaintext highlighter-rouge"><div class="highlight"><pre class="highlight"><code>*** Begin Patch
*** Update File: main.py
@@ def main():
   # This is the main function
-  print("hello")
+  print("hello world!")
   return None
*** End Patch
</code></pre></div></div>

<p>Here, <code class="language-plaintext highlighter-rouge">@@ def main():</code> helps locate the function, while the space-prefixed context lines (<code class="language-plaintext highlighter-rouge"># This is...</code>, <code class="language-plaintext highlighter-rouge">return None</code>) pinpoint the exact edit location.</p>

<p>The system attempts to match the <code class="language-plaintext highlighter-rouge">@@</code> line and context lines exactly. If this fails, it employs fallback strategies: first matching with trimmed line endings, then matching with all whitespace trimmed. This flexibility accommodates minor discrepancies between the LLM’s view and the actual file. A single patch can contain multiple <code class="language-plaintext highlighter-rouge">@@</code> sections to target different parts of a file.</p>

<h3 id="patch-parsing-and-application">Patch Parsing and Application</h3>

<p>Upon receiving a patch via the <code class="language-plaintext highlighter-rouge">apply_patch</code> tool, the system performs these steps:</p>

<ol>
  <li>Validates the basic patch structure (<code class="language-plaintext highlighter-rouge">*** Begin Patch</code> / <code class="language-plaintext highlighter-rouge">*** End Patch</code>).</li>
  <li>Identifies the target file(s).</li>
  <li>Loads the current content of the target file(s).</li>
  <li>Parses the patch into discrete operations (create, update sections, delete).</li>
  <li>Attempts to apply the changes to the loaded file content.</li>
</ol>

<h3 id="fuzzy-matching-for-robustness">Fuzzy Matching for Robustness</h3>

<p>The progressive matching strategy for context lines enhances robustness:</p>

<ol>
  <li>Attempt exact match.</li>
  <li>If failed, attempt match ignoring line endings.</li>
  <li>If failed, attempt match ignoring all whitespace.</li>
</ol>

<p>This helps overcome small variations between the expected and actual file content.</p>

<h3 id="error-handling-and-feedback-mechanisms">Error Handling and Feedback Mechanisms</h3>

<p>Codex provides structured JSON feedback upon failure, aiding the LLM’s correction attempts:</p>

<p><strong>Context Line Mismatch:</strong></p>

<div class="language-json highlighter-rouge"><div class="highlight"><pre class="highlight"><code><span class="p">{</span><span class="w">
  </span><span class="nl">"exit_code"</span><span class="p">:</span><span class="w"> </span><span class="mi">1</span><span class="p">,</span><span class="w">
  </span><span class="nl">"stderr"</span><span class="p">:</span><span class="w"> </span><span class="s2">"Error: context line 3, </span><span class="se">\"</span><span class="s2">  const response = await fetch(`/api/users/${userId}`);</span><span class="se">\"</span><span class="s2"> does not match </span><span class="se">\"</span><span class="s2">  const response = await fetch(`/api/users/${userId}`, { headers });</span><span class="se">\"</span><span class="s2">"</span><span class="w">
</span><span class="p">}</span><span class="w">
</span></code></pre></div></div>
<p>(Clearly indicates the mismatch and the differing lines.)</p>

<p><strong>File Not Found:</strong></p>

<div class="language-json highlighter-rouge"><div class="highlight"><pre class="highlight"><code><span class="p">{</span><span class="w">
  </span><span class="nl">"exit_code"</span><span class="p">:</span><span class="w"> </span><span class="mi">1</span><span class="p">,</span><span class="w">
  </span><span class="nl">"stderr"</span><span class="p">:</span><span class="w"> </span><span class="s2">"Error: File not found: src/api.js"</span><span class="w">
</span><span class="p">}</span><span class="w">
</span></code></pre></div></div>
<p>(Unambiguous file access error.)</p>

<p><strong>Invalid Patch Format:</strong></p>

<div class="language-json highlighter-rouge"><div class="highlight"><pre class="highlight"><code><span class="p">{</span><span class="w">
  </span><span class="nl">"exit_code"</span><span class="p">:</span><span class="w"> </span><span class="mi">1</span><span class="p">,</span><span class="w">
  </span><span class="nl">"stderr"</span><span class="p">:</span><span class="w"> </span><span class="s2">"Error: Patch must start with *** Begin Patch"</span><span class="w">
</span><span class="p">}</span><span class="w">
</span></code></pre></div></div>
<p>(Specific format violation feedback.)</p>

<p>This detailed, structured feedback allows the LLM to diagnose the failure and potentially retry with a corrected approach (e.g., re-fetching the file or adjusting the patch context).</p>

<h3 id="example-real-world-edit-scenario">Example: Real-World Edit Scenario</h3>

<p>Let’s examine how Codex handles a real-world edit scenario. Imagine we need to add error handling to a function that fetches user data:</p>

<p><strong>Original code in src/api.js</strong>:</p>

<div class="language-javascript highlighter-rouge"><div class="highlight"><pre class="highlight"><code><span class="k">async</span> <span class="kd">function</span> <span class="nx">fetchUserData</span><span class="p">(</span><span class="nx">userId</span><span class="p">)</span> <span class="p">{</span>
  <span class="kd">const</span> <span class="nx">response</span> <span class="o">=</span> <span class="k">await</span> <span class="nx">fetch</span><span class="p">(</span><span class="s2">`/api/users/</span><span class="p">${</span><span class="nx">userId</span><span class="p">}</span><span class="s2">`</span><span class="p">);</span>
  <span class="kd">const</span> <span class="nx">data</span> <span class="o">=</span> <span class="k">await</span> <span class="nx">response</span><span class="p">.</span><span class="nx">json</span><span class="p">();</span>
  <span class="k">return</span> <span class="nx">data</span><span class="p">;</span>
<span class="p">}</span>
</code></pre></div></div>

<p><strong>LLM generates a patch</strong>:</p>

<div class="language-plaintext highlighter-rouge"><div class="highlight"><pre class="highlight"><code>*** Begin Patch
*** Update File: src/api.js
@@ async function fetchUserData(userId) {
-  const response = await fetch(`/api/users/${userId}`);
-  const data = await response.json();
-  return data;
+  try {
+    const response = await fetch(`/api/users/${userId}`);
+    if (!response.ok) {
+      throw new Error(`Failed to fetch user data: ${response.status}`);
+    }
+    const data = await response.json();
+    return data;
+  } catch (error) {
+    console.error(`Error fetching user ${userId}:`, error);
+    throw error;
+  }
 }

@@ function formatUserData(data) {
-  return data;
+  return {
+    id: data.id,
+    name: data.name,
+    email: data.email,
+    formattedDate: new Date(data.createdAt).toLocaleDateString()
+  };
 }
*** End Patch
</code></pre></div></div>

<p>This example shows a patch that modifies two different functions in the same file, each with its own <code class="language-plaintext highlighter-rouge">@@</code> context marker.</p>

<h3 id="openais-patch-format-standardization">OpenAI’s Patch Format Standardization</h3>

<p>With the release of GPT-4.1 (April 2025), OpenAI published a “prompt cookbook” detailing this recommended patch format and a reference implementation (<code class="language-plaintext highlighter-rouge">apply_patch.py</code>). They indicated significant training effort for GPT-4.1 on this format, contributing to its effective use within the Codex CLI ecosystem.</p>

<p>OpenAI’s commentary highlighted that successful formats often <strong>avoid line numbers</strong> and <strong>clearly provide both the code to be replaced and its replacement, using distinct delimiters</strong>. This suggests core principles for reliable AI-driven editing. OpenAI’s ability to co-develop the LLM and the editing tool allows for tight integration and optimization.</p>

<h2 id="aider-a-multi-format-editing-system">Aider: A Multi-Format Editing System</h2>

<p>Aider employs a more flexible approach, supporting multiple edit formats. It can select the format best suited to the task or the specific LLM being used.</p>

<h3 id="pluggable-edit-format-architecture">Pluggable Edit Format Architecture</h3>

<p>Aider uses a system of “coder” classes, each responsible for handling a specific edit format:</p>

<div class="language-python highlighter-rouge"><div class="highlight"><pre class="highlight"><code><span class="k">class</span> <span class="nc">Coder</span><span class="p">:</span>
    <span class="c1"># ... attributes like edit_format identifier ...
</span>
    <span class="k">def</span> <span class="nf">get_edits</span><span class="p">(</span><span class="bp">self</span><span class="p">):</span> <span class="c1"># Parses AI response into edit operations
</span>        <span class="k">raise</span> <span class="nb">NotImplementedError</span>

    <span class="k">def</span> <span class="nf">apply_edits</span><span class="p">(</span><span class="bp">self</span><span class="p">,</span> <span class="n">edits</span><span class="p">):</span> <span class="c1"># Applies parsed edits to files
</span>        <span class="k">raise</span> <span class="nb">NotImplementedError</span>
</code></pre></div></div>

<p>This modular design allows for easy extension and selection of different editing strategies.</p>

<h3 id="supported-edit-formats-in-aider">Supported Edit Formats in Aider</h3>

<p>Aider supports several formats, choosing based on the model or user configuration (<code class="language-plaintext highlighter-rouge">--edit-format</code>):</p>

<ol>
  <li>
    <p><strong>EditBlock Format (Search/Replace)</strong>: Intuitive format clearly showing search/replace blocks.</p>

    <div class="language-plaintext highlighter-rouge"><div class="highlight"><pre class="highlight"><code>file.py
&lt;&lt;&lt;&lt;&lt;&lt;&lt; SEARCH
# Code block to find
=======
# Code block to replace with
&gt;&gt;&gt;&gt;&gt;&gt;&gt; REPLACE
</code></pre></div>    </div>
  </li>
  <li>
    <p><strong>Unified Diff Format (udiff)</strong>: Standard diff format (<code class="language-plaintext highlighter-rouge">diff -U0</code> style), suitable for complex changes.</p>

    <div class="language-diff highlighter-rouge"><div class="highlight"><pre class="highlight"><code><span class="gd">--- file.py
</span><span class="gi">+++ file.py
</span><span class="p">@@ -10,7 +10,7 @@</span>
 def some_function():
<span class="gd">-    return "old value"
</span><span class="gi">+    return "new value"
</span></code></pre></div>    </div>
  </li>
  <li>
    <p><strong>OpenAI Patch Format</strong>: Aider implemented OpenAI’s reference format, leveraging GPT-4.1’s training on this syntax.</p>

    <div class="language-plaintext highlighter-rouge"><div class="highlight"><pre class="highlight"><code>*** Begin Patch
*** Update File: file.py
@@ class MyClass:
    def some_function():
-        return "old"
+        return "new"
*** End Patch
</code></pre></div>    </div>
  </li>
  <li>
    <p><strong>Additional Formats</strong>:</p>
    <ul>
      <li><code class="language-plaintext highlighter-rouge">whole</code>: LLM returns the complete modified file content. Simple but potentially inefficient for large files.</li>
      <li><code class="language-plaintext highlighter-rouge">diff-fenced</code>: Diff format variant where the filename is inside the code fence (```), used with models like Gemini.</li>
      <li><code class="language-plaintext highlighter-rouge">editor-diff</code> / <code class="language-plaintext highlighter-rouge">editor-whole</code>: Streamlined versions for specific internal modes.</li>
    </ul>
  </li>
</ol>

<h3 id="flexible-search-strategies">Flexible Search Strategies</h3>

<p>When applying Search/Replace blocks, Aider attempts multiple matching strategies sequentially:</p>

<ol>
  <li>Exact match.</li>
  <li>Whitespace-insensitive match.</li>
  <li>Indentation-preserving match.</li>
  <li>Fuzzy match using <code class="language-plaintext highlighter-rouge">difflib</code>.</li>
</ol>

<p>This layered approach increases the likelihood of successfully applying edits even with minor imperfections in the <code class="language-plaintext highlighter-rouge">SEARCH</code> block.</p>

<h3 id="detailed-error-reporting">Detailed Error Reporting</h3>

<p>Aider excels at providing highly informative feedback when edits fail:</p>

<div class="language-plaintext highlighter-rouge"><div class="highlight"><pre class="highlight"><code># 1 SEARCH/REPLACE block failed to match!

## SearchReplaceNoExactMatch: This SEARCH block failed to exactly match lines in src/api.js
&lt;&lt;&lt;&lt;&lt;&lt;&lt; SEARCH
async function fetchUserData(userId) {
  const response = await fetch(`/api/users/${userId}`);
  const data = await response.json();
  return data;
}
=======
...
&gt;&gt;&gt;&gt;&gt;&gt;&gt; REPLACE

Did you mean to match some of these actual lines from src/api.js?


async function fetchUserData(userId) {
    const response = await fetch(`/api/users/${userId}`);
    // Some comment here
    const data = await response.json();
    return data;
}

The SEARCH section must exactly match an existing block of lines including all white space, comments, indentation, docstrings, etc

# The other X SEARCH/REPLACE blocks were applied successfully.
Don't re-send them.
Just reply with fixed versions of the blocks above that failed to match.
</code></pre></div></div>

<p>This feedback is significantly more detailed than simple failure messages. It explains the mismatch, suggests potential correct targets, reiterates the matching rules, and instructs the AI on how to proceed (only resend failed blocks). This detailed guidance greatly improves the AI’s ability to correct its edits.</p>

<p>While adopting OpenAI’s format, Aider enhances it with greater flexibility and substantially more informative error handling.</p>

<h2 id="openhands-blending-traditional-and-ai-assisted-editing">OpenHands: Blending Traditional and AI-Assisted Editing</h2>

<p>OpenHands primarily relies on traditional edit application methods while also incorporating an optional LLM-based editing capability.</p>

<h3 id="traditional-edit-application">Traditional Edit Application</h3>

<p>OpenHands primarily uses traditional editing approaches. It has built-in support for detecting different patch formats – including unified diffs, git diffs, context diffs, ed scripts, and RCS ed scripts – using regular expression patterns. Based on the detected format, it applies the appropriate parsing and application logic. The system supports several traditional editing methods:</p>

<ol>
  <li>String replacement.</li>
  <li>Line-based operations (by number).</li>
  <li>Standard patch application utilities.</li>
</ol>

<p>It includes features like whitespace normalization to handle variations in patch indentation.</p>

<h3 id="optional-llm-based-editing-feature">Optional LLM-Based Editing Feature</h3>

<p>OpenHands allows configuring a separate “draft editor” LLM for a distinct editing workflow:</p>

<ol>
  <li><strong>Target Identification</strong>: The primary LLM specifies the target line range for the edit.</li>
  <li><strong>Content Extraction</strong>: The tool extracts this specific code section.</li>
  <li><strong>LLM Rewrite</strong>: The extracted section and a description of the desired change are sent to the specialized “draft editor” LLM. This editor LLM can have different configurations (model, temperature) optimized for editing.</li>
  <li><strong>File Reconstruction</strong>: The tool receives the modified section from the editor LLM and integrates it back into the file, replacing the original lines.</li>
</ol>

<p>To ensure the draft editor LLM produces the correct output for integration, it is given a specific system prompt instructing it to:</p>

<ul>
  <li>Produce a complete and accurate version of the modified code section.</li>
  <li>Replace any placeholder comments (like <code class="language-plaintext highlighter-rouge"># no changes needed before this line</code>) with the actual, unchanged code from the original section if parts were meant to be preserved.</li>
  <li>Ensure correct and consistent indentation is maintained throughout the block.</li>
  <li>Output the final, complete edited content precisely wrapped in a designated code block format for easy parsing by the tool.</li>
</ul>

<p>Potential benefits of a separate editor LLM:</p>

<ul>
  <li><strong>Task-Specific Tuning</strong>: Optimize parameters specifically for code modification.</li>
  <li><strong>Model Flexibility</strong>: Use different models for reasoning vs. editing.</li>
  <li><strong>Focused Prompting</strong>: Provide the editor LLM with a narrow, edit-specific prompt.</li>
</ul>

<p>The reconstruction process carefully combines the content before the edit, the LLM-edited block, and the content after the edit. Optional validation steps like linting can be performed.</p>

<p>This LLM-based editing appears to be an optional, potentially experimental feature within OpenHands, often disabled by default.</p>

<h2 id="roocode-advanced-search-and-format-preservation">RooCode: Advanced Search and Format Preservation</h2>

<p>RooCode utilizes the search/replace block format. Its strengths lie in its advanced search algorithm for locating the target block and its meticulous handling of code formatting during replacement.</p>

<h3 id="advanced-search-strategy-middle-out-fuzzy-matching">Advanced Search Strategy: Middle-Out Fuzzy Matching</h3>

<p>When an exact match for the search block fails, RooCode employs a ‘middle-out’ fuzzy matching approach via its <code class="language-plaintext highlighter-rouge">MultiSearchReplaceDiffStrategy</code>:</p>

<ol>
  <li><strong>Estimate Region</strong>: Start searching near the expected location (potentially hinted by line numbers).</li>
  <li><strong>Expand Search</strong>: Search outwards from this central point.</li>
  <li><strong>Score Similarity</strong>: Use algorithms like Levenshtein distance to score the similarity between the search block and potential matches in the file.</li>
  <li><strong>Select Best Match</strong>: Choose the highest-scoring match that exceeds a defined threshold.</li>
</ol>

<p>This strategy is effective for large files or when line numbers are slightly inaccurate, providing robustness against minor context shifts.</p>

<h3 id="emphasis-on-indentation-preservation"><strong>Emphasis on Indentation Preservation</strong></h3>

<p>Incorrect indentation is a common frustration with automated edits. RooCode implements a sophisticated system to preserve formatting:</p>

<ol>
  <li><strong>Capture Original Indentation</strong>: Record the exact leading whitespace (spaces/tabs) of the matched lines in the original file.</li>
  <li><strong>Analyze Relative Indentation</strong>: Calculate the indentation of each line within the replacement block <em>relative</em> to its first line or surrounding block.</li>
  <li><strong>Apply Original Style with Relative Structure</strong>: Re-apply the captured original indentation style while maintaining the calculated relative indentation structure of the replacement code.</li>
</ol>

<p><strong>This detailed attention to indentation is crucial</strong> for code readability and syntactic correctness (especially in languages like Python).</p>

<h3 id="roocode-edit-process-example">RooCode Edit Process Example</h3>

<div class="language-plaintext highlighter-rouge"><div class="highlight"><pre class="highlight"><code>&lt;&lt;&lt;&lt;&lt;&lt;&lt; SEARCH
:start_line:10
-------
function calculateTotal(items) {
  return items.reduce((sum, item) =&gt; sum + item, 0);
}
=======
function calculateTotal(items) {
  // Add 10% tax
  return items.reduce((sum, item) =&gt; sum + (item * 1.1), 0);
}
&gt;&gt;&gt;&gt;&gt;&gt;&gt; REPLACE
</code></pre></div></div>

<ol>
  <li>
    <p><strong>RooCode parses the diff</strong>:</p>

    <ul>
      <li>Extracts the start line (10)</li>
      <li>Extracts the search block (<code class="language-plaintext highlighter-rouge">function calculateTotal...</code>)</li>
      <li>Extracts the replace block (<code class="language-plaintext highlighter-rouge">function calculateTotal...</code>)</li>
    </ul>
  </li>
  <li>
    <p><strong>RooCode applies the diff</strong>:</p>

    <ul>
      <li>Reads the current content of the file</li>
      <li>Uses fuzzy matching to find the best match for the search block</li>
      <li>Applies the replacement with proper indentation preservation</li>
      <li>Shows a diff view for user approval</li>
      <li>Applies the changes if approved</li>
    </ul>
  </li>
  <li>
    <p><strong>Feedback to LLM</strong>:</p>
    <ul>
      <li>If successful: “Changes successfully applied to file”</li>
      <li>If failed: Detailed error message with the reason for failure</li>
    </ul>
  </li>
</ol>

<p>RooCode combines robust fuzzy matching with a strong focus on maintaining code formatting integrity.</p>

<h2 id="cursor-specialized-ai-for-change-application">Cursor: Specialized AI for Change Application</h2>

<p>While other systems refine edit formats or matching algorithms, Cursor introduces <strong>a dedicated AI model specifically for the <em>application</em> step of the edit process.</strong></p>

<p>This directly addresses the observation that even powerful LLMs, skilled at code generation and reasoning, may struggle to produce perfectly formatted, precisely located diffs that apply cleanly via simple algorithms, particularly in complex files.</p>

<p>Cursor’s approach involves a two-step AI process:</p>

<ol>
  <li><strong>Sketching</strong>: A primary, powerful LLM generates the intended change, focusing on the core logic rather than perfect diff syntax. This might be a code block or a rough description.</li>
  <li><strong>Applying</strong>: A separate, custom-trained “Apply” model receives this sketch. This specialized model is trained to intelligently integrate the sketch into the existing codebase, handling nuances of context, structure, and potential imperfections in the input sketch. It performs more than simple text matching; it aims for intelligent code integration.</li>
</ol>

<p>This strategy separates high-level change generation from the detailed mechanics of application. The primary LLM focuses on <em>what</em> to change, while the specialized Apply model focuses on <em>how</em> to integrate that change robustly and accurately into the file system.</p>

<p>You can hear the Cursor team discuss this approach:</p>

<!-- Courtesy of embedresponsively.com -->

<div class="responsive-video-container">
    <iframe src="https://www.youtube-nocookie.com/embed/oFfVt3S51T4?start=1891" frameborder="0" webkitallowfullscreen="" mozallowfullscreen="" allowfullscreen=""></iframe>
  </div>

<h2 id="evolution-and-convergence-of-edit-formats">Evolution and Convergence of Edit Formats</h2>

<p>Examining these systems reveals interesting patterns in format development:</p>

<ol>
  <li><strong>Search/Replace Lineage</strong>: Aider’s EditBlock format (<code class="language-plaintext highlighter-rouge">&lt;&lt;&lt;&lt;&lt;&lt;&lt;</code>/<code class="language-plaintext highlighter-rouge">&gt;&gt;&gt;&gt;&gt;&gt;&gt;</code>) established an intuitive approach later adopted by Cline, which RooCode then built upon.</li>
  <li><strong>OpenAI’s Patch Influence</strong>: The specific patch format released with GPT-4.1 gained traction due to focused model training. Used natively by Codex, it was also adopted as an option by Aider.</li>
  <li><strong>Underlying Principles</strong>: Despite different origins, successful formats converge on key ideas noted by OpenAI: <strong>avoiding line numbers</strong> and <strong>clearly delimiting the original and replacement code</strong>. These features appear fundamental for reliable AI-driven editing.</li>
</ol>

<h2 id="conclusion-and-key-learnings">Conclusion and Key Learnings</h2>

<p>Investigating how AI coding assistants edit files reveals complex processes involving sophisticated techniques and evolving strategies.</p>

<p><strong>Key Learnings:</strong></p>

<ol>
  <li><strong>Format Matters</strong>: Formats avoiding line numbers and clearly separating before/after code (like OpenAI’s patch or search/replace blocks) are prevalent and effective, especially when models are trained on them.</li>
  <li><strong>Robust Matching is Essential</strong>: Successful systems employ layered matching strategies (exact, then increasingly fuzzy) to balance precision with the ability to handle minor discrepancies.</li>
  <li><strong>Indentation Integrity is Crucial</strong>: Careful preservation of whitespace and indentation (as emphasized by RooCode) is vital for code correctness and developer acceptance.</li>
  <li><strong>Informative Feedback Enables Correction</strong>: Detailed error messages (like Aider’s) are critical for enabling the AI (or user) to diagnose and fix failed edits effectively.</li>
  <li><strong>Specialization Shows Promise</strong>: Using dedicated AI models for specific sub-tasks like change application (Cursor) represents an advanced approach to improving reliability.</li>
</ol>

<h3 id="considerations-for-tool-builders">Considerations for Tool Builders</h3>

<p>Developing robust AI editing tools involves several considerations:</p>

<ol>
  <li><strong>Implement Layered Matching</strong>: Start with strict matching and add fallback fuzzy strategies.</li>
  <li><strong>Prioritize Indentation Preservation</strong>: Invest effort in accurately maintaining formatting.</li>
  <li><strong>Design Actionable Error Feedback</strong>: Provide specific, informative error messages.</li>
  <li><strong>Leverage Existing Formats and Implementations</strong>: Consider established formats and study open-source systems (Aider, OpenHands, RooCode/Cline).</li>
</ol>]]></content><author><name>Fabian Hertwig</name></author><category term="blog" /><category term="AI" /><category term="Programming" /><category term="Developer Tools" /><category term="Code Editing" /><summary type="html"><![CDATA[How Codex, Aider, RooCode, and Cursor apply AI-generated changes to files—comparing patch formats, fuzzy matching, and Cursor's specialized apply model.]]></summary></entry><entry><title type="html">GPT Rabbit Hole: The Wild Horses That Weren’t: The Surprising Tale of America’s Free-Roaming Horses</title><link href="https://fabianhertwig.com/blog/there-are-no-wild-horses/" rel="alternate" type="text/html" title="GPT Rabbit Hole: The Wild Horses That Weren’t: The Surprising Tale of America’s Free-Roaming Horses" /><published>2024-11-02T11:00:00+01:00</published><updated>2024-11-02T11:00:00+01:00</updated><id>https://fabianhertwig.com/blog/there-are-no-wild-horses</id><content type="html" xml:base="https://fabianhertwig.com/blog/there-are-no-wild-horses/"><![CDATA[<p>Sometimes, I find myself diving deep into rabbit holes when I’m curious about something. Recently, someone mentioned that wild horses in America aren’t actually wild, and that caught my attention. I started asking ChatGPT about it—how do we know, what’s the history, and more. The conversation turned out to be so interesting that I decided to turn it into a blog post. Everything you’re about to read was written by ChatGPT (the o1-preview version), but I’ve refined it a lot through a long conversation, keeping things, editing, and rewriting. Enjoy!</p>

<hr />

<p><strong>The Wild Horses That Weren’t: The Surprising Tale of America’s Free-Roaming Horses</strong></p>

<p><em>Picture this:</em> You’re gazing out over a sprawling plain as the sun sets in a blaze of oranges and purples. In the distance, a herd of horses gallops freely, manes flying like they’re in some kind of shampoo commercial. It’s wild, it’s raw, it’s… the epitome of freedom.</p>

<p>But here’s the twist: Those “wild” horses? Not exactly wild.</p>

<p>We’re about to dive into a time-traveling adventure that flips the script on everything you thought you knew about these majestic creatures roaming free across America.</p>

<p>Let’s rewind—way back to about 55 million years ago. North America was the original homeland of horses. Imagine a creature the size of a small dog, with multiple toes, munching on leaves in a lush forest. Meet <strong>Eohippus</strong>, the ancient ancestor of the modern horse.</p>

<p><img src="/assets/images/wild_horses/Eohippus.webp" alt="illustration of an Eohippus" /></p>

<p>
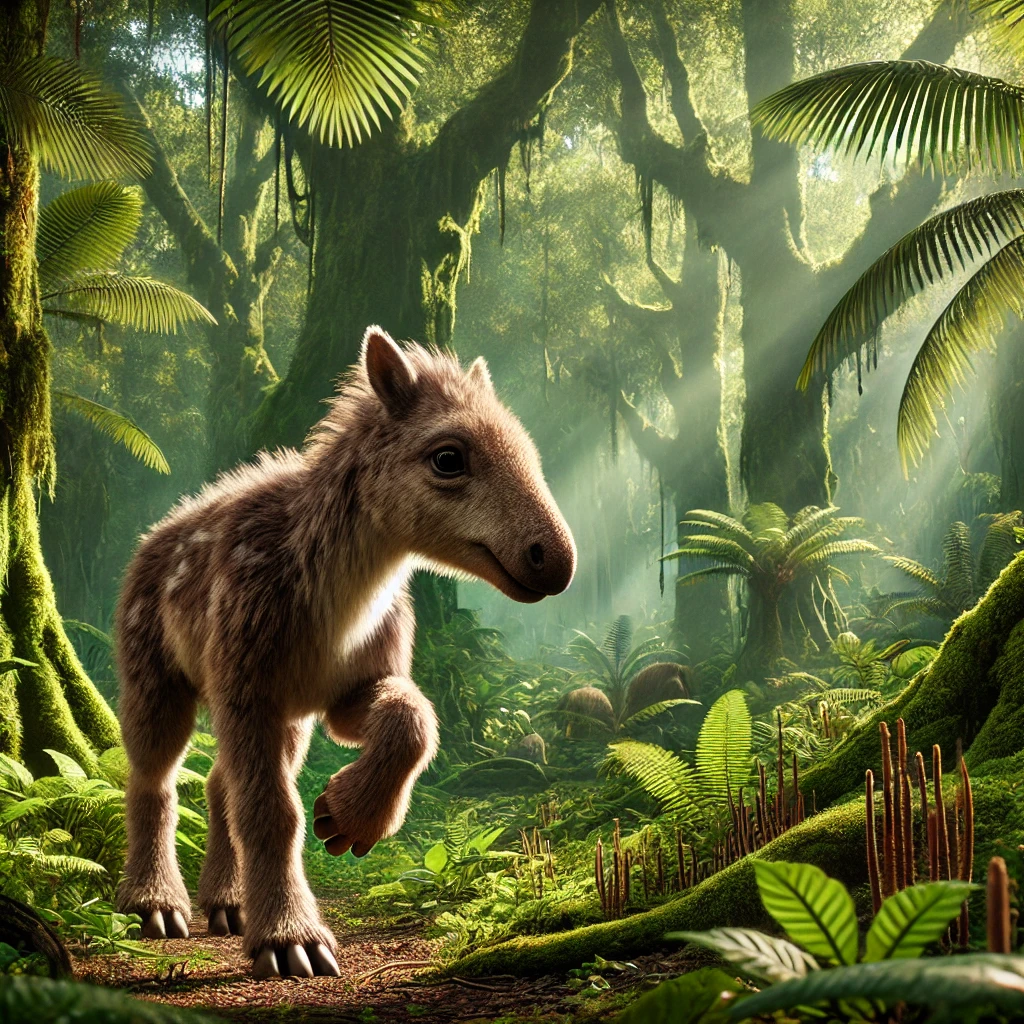
Over millions of years, these early forest-dwelling horses evolved into larger, single-toed grazers adapted to open grasslands. They transitioned from nibbling on soft leaves to munching on tough grasses. North America became a vast playground of grasslands where these horses thrived.</p>

<p>Then, around the end of the last Ice Age, approximately 10,000 years ago, horses disappeared from North America. One moment they were everywhere, and then, over a relatively short period, they were gone.</p>

<p><strong>What happened?</strong></p>

<p>The end of the Pleistocene epoch brought dramatic changes to the environment. Climate shifts transformed vast grasslands into forests and tundra. Food sources dwindled, and the habitats horses relied on changed faster than they could adapt.</p>

<p>And then humans showed up—hungry, resourceful humans who looked at horses and saw a walking buffet. The exact reasons are still debated among scientists, but most agree that a mix of climate change and human activities played a role in the horses’ extinction on the continent.</p>

<p>For thousands of years after that, North America was a land without horses. Indigenous peoples built rich, complex societies without ever knowing the thunder of hooves across the plains. No galloping across the plains, no epic horse-mounted hunts—just humans and their own two feet (and sometimes canoes).</p>

<p>Fast forward to 1492. Columbus accidentally bumps into the Americas while looking for a shortcut to India. Over the next couple of centuries, European explorers and settlers arrive, bringing all sorts of things—some good, some bad, and some that would change the continent forever.</p>

<p>One of those things was the horse.</p>

<p>The Spanish, in particular, were big on horses. They used them for exploration, conquest, and just looking generally intimidating. These were domesticated horses, trained and bred for human use.</p>

<p><img src="/assets/images/wild_horses/spanish.webp" alt="illustration of spanish riding horses" /></p>

<p>
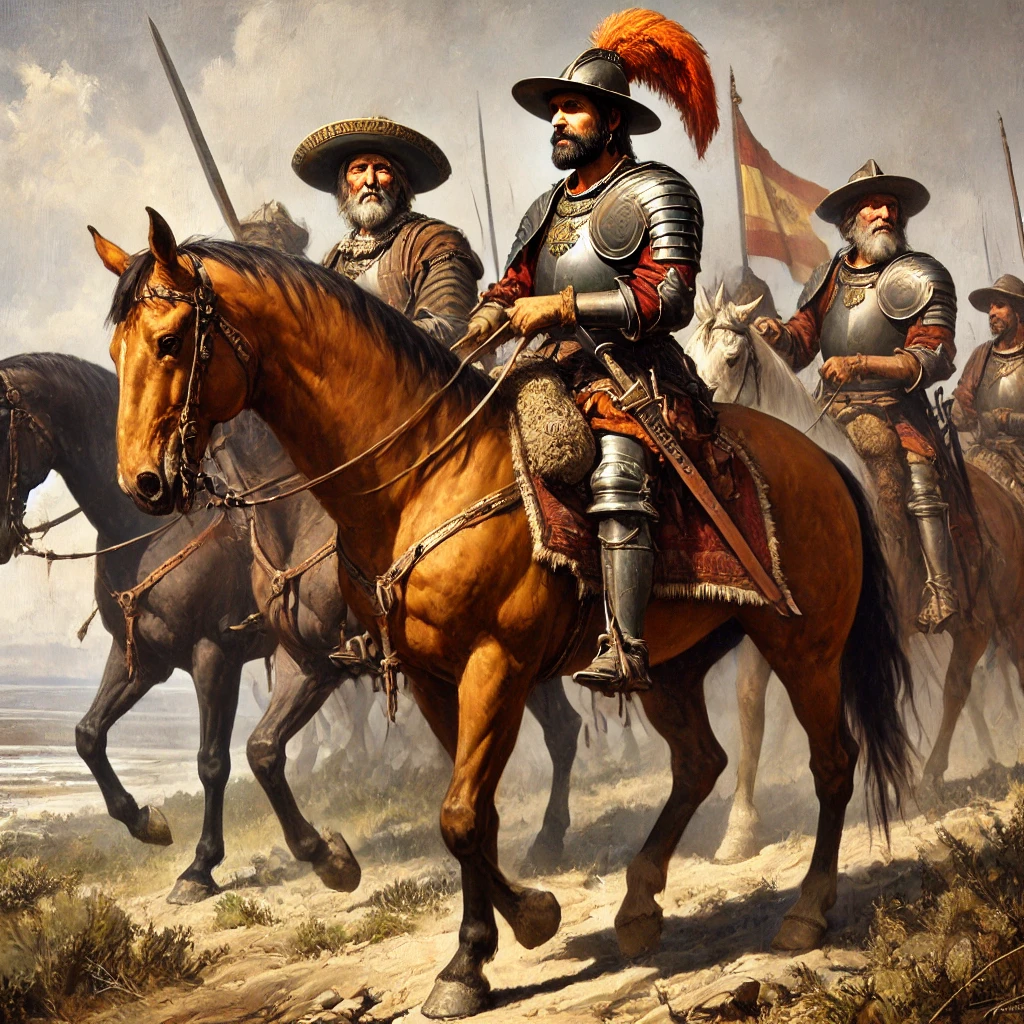
But horses being the free-spirited creatures they are, some managed to escape. Maybe they got spooked during a thunderstorm, or maybe they just decided they’d had enough of carrying conquistadors around. Whatever the case, these escapees started living it up in the wild, doing horse things—eating grass, making babies, and rediscovering their ancestral homeland.</p>

<p>These free-roaming horses came to be known as “mustangs,” a term derived from the Spanish word <em>mestengo</em>, meaning “stray animal.”</p>

<p>Now, here’s where things get really interesting.</p>

<p>Indigenous peoples, who had been horseless for millennia, suddenly had these new, strange creatures roaming their lands. Over time, they figured out how to catch them, tame them, and incorporate them into their daily lives. And they didn’t just stop at basic domestication—they became some of the finest horsemen the world has ever seen.</p>

<p>
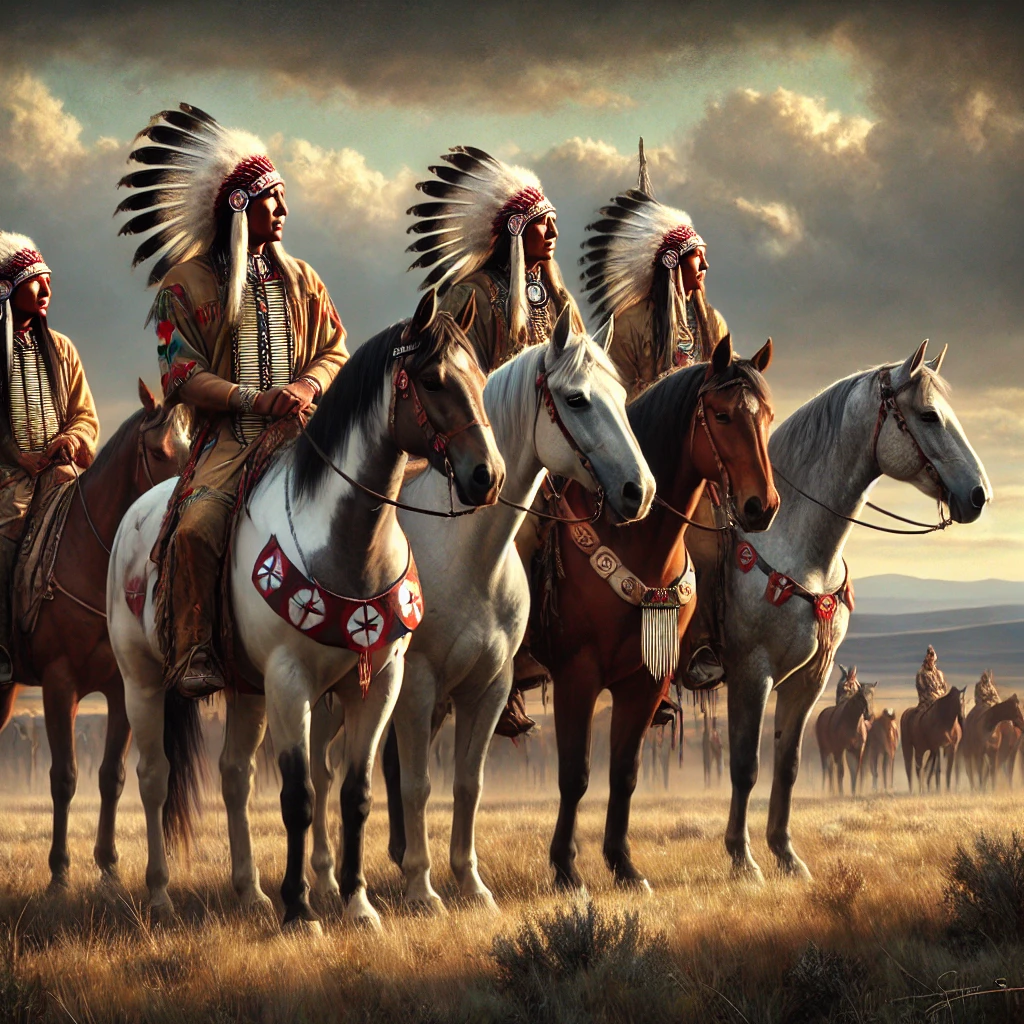
By the 17th and 18th centuries, tribes like the Comanche, Sioux, and Cheyenne had become master horsemen. The Comanche, in particular, went from being pedestrian hunters to some of the most skilled horse riders and warriors the world had ever seen—essentially inventing new forms of mounted warfare on the Plains.</p>

<p>They embraced the horse with ingenuity and adaptability. Horses revolutionized hunting (buffalo hunting went from being really hard to ridiculously efficient), travel (why walk when you can ride?), and warfare (now with more horsepower and mobility).</p>

<p>So yes, indigenous peoples like the Comanche didn’t always have horses. But once horses were reintroduced by Europeans, they adopted them quickly and integrated them deeply into their cultures, showcasing remarkable adaptability.</p>

<p>Alright, let’s tackle the elephant—or rather, the horse—in the room.</p>

<p>We often call these free-roaming horses “wild,” but technically, they’re “feral.” What’s the difference?</p>

<ul>
  <li>
    <p><strong>Wild Horses:</strong> Horses that have never been domesticated. The Przewalski’s horse from Mongolia was long considered the only true wild horse species left.</p>
  </li>
  <li>
    <p><strong>Feral Horses:</strong> Horses that are descended from domesticated ancestors but now live in the wild.</p>
  </li>
</ul>

<p>Interestingly, recent genetic studies suggest that Przewalski’s horses may themselves descend from early domesticated horses, blurring the lines even further. The scientific community continues to explore this, but for now, it’s clear that the mustangs of the American West are feral horses.</p>

<p>But let’s be honest, “feral horse” doesn’t have the same romantic ring to it. It sounds like a horse that’s going to rummage through your trash. “Feral West” sounds more like a post-apocalyptic movie than the stuff of legends.</p>

<p>Scientists love a good mystery. By digging up fossils, they use radiocarbon dating to figure out when these ancient horses lived and DNA analysis to understand how they’re related to modern horses. They’ve confirmed that there’s a significant gap between the ancient horses that went extinct around 10,000 years ago and the modern horses reintroduced by Europeans.</p>

<p><strong>Radiocarbon Dating Explained (Without Melting Your Brain):</strong></p>

<p>All living things contain carbon, and a tiny fraction of that carbon is a radioactive type called carbon-14. While an organism is alive, it keeps a steady amount of carbon-14 because it’s constantly eating, breathing, or otherwise exchanging carbon with its environment.</p>

<p>When the organism dies, it stops taking in new carbon. The carbon-14 it has starts to decay at a known rate—a half-life of about 5,730 years. This means that every 5,730 years, half of the carbon-14 decays into nitrogen.</p>

<p>Scientists can measure how much carbon-14 is left in a fossil and, knowing the rate of decay, calculate how long it’s been since the organism died. This method is effective for dating materials up to about 50,000 years old, which covers the timeframe we’re talking about.</p>

<p>Using this method, scientists determined that native North American horses disappeared around the end of the last Ice Age. The absence of horse fossils after that time and the lack of horse imagery in indigenous cultures before European contact support this timeline.</p>

<p>The reintroduction of horses didn’t just change things for the horses—it reshaped entire cultures.</p>

<p>For indigenous peoples, the horse was a game-changer. It altered hunting practices, made long-distance travel more feasible, and became central to warfare and status. Societies evolved rapidly, and the horse became woven into myths, stories, and identities.</p>

<p>Their ingenuity and adaptability in integrating the horse into their cultures is a testament to the resilience and innovation of Native American tribes.</p>

<p><img src="/assets/images/wild_horses/natives.webp" alt="illustration of natives on horseback" /></p>

<p>But it’s not all majestic gallops into the sunset. Free-roaming horses have a significant ecological impact.</p>

<ul>
  <li>
    <p><strong>Overgrazing:</strong> Horses can overgraze vegetation, leading to soil erosion and degradation of habitats.</p>
  </li>
  <li>
    <p><strong>Competition with Native Species:</strong> They compete with native wildlife like pronghorns and bighorn sheep for food and water resources.</p>
  </li>
  <li>
    <p><strong>Water Sources:</strong> Their presence can affect riparian areas, impacting water quality and availability for other species.</p>
  </li>
</ul>

<p>This has led to debates about how to manage their populations humanely and sustainably. While they may not be “wild” in the technical sense, they’re undeniably part of the American landscape now, and balancing their presence with environmental conservation is an ongoing challenge.</p>

<p>Horses in America are like that friend who moves away in elementary school and then suddenly shows up years later, totally transformed. They originated here, disappeared for a long time, and then came back under completely different circumstances.</p>

<p>They’re symbols of freedom and wildness, yet their very existence here is tied to human history and intervention. They represent both the untamed spirit of nature and the complex ways humans interact with the environment.</p>

<p>At the end of the day, the story of America’s free-roaming horses is a reminder that history is full of twists, turns, and unexpected returns. Horses have become an enduring symbol of the American West—not because they’ve always been here, but because of the incredible journey they’ve taken alongside us.</p>

<p>They embody resilience, adaptability, and that wild streak that runs through the heart of the American identity.</p>

<p>So, the next time you see a photo or painting of mustangs running free across the plains, you’ll know the real story. It’s not just a scene of wild beauty; it’s a complex tapestry of evolution, extinction, reintroduction, and cultural transformation.</p>

<p>And that’s way cooler than any myth.</p>

<p><strong>P.S.</strong> If you ever get the chance to see these horses in the wild (or, well, the “feral”), take a moment to appreciate the epic saga they’ve been part of. They’re not just horses; they’re living history galloping across the plains.</p>]]></content><author><name>Fabian Hertwig</name></author><category term="blog" /><category term="ChatGPT" /><category term="Curiosity" /><summary type="html"><![CDATA[America's 'wild' horses are actually feral descendants of Spanish imports. A ChatGPT-assisted deep dive into 55 million years of horse evolution and extinction.]]></summary></entry><entry><title type="html">Streamlining Corporate Decision-Making, Insights from Jeff Bezos</title><link href="https://fabianhertwig.com/blog/fast-decision-making/" rel="alternate" type="text/html" title="Streamlining Corporate Decision-Making, Insights from Jeff Bezos" /><published>2024-01-07T17:00:00+01:00</published><updated>2024-01-07T17:00:00+01:00</updated><id>https://fabianhertwig.com/blog/fast-decision-making</id><content type="html" xml:base="https://fabianhertwig.com/blog/fast-decision-making/"><![CDATA[<p>In a <a href="https://youtu.be/DcWqzZ3I2cY?si=n8Q9-EhUMpbKphL4">recent Lex Fridman podcast</a>, Jeff Bezos shared essential leadership insights, emphasizing the need for speed and truth in business decision-making. He discussed strategies for companies to rapidly reach decisions and avoid excessive deliberation. Bezos also delved into practices that facilitate the pursuit of truth, crucial for effective and informed decision-making in the corporate world.</p>

<h1 id="how-to-become-fast-at-decision-making">How to become fast at decision making</h1>
<p>When discussing the concept of decision-making in businesses, Jeff Bezos’s insights provide a profound perspective, particularly on the common pitfall many companies face: failing to recognize “two-way doors.” This failure often leads to unnecessary delays and hinders agility in the corporate world.</p>

<p><img src="/assets/images/decision_making/one-way-door.png" alt="illustration of a one way door" /></p>

<p>Most decisions in a business, according to Bezos, are “two-way doors.” These are decisions that are reversible and less critical. If a mistake is made, it’s relatively easy to backtrack and choose a different path. However, Bezos advocates that these <strong>two-way door decisions should primarily be made by single individuals</strong> or very small teams within the organization. This approach empowers teams to act swiftly and efficiently, avoiding the trap of over-deliberation.</p>

<p>Many companies treat these decisions as if they are “one-way doors” - significant, irreversible choices that require extensive deliberation. This cautious approach, while prudent for genuinely critical decisions, becomes a hindrance when applied indiscriminately. <strong>By applying the heavy, slow-moving process meant for one-way doors to all decisions, companies inadvertently stall their progress.</strong> They spend excessive time analyzing and deliberating choices that could be made quickly and adjusted if necessary. This not only slows down the decision-making process but also stifles innovation and responsiveness to changing market conditions.</p>

<p>Bezos’s philosophy at Amazon was to empower individuals and small teams to make two-way door decisions swiftly, reserving the meticulous, slower approach for the true one-way doors. This balance between caution and speed is crucial. It allows businesses to move quickly on most fronts while still being deliberate where it counts.</p>

<h1 id="getting-to-the-truth">Getting to the truth</h1>

<h2 id="tackling-groupthink-in-meetings">Tackling Groupthink in Meetings:</h2>
<p>Groupthink is a common phenomenon in meetings, especially those involving individuals of varying seniority. Jeff Bezos sheds light on this issue, emphasizing that <strong>when a senior member expresses their opinion first, it can inadvertently influence the thoughts of others.</strong> This dynamic leads to a situation where diverse opinions may get suppressed or altered in favor of aligning with the leader’s view.</p>

<p>But why does this happen, even among the most competent and confident individuals? The answer lies in our inherent nature as social beings. As Bezos points out, <strong>humans are not primarily truth-seeking; we are social animals.</strong> Our survival and success have historically depended on our ability to cooperate and align with our social groups. This instinct is deeply ingrained and can subtly influence our behavior in group settings.</p>

<p>In a meeting, when a respected or senior figure voices their opinion, <strong>it triggers an almost instinctual response in others to align with that viewpoint.</strong> This isn’t necessarily about agreement or disagreement on a rational level; it’s about the social dynamics of respect, authority, and the desire for harmony within the group. Even highly experienced and intelligent individuals are not immune to this social influence.</p>

<p>To counteract this, Bezos practices speaking last in meetings. Ideally, participants state their opinions from most junior to the most senior role, ensuring that all voices are heard in an unfiltered manner. This approach not only encourages honest expression but also highlights the importance of every team member’s perspective.</p>

<h2 id="the-peril-of-proxies">The Peril of Proxies:</h2>
<p>In business, the use of proxies – indirect measures to gauge performance or success – is common. Yet, as Jeff Bezos highlights, the management of these proxies can often lead to skewed decisions and strategies. This usually happens when organizations lose touch with the original purpose behind these proxies.</p>

<p>One major issue is organizational inertia. Over time, the reasons behind the selection of certain metrics as proxies can get lost in the shuffle of daily operations. Teams might continue tracking these metrics out of habit, not because they still provide relevant or useful insights. What made sense as a proxy five years ago might not be relevant today. Markets evolve, consumer behaviors shift, and what once was a reliable indicator of success or performance might now be outdated or misleading. <strong>This evolution can render once-crucial proxies ineffective, yet companies may continue to rely on them without recognizing their diminished relevance.</strong></p>

<p>There’s often a lack of critical reassessment of proxies. In many organizations, questioning the validity and effectiveness of established metrics is not a regular practice. This lack of scrutiny can lead to a situation where businesses optimize for metrics that no longer align with their current goals or market realities.</p>

<p>To avoid the pitfalls of mismanaged proxies, Bezos suggests fostering a culture that continuously questions and reassesses these metrics. It’s vital for organizations to regularly review their proxies to ensure they still represent their true objectives and adapt to the dynamic nature of the business environment. This ensures that decision-making and strategy remain focused on actual goals, not just the numbers that are meant to represent them.</p>

<h2 id="revolutionizing-meetings-with-the-6-page-memo">Revolutionizing Meetings with the 6-Page Memo:</h2>

<p>Jeff Bezos’ introduction of the 6-page memo to meetings at Amazon and Blue Origin marks a significant departure from traditional corporate meeting practices. This method ensures that every participant is not just physically present but also intellectually engaged with the matter at hand.</p>

<p>At the core of this approach is the ‘study hall’ session, where the meeting commences with everyone silently reading a narratively structured memo for about 30 minutes. This practice counters a common problem in many companies where participants come to meetings either unprepared or having only skimmed through the pre-read materials. In such scenarios, discussions can lack depth and understanding, leading to surface-level conversations and often, misguided decisions.</p>

<p><img src="/assets/images/decision_making/6-page-memo.png" alt="Illustration of a meeting, where everyone is reading a memo" /></p>

<p>Another critical issue in traditional meetings is the reliance on <strong>PowerPoint presentations, which Bezos views as a persuasion tool rather than a means for truth-seeking.</strong> Presentations with slides filled with <strong>bullet points can be misleading, allowing for vague and incomplete information</strong> to be conveyed. This method often leads to discussions that are more about aligning with the presenter’s perspective rather than delving into the actual substance of the issue.</p>

<p>In contrast, the 6-page memo demands comprehensive thinking and clarity from the author. <strong>This rigorous process of writing, rewriting, and editing ensures that the author presents their best thinking, leaving little room for ambiguity or half-baked ideas.</strong> For the participants, this means they are not spending time trying to extract the presenter’s thoughts during the meeting but are instead coming in with a full understanding of the subject.</p>

<p>Post the reading session, the meeting transforms into a dynamic discussion space, often described by Bezos as ‘messy.’ Here, the real problem-solving occurs, with participants exploring solutions based on a shared understanding developed through the memo. This method is especially effective in preventing higher-ranking individuals from unduly influencing the discussion, as everyone’s input is based on the same detailed document.</p>

<p>This approach also addresses the common problem of interruptions in meetings. Often in traditional settings, senior executives interject with questions, some of which would be addressed later in the presentation. The memo approach eliminates this by providing all the necessary information upfront, allowing for a more structured and focused discussion.</p>]]></content><author><name>Fabian Hertwig</name></author><category term="blog" /><category term="Decision Making" /><category term="Business" /><category term="Management" /><category term="Leadership" /><summary type="html"><![CDATA[Jeff Bezos on two-way doors, why senior leaders should speak last, the danger of proxies, and how 6-page memos beat PowerPoint for truth-seeking.]]></summary></entry><entry><title type="html">Unlocking the Power of First Principles Thinking: A Timeless Approach to Innovation and Problem-Solving</title><link href="https://fabianhertwig.com/blog/first-principles-thinking/" rel="alternate" type="text/html" title="Unlocking the Power of First Principles Thinking: A Timeless Approach to Innovation and Problem-Solving" /><published>2023-03-25T21:00:00+01:00</published><updated>2023-03-25T21:00:00+01:00</updated><id>https://fabianhertwig.com/blog/first-principles-thinking</id><content type="html" xml:base="https://fabianhertwig.com/blog/first-principles-thinking/"><![CDATA[<p>First principles thinking is the superpower that many attribute to Elon Musks success. With Tesla he revolutionized the automotive industry. First doubted by many that he will be able to create an electric car company at all, now many other car manufacturers followed his lead in committing to only building electric cars. With SpaceX Elon Musk reduced the cost of bringing payloads to orbit by 10 fold by making boosters land back on land and reusable for future flights. With that as well experts doubted that it will be possible to land a rocket at all. But Elon Musk’s first principles thinking dictated that if it didn’t violate the laws of physics, it must be possible. After multiple attempts, he successfully demonstrated the viability of this innovative approach.</p>

<!-- Courtesy of embedresponsively.com -->

<div class="responsive-video-container">
    <iframe src="https://www.youtube-nocookie.com/embed/bvim4rsNHkQ" frameborder="0" webkitallowfullscreen="" mozallowfullscreen="" allowfullscreen=""></iframe>
  </div>

<p>So what is first principles thinking and how can you become a first principles thinker?</p>

<h1 id="what-is-first-principles-thinking">What is First Principles Thinking</h1>

<p>First principles comes from philosophy and physics. There a first principle is a fundamental truth that can not be broken down any further. From this fundamental truth you can reason up and explain the processes.</p>

<p>Elon Musk about his way of thinking at TED <sup id="fnref:way_of_thinking_ted" role="doc-noteref"><a href="#fn:way_of_thinking_ted" class="footnote" rel="footnote">1</a></sup>:</p>
<blockquote>
  <p>Well, I do think there’s a good framework for thinking. It is physics. You know, the sort of first principles reasoning. What I mean by that is, boil things down to their fundamental truths and reason up from there, as opposed to reasoning by analogy. Through most of our life, we get through life by reasoning by analogy, which essentially means copying what other people do with slight variations. And you have to do that. Otherwise, mentally, you wouldn’t be able to get through the day. But when you want to do something new,
you have to apply the physics approach. Physics is really figuring out how to discover new things that are counterintuitive, like quantum mechanics.</p>
</blockquote>

<h2 id="first-principles-thinking-in-philosophy-aristotles-approach">First Principles Thinking in Philosophy: Aristotle’s Approach</h2>
<p><img src="/assets/images/first_principles/aristoteles.png" alt="picture of Aristoteles with an abstract concept of the unmoved mover in the background" /></p>

<p>First principles thinking has its roots in the philosophical teachings of Aristotle, who used this approach to uncover fundamental truths and build a coherent understanding of the world. He called these fundamental truths “archai,” which translates to “beginnings” or “principles.” In his philosophical inquiries, Aristotle sought to understand the essence of things by identifying their fundamental building blocks and deriving knowledge from these basic truths.</p>

<p>To Aristotle, first principles were self-evident and indubitable truths that could not be derived from any other principles. He believed that by starting with these first principles, one could logically deduce other truths and build a solid foundation for understanding the world. Aristotle’s process of reaching these first principles involved a technique called “dialectic,” which was an exploration of different opinions and viewpoints through dialogue and questioning. By engaging in dialectic, Aristotle aimed to peel away the layers of complexity and ambiguity, ultimately revealing the foundational principles that underlie various phenomena.</p>

<p>One famous example of Aristotle’s application of first principles thinking is his concept of the “unmoved mover.” He reasoned that if everything in the universe is in motion, there must be a cause for this motion, and that cause must be something that is itself unmoving. By identifying the unmoved mover as a first principle, Aristotle developed a comprehensive metaphysical framework that accounted for the motion and change observed in the world.</p>

<h2 id="descartes-radical-doubt-i-think-therefore-i-am">Descartes’ Radical Doubt: “I think, therefore I am”</h2>

<p>René Descartes, the 17th-century French philosopher, began his philosophical journey by doubting everything he knew or believed to be true. He questioned the reliability of his senses, the existence of the external world, and even the validity of his own thoughts. Through this process of relentless questioning and doubt, Descartes aimed to identify the most fundamental and self-evident truths, from which he could construct a solid and unshakable foundation for his philosophical system.</p>

<p>In his quest for certainty, Descartes arrived at the realization that the very act of doubting and thinking proved his own existence. He reasoned that even if he doubted everything else, he could not doubt the fact that he was doubting and thinking. This simple yet profound insight led to his famous declaration, “I think, therefore I am.”</p>

<p>This statement encapsulates Descartes’ first principles approach to knowledge and understanding. By questioning everything he identified a fundamental and self-evident truth: his own existence as a thinking being. From this indubitable starting point, Descartes went on to build a comprehensive philosophical system that encompassed the nature of reality, the existence of God, and the relationship between the mind and the body.</p>

<p><img src="/assets/images/first_principles/descartes.png" alt="picture of Descartes looking doubting at the viewer" /></p>

<h2 id="the-power-of-first-principles-in-physics">The Power of First Principles in Physics</h2>

<p>In the late 17th century, a young and inquisitive man named Isaac Newton was studying at the University of Cambridge. A brilliant and curious student, Newton was captivated by the mysteries of the natural world and constantly sought to uncover the fundamental principles that governed it.</p>

<p>One day, as Newton sat beneath an apple tree in the university’s garden, he witnessed an apple falling from a branch above. This simple event sparked a profound question in his mind: what force causes objects to fall towards the ground? Inspired by this question, Newton embarked on a journey to discover the underlying principles that governed the motion of objects on Earth and in the heavens.</p>

<p>Through diligent research and experimentation, Newton formulated his groundbreaking laws of motion, which described the relationship between the forces acting on an object and its motion. Armed with these principles, Newton sought to apply them to the celestial realm and understand the motion of the planets and other celestial bodies.</p>

<p>Focusing on the Moon, Newton wondered if the same force that caused the apple to fall from the tree could also be responsible for the Moon’s orbit around the Earth. To investigate this hypothesis, he considered the gravitational force acting on the Moon and the force required to keep it in orbit.</p>

<p><img src="/assets/images/first_principles/apple.png" alt="picture of an apple falling from a tree, the moon directly behind it" /></p>

<p>Through a series of calculations, Newton found that the force needed to maintain the Moon’s orbit was indeed proportional to the gravitational force acting upon it, suggesting that a single force - gravity - was responsible for both the motion of the apple falling to the ground and the Moon’s orbit around the Earth. This revelation was a groundbreaking discovery that unified the understanding of forces acting on both terrestrial and celestial objects.</p>

<p>Newton’s insight led to the formulation of his law of universal gravitation, which stated that every object with mass attracts every other object with mass, with a force that is proportional to the product of their masses and inversely proportional to the square of the distance between them. This law provided a unified framework for understanding the motion of objects on Earth and in the heavens, forever changing the way we perceive the universe.</p>

<p>Through his relentless pursuit of knowledge and his ability to reason up from first principles, Isaac Newton revolutionized our understanding of the natural world. His laws of motion and law of universal gravitation continue to serve as foundational principles in physics, shaping our comprehension of the cosmos and inspiring generations of scientists and thinkers to come.</p>

<h2 id="general-approach-to-first-principles-in-physics">General Approach to First Principles in Physics</h2>

<p>The first step in applying first principles thinking in physics is to formulate a hypothesis for a potential fundamental law. This often involves observing the natural world, identifying patterns, and devising a possible explanation or rule that governs the observed behavior. Physicists draw upon their knowledge of existing theories, as well as their creativity and intuition, to propose new hypotheses that can be tested through experimentation.</p>

<p>Once a hypothesis has been formulated, physicists design and conduct experiments to test its validity. These experiments must be carefully controlled and repeatable, allowing for the accurate measurement of relevant variables and the elimination of potential confounding factors. By comparing the experimental results with the predictions made by the hypothesis, physicists can assess whether the proposed law aligns with the observed data.</p>

<p>If the experimental results consistently support the hypothesis, it may become accepted as a first principle or fundamental law in physics. However, if the results contradict the hypothesis, it may need to be revised or discarded in favor of an alternative explanation.</p>

<h1 id="developing-first-principles-thinking-skills">Developing First Principles Thinking Skills</h1>

<p>First principles thinking is a powerful mental tool that can be applied in various aspects of life, not just in physics or philosophy. By learning to think in first principles, you can develop the ability to break down complex problems, identify their fundamental truths, and reason up from there to find innovative and effective solutions. Here are some techniques to help you cultivate first principles thinking:</p>

<ol>
  <li>Ask “why” multiple times: When faced with a problem or question, ask “why” several times to peel back the layers of complexity and uncover the underlying principles. By questioning assumptions and diving deep into the core of the issue, you can identify the fundamental truths from which you can reason up and develop a solution.</li>
  <li>Embrace doubt and skepticism: Cultivate a mindset of doubt and skepticism when tackling problems or beliefs. By questioning everything, even your own thoughts, you can identify the most fundamental and self-evident truths as your starting point. This practice enables you to build a solid foundation for understanding and solving problems, grounded in first principles thinking.</li>
  <li>Challenge analogies: Many of our beliefs are based on analogies that may not be entirely accurate or relevant. To think in first principles, it’s essential to identify and challenge these analogies, scrutinizing their validity and questioning whether they truly apply in the context of the problem at hand.</li>
  <li>Understand analogies and mental models: While first principles thinking encourages reasoning from fundamental truths rather than relying on analogies, it’s still valuable to be familiar with various analogies and mental models. These can serve as useful starting points for your reasoning or doubting process, helping you to identify patterns and connections between seemingly unrelated phenomena. Once you’ve drawn upon these analogies and models, you can then apply first principles thinking to refine and develop your understanding further.</li>
  <li>Break down problems into their basic components: By dissecting complex issues into smaller, more manageable parts, you can analyze each component individually and identify the fundamental principles that govern them. This process will help you gain a deeper understanding of the problem and enable you to build a solution from the ground up.</li>
  <li>Envision the ideal solution and work backwards: Rather than relying solely on familiar tools and methods, take a moment to imagine the perfect solution to the problem at hand. Ask yourself what the ideal outcome would look like and what characteristics it would possess. Once you have a clear vision of the desired solution, work backward to determine the necessary steps and resources to achieve it. This approach encourages you to think beyond the limitations of conventional methods, fostering creativity and innovation in your problem-solving process.</li>
  <li>Embrace curiosity and continuous learning: Developing first principles thinking requires a strong sense of curiosity and a commitment to learning. By nurturing your curiosity and constantly seeking out new knowledge, you’ll be better equipped to identify fundamental truths and reason up from them to tackle complex challenges.</li>
</ol>

<h1 id="first-hand-examples-of-first-principles-thinking">First Hand Examples of First Principles Thinking</h1>

<p>Here are a few first hand examples of first principles thinking from Elon Musk. Notice how he applies the skills outlined above.</p>

<p>In the video below he explains how to think from first principles:</p>
<ul>
  <li>Don’t brake the laws of physics.</li>
  <li>Think about how things change when you scale something to a very large or very low number. If a part is still expensive when you produce a million a year then the reason is its design.</li>
  <li>Anything at volume can be made for costs that asymptotically approach the costs of the raw materials plus intellectual property license rights.</li>
  <li>Instead of using the tools and methods that you already know ask yourself: What would be the perfect solution and how can you get to that.</li>
</ul>

<!-- Courtesy of embedresponsively.com -->

<div class="responsive-video-container">
    <iframe src="https://www.youtube-nocookie.com/embed/54OSbbtXrdI" frameborder="0" webkitallowfullscreen="" mozallowfullscreen="" allowfullscreen=""></iframe>
  </div>

<p>Next he explains how people reason from analogy:</p>
<blockquote>
  <p>Batteries are expensive and they will always be, because the are expensive right now. But if you break down the material costs of batteries, then you see that these are really cheap and it is the assembly that is expensive. These costs can be reduced by improving the assembly process and increasing the scale.</p>
</blockquote>

<!-- Courtesy of embedresponsively.com -->

<div class="responsive-video-container">
    <iframe src="https://www.youtube-nocookie.com/embed/L-s_3b5fRd8?start=1385" frameborder="0" webkitallowfullscreen="" mozallowfullscreen="" allowfullscreen=""></iframe>
  </div>

<p>On the costs of rockets. Again he breaks down the costs of a rocket to the cost of its components and the cost of assembly.</p>

<!-- Courtesy of embedresponsively.com -->

<div class="responsive-video-container">
    <iframe src="https://www.youtube-nocookie.com/embed/vDwzmJpI4io?start=1384" frameborder="0" webkitallowfullscreen="" mozallowfullscreen="" allowfullscreen=""></iframe>
  </div>

<p>Elon about what a company and profit is:</p>
<blockquote>
  <p>A company is a assembly of people who gather together to create and deliver a product or service. A company has no value in itself, only in being an effective allocator to create goods and services that are of greater value than the costs of the inputs. Profit is that over time the value of the outputs is greater than the value of the inputs.</p>
</blockquote>

<!-- Courtesy of embedresponsively.com -->

<div class="responsive-video-container">
    <iframe src="https://www.youtube-nocookie.com/embed/Y6P8qdanszw?start=66" frameborder="0" webkitallowfullscreen="" mozallowfullscreen="" allowfullscreen=""></iframe>
  </div>

<p>Elon about how he is able to attract talent:</p>

<blockquote>
  <p>If you wanna recruit people that are really talented and driven you have to state the mission and have a convincing argument for why it matters. 
There a three major things in terms of motivation:</p>
  <ul>
    <li>A person is enjoying the work itself intrinsically</li>
    <li>The financial compensation is fair and good</li>
    <li>The best people wanna know if what they are doing is going to matter, will people notice their work or will the world be different</li>
  </ul>
</blockquote>

<!-- Courtesy of embedresponsively.com -->

<div class="responsive-video-container">
    <iframe src="https://www.youtube-nocookie.com/embed/BN88HPUm6j0?start=3387" frameborder="0" webkitallowfullscreen="" mozallowfullscreen="" allowfullscreen=""></iframe>
  </div>

<h1 id="conclusion">Conclusion</h1>

<p>In conclusion, first principles thinking is a powerful and transformative approach to problem-solving that has been employed by some of the most brilliant minds in history, including Aristotle, Isaac Newton, and Elon Musk. This way of thinking transcends disciplines and can be applied to various aspects of life, from philosophy and physics to business and everyday challenges. By cultivating this mindset and applying it in our own lives, we can unlock our own potential for creative problem-solving and embark on a journey of continuous growth and learning.</p>

<h2 id="references">References</h2>
<div class="footnotes" role="doc-endnotes">
  <ol>
    <li id="fn:way_of_thinking_ted" role="doc-endnote">
      <p>Elon explains first principles thinking at TED: https://youtu.be/IgKWPdJWuBQ?t=1096 <a href="#fnref:way_of_thinking_ted" class="reversefootnote" role="doc-backlink">&#8617;</a></p>
    </li>
  </ol>
</div>]]></content><author><name>Fabian Hertwig</name></author><category term="blog" /><category term="First Principles Thinking" /><category term="Mental Models" /><summary type="html"><![CDATA[From Aristotle to Elon Musk: how breaking problems down to fundamental truths and reasoning up from there leads to breakthrough innovations.]]></summary></entry><entry><title type="html">Python Virtual Environments: The best workflow</title><link href="https://fabianhertwig.com/blog/python-venv-workflow/" rel="alternate" type="text/html" title="Python Virtual Environments: The best workflow" /><published>2023-01-07T11:00:00+01:00</published><updated>2023-01-07T11:00:00+01:00</updated><id>https://fabianhertwig.com/blog/python-venv-workflow</id><content type="html" xml:base="https://fabianhertwig.com/blog/python-venv-workflow/"><![CDATA[<h2 id="update-a-simpler-workflow-with-uv">Update: A Simpler Workflow with <code class="language-plaintext highlighter-rouge">uv</code></h2>

<p><strong>Note:</strong> The workflow described below using <code class="language-plaintext highlighter-rouge">pyenv</code> and <code class="language-plaintext highlighter-rouge">venv</code> is now largely superseded by a fantastic new tool called <a href="https://github.com/astral-sh/uv"><code class="language-plaintext highlighter-rouge">uv</code></a>. While the principles discussed in this post remain relevant, <code class="language-plaintext highlighter-rouge">uv</code> offers a significantly faster and more streamlined experience.</p>

<p><code class="language-plaintext highlighter-rouge">uv</code> acts as a replacement for <code class="language-plaintext highlighter-rouge">pip</code>, <code class="language-plaintext highlighter-rouge">pip-tools</code>, <code class="language-plaintext highlighter-rouge">virtualenv</code>, and <code class="language-plaintext highlighter-rouge">venv</code>, all rolled into one incredibly fast Rust-based package manager and resolver.</p>

<p>With <code class="language-plaintext highlighter-rouge">uv</code>, creating a virtual environment is as simple as running:</p>

<div class="language-bash highlighter-rouge"><div class="highlight"><pre class="highlight"><code>uv init
</code></pre></div></div>

<p>And adding packages is straightforward:</p>

<div class="language-bash highlighter-rouge"><div class="highlight"><pre class="highlight"><code>uv add &lt;package&gt;
<span class="c"># or using the familiar pip install command</span>
uv pip <span class="nb">install</span> &lt;package&gt;
</code></pre></div></div>

<p>Crucially, when using <code class="language-plaintext highlighter-rouge">uv add</code>, it modifies your <code class="language-plaintext highlighter-rouge">pyproject.toml</code> to record the direct dependencies and their version constraints (similar to <code class="language-plaintext highlighter-rouge">package.json</code> in Node.js). <code class="language-plaintext highlighter-rouge">uv</code> then automatically maintains a lock file (<code class="language-plaintext highlighter-rouge">uv.lock</code>) which records the exact versions of all dependencies (direct and transitive) needed for your project. This lock file brings a level of dependency consistency similar to what you might be familiar with from the JavaScript ecosystem (e.g., <code class="language-plaintext highlighter-rouge">npm</code> and <code class="language-plaintext highlighter-rouge">package-lock.json</code>), something I’ve come to appreciate greatly. It ensures reproducible builds across different environments.</p>

<p>Given its speed and simplicity, I now recommend <code class="language-plaintext highlighter-rouge">uv</code> as the primary tool for managing Python virtual environments and dependencies. The rest of this post remains for historical context or if you encounter situations where <code class="language-plaintext highlighter-rouge">uv</code> isn’t suitable.</p>

<h2 id="original-post">Original post</h2>

<p>When I start a new Python project I use <code class="language-plaintext highlighter-rouge">pyenv install 3.11</code> and <code class="language-plaintext highlighter-rouge">pyenv shell 3.11</code> to install and set the Python version (here to 3.11) and then <code class="language-plaintext highlighter-rouge">python -m venv .venv</code> to create a virtual environment that sits in my project folder. At last it gets activated with <code class="language-plaintext highlighter-rouge">source .venv/bin/activate</code>. I bundled these commands into a function, so that I only need to run <code class="language-plaintext highlighter-rouge">mkpyvenv 3.11</code> and the virtual environment is created and activated.</p>

<h2 id="the-reasons-for-this-workflow">The reasons for this workflow</h2>

<p>Every project should have its own virtual environment, so that each project is independent.</p>

<p>I want to be able to control the Python version for each project, eg. use 3.8 for one project and 3.11 for another.</p>

<p>I want my virtual environment to be in the project folder, so that when I delete the project folder, that virtual environment is also gone. Like that my system does not get littered with virtual environments that I have long forgotten about, as conda or virtualenvwrapper does.</p>

<p>Another benefit is, that my virtual environment does not have a name that I need to remember. I can always activate it with <code class="language-plaintext highlighter-rouge">source .venv/bin/activate</code> in the project folder. VSCode automatically activates a virtual environment in a <code class="language-plaintext highlighter-rouge">.venv</code> folder, so I don’t even have to do that.</p>

<p>I want to install all my dependencies with <code class="language-plaintext highlighter-rouge">pip</code> and a <code class="language-plaintext highlighter-rouge">requirements.txt</code> or <code class="language-plaintext highlighter-rouge">pyproject.toml</code> file (and not with <code class="language-plaintext highlighter-rouge">conda</code> and an <code class="language-plaintext highlighter-rouge">environment.yml</code>), as often a project ends up running in a Docker container. As a Docker container is its own virtual environment, I don’t want to have to install another virtual environment manager in that docker container. Also pip is the Python standard, and conda is only common in the scientific community.</p>

<h2 id="the-workflow-in-practice">The workflow in practice</h2>

<p>This is for MacOS.</p>

<h3 id="installation">Installation</h3>

<p>Use <a href="https://brew.sh/index_de">brew</a> to install <a href="https://github.com/pyenv/pyenv#homebrew-in-macos">pyenv</a></p>

<div class="language-plaintext highlighter-rouge"><div class="highlight"><pre class="highlight"><code>brew update
brew install pyenv
</code></pre></div></div>

<p>Then follow the instructions of <code class="language-plaintext highlighter-rouge">pyenv init</code> to load pyenv when starting a shell. For the zsh shell that is:</p>

<div class="language-plaintext highlighter-rouge"><div class="highlight"><pre class="highlight"><code># Load pyenv automatically by appending
# the following to
~/.zprofile (for login shells)
and ~/.zshrc (for interactive shells) :

export PYENV_ROOT="$HOME/.pyenv"
command -v pyenv &gt;/dev/null || export PATH="$PYENV_ROOT/bin:$PATH"
eval "$(pyenv init -)"

# Restart your shell for the changes to take effect.
</code></pre></div></div>

<p>Then install the Python versions that you want to use. With <code class="language-plaintext highlighter-rouge">pyenv versions</code> you can see which ones are already installed.</p>

<div class="language-plaintext highlighter-rouge"><div class="highlight"><pre class="highlight"><code>pyenv install 3.8.16
pyenv install 3.11
...
</code></pre></div></div>

<h3 id="creating-a-virtual-environment">Creating a virtual environment</h3>

<p>Now let us assume we start a new project:</p>

<div class="language-plaintext highlighter-rouge"><div class="highlight"><pre class="highlight"><code>mkdir my_awesome_tool
cd my_awesome_tool
</code></pre></div></div>

<p>Now we set the Python version for the current shell session:</p>

<div class="language-plaintext highlighter-rouge"><div class="highlight"><pre class="highlight"><code>pyenv shell 3.11
</code></pre></div></div>

<p>When you run <code class="language-plaintext highlighter-rouge">python --version</code> you will see that the <code class="language-plaintext highlighter-rouge">Python 3.11.1</code> version is used (or a newer patch version, as we have not been specific there). With <code class="language-plaintext highlighter-rouge">which python</code> you see that the python executable is in the <code class="language-plaintext highlighter-rouge">.pyenv/shims</code> directory. With <code class="language-plaintext highlighter-rouge">pyenv which python</code> you see that the python executable is stored in the pyenv directory <code class="language-plaintext highlighter-rouge">/Users/fabian.hertwig/.pyenv/versions/3.11.1/bin/python</code>.</p>

<p>So let us create a virtual environment in a <code class="language-plaintext highlighter-rouge">.venv</code> folder:</p>

<div class="language-plaintext highlighter-rouge"><div class="highlight"><pre class="highlight"><code>python -m venv .venv
source .venv/bin/activate
</code></pre></div></div>

<p>Now <code class="language-plaintext highlighter-rouge">which python</code> points to the virtual environment: <code class="language-plaintext highlighter-rouge">/Users/fabian.hertwig/Projects/my_awesome_tool/.venv/bin/python</code>. And again if you run <code class="language-plaintext highlighter-rouge">python --version</code> you will see that the <code class="language-plaintext highlighter-rouge">Python 3.11.1</code> version is used. If you install a package, eg. <code class="language-plaintext highlighter-rouge">pip install numpy</code> then it will be stored in the <code class="language-plaintext highlighter-rouge">.venv/lib/python3.11/site-packages/numpy</code> directory.</p>

<h2 id="making-shortcuts">Making shortcuts</h2>

<p>To easily run through that process with just one command <code class="language-plaintext highlighter-rouge">mkpyvenv 3.11</code>, you can add the function below to your shell configuration file, e.g. <code class="language-plaintext highlighter-rouge">.zshrc</code>. Or you can use the awesome <a href="https://fig.io/blog/post/dotfiles-launch">fig tool to create a dot file there</a> which gets shared across all your fig installations.</p>

<div class="language-plaintext highlighter-rouge"><div class="highlight"><pre class="highlight"><code>mkpyvenv() {
    # Check if an argument was given
    if [ -z "$1" ]; then
        echo "Please specify a Python version to use, e.g. mkpyvenv 3.9.4"
        return 1
    fi
    PYTHON_VERSION=$1

    # Check if pyenv is installed
    if ! command -v pyenv &gt; /dev/null; then
        echo "pyenv is not installed. Please install it, e.g. by running `brew install pyenv`"
        return 1
    fi

    # Install the python version if it does not exist
    pyenv install --skip-existing $PYTHON_VERSION

    # Create the virtual environment and activate it
    pyenv shell $PYTHON_VERSION
    python -m venv .venv
    pyenv shell --unset
    source .venv/bin/activate
}
</code></pre></div></div>]]></content><author><name>Fabian Hertwig</name></author><category term="blog" /><category term="Python" /><category term="Environments" /><category term="Developing" /><summary type="html"><![CDATA[Why uv is now the best tool for Python environments, plus the pyenv + venv workflow that keeps each project isolated with its own Python version.]]></summary></entry><entry><title type="html">Metrics for Information Retrieval</title><link href="https://fabianhertwig.com/blog/information-retrieval-metrics/" rel="alternate" type="text/html" title="Metrics for Information Retrieval" /><published>2023-01-04T14:00:00+01:00</published><updated>2023-01-04T14:00:00+01:00</updated><id>https://fabianhertwig.com/blog/information-retrieval-metrics</id><content type="html" xml:base="https://fabianhertwig.com/blog/information-retrieval-metrics/"><![CDATA[<p>In the past year I have built a neural search system on top of the awesome <a href="https://github.com/deepset-ai/haystack">Haystack</a> project. One of the tasks was to understand how well different models or algorithms perform for our corpus. Therefore I needed to understand the metrics that are commonly used in information retrieval tasks. I could not find one source that described them neatly, therefor I created this post. The metrics explained in this post are the ones that the <a href="https://github.com/beir-cellar/beir">BEIR</a> benchmark currently reports:</p>

<ul>
  <li><a href="#ndcgk---normalized-discounted-cumulative-gain-at-k">NDCG@k - Normalized Discounted Cumulative Gain at k</a></li>
  <li><a href="#mapk---mean-average-precision-at-k">MAP@k - Mean average precision at k</a></li>
  <li><a href="#precisionk">Precision@k</a></li>
  <li><a href="#recallk">Recall@k</a></li>
  <li><a href="#r_capk---capped-recall">R_cap@k - Capped Recall</a></li>
  <li><a href="#mrrk---mean-reciprocal-rank-at-k">MRR@k - Mean Reciprocal Rank at k</a></li>
</ul>

<p>These metrics calculate performance for a ranking task. Ranking is the more general task of search systems. Given:</p>
<ul>
  <li>a <code class="language-plaintext highlighter-rouge">corpus</code> of documents or passages</li>
  <li>a set of <code class="language-plaintext highlighter-rouge">queries</code></li>
  <li>a set of relevance scores, which define for each query how relevant each document is, in the simplest case by marking them with 0 or 1.</li>
</ul>

<p>The system should retrieve the most relevant documents for each query and show them at the top rank.</p>

<p>Of course the system does not know the relevance scores and has to calculate them on its own. To calculate the metrics though you need them. We used a feedback system, where users could vote on search results if they are relevant for their search or not.</p>

<h2 id="example">Example</h2>
<p>I will use the following example to illustrate the metrics.</p>

<h3 id="corpus">Corpus:</h3>

<div class="language-plaintext highlighter-rouge"><div class="highlight"><pre class="highlight"><code>Document 1: "How to train a cat"
Document 2: "How to train a dog"
Document 3: "How to train a parrot"
Document 4: "How to train a hamster"
</code></pre></div></div>
<h3 id="queries">Queries:</h3>
<div class="language-plaintext highlighter-rouge"><div class="highlight"><pre class="highlight"><code>Query 1: "train cat"
Query 2: "train dog"
Query 3: "train parrot"
</code></pre></div></div>

<h3 id="relevance-scores">Relevance scores:</h3>
<p>Let us also assume, the the search system returned the documents in this order for each query.</p>
<div class="language-plaintext highlighter-rouge"><div class="highlight"><pre class="highlight"><code>Query 1, Document 1: 1.0 (maximum relevance)
Query 1, Document 2: 0.5
Query 1, Document 3: 0.3
Query 1, Document 4: 0.1

Query 2, Document 1: 0.7
Query 2, Document 2: 1.0 (maximum relevance)
Query 2, Document 3: 0.2
Query 2, Document 4: 0.1

Query 3, Document 1: 0.4
Query 3, Document 2: 0.2
Query 3, Document 3: 1.0 (maximum relevance)
Query 3, Document 4: 0.1
</code></pre></div></div>

<h2 id="ndcgk---normalized-discounted-cumulative-gain-at-k">NDCG@k - Normalized Discounted Cumulative Gain at k</h2>

<p>Normalized Discounted Cumulative Gain at k (NDCG@k) is a metric used to evaluate the performance of a ranking model. NDCG@k measures the usefulness of the top k items in the ranking, taking into account both the relevance of the items and their order in the ranking.</p>

<p>To calculate NDCG@k, the discounted cumulative gain (DCG) of the top k items in the ranking is first calculated. The DCG is a measure of the relevance of the items in the ranking, where higher relevance scores are given more weight. The DCG value is calculated by summing the product of the relevance of each item and a discount factor that decreases as the rank of the item increases.</p>

<p>Next, the maximum possible discounted cumulative gain (IDCG) of the top k items is calculated. This is the DCG of the ideal ranking, where the most relevant items appear at the top.</p>

<p>Finally, the NDCG@k score is calculated by dividing the DCG of the top k items by the IDCG of the top k items. The NDCG@k score ranges from 0 to 1, with a higher score indicating a more useful ranking.</p>

<h3 id="formula">Formula</h3>
<div class="language-plaintext highlighter-rouge"><div class="highlight"><pre class="highlight"><code>NDCG@k = DCG@k / IDCG@k
</code></pre></div></div>
<p>Where:</p>

<ul>
  <li><code class="language-plaintext highlighter-rouge">DCG@k</code> is the discounted cumulative gain for the top k items in the ranking</li>
  <li><code class="language-plaintext highlighter-rouge">IDCG@k</code> is the maximum possible discounted cumulative gain for the top k items</li>
</ul>

<p>The formula for DCG@k is:</p>
<div class="language-plaintext highlighter-rouge"><div class="highlight"><pre class="highlight"><code>DCG@k = ∑ rel_i * (1 / log_2(i+1)) for i = 1 to k
</code></pre></div></div>

<p>Where:</p>

<ul>
  <li><code class="language-plaintext highlighter-rouge">rel_i</code> is the relevance of the item at rank i</li>
  <li><code class="language-plaintext highlighter-rouge">k</code> is the number of items in the top k portion of the ranking</li>
</ul>

<p>The formula for IDCG@k is:</p>

<div class="language-plaintext highlighter-rouge"><div class="highlight"><pre class="highlight"><code>IDCG@k = ∑ max_rel_i * (1 / log_2(i+1)) for i = 1 to k
</code></pre></div></div>

<p>Where:</p>

<ul>
  <li><code class="language-plaintext highlighter-rouge">max_rel_i</code> is the maximum relevance among all items at rank i</li>
</ul>

<h3 id="example-1">Example:</h3>
<p>Here is an example of how NDCG@k can be calculated for the corpus, set of queries, and set of relevance scores from above:</p>

<p>Let’s say we want to calculate NDCG@2 for each query. First, we need to calculate the DCG@2 and IDCG@2 values for each query.</p>

<p>For Query 1:</p>
<div class="language-plaintext highlighter-rouge"><div class="highlight"><pre class="highlight"><code>DCG@2 = 1.0 + 0.5 * (1 / log_2(3)) = 1.0 + 0.5 * (1 / 1.585) = 1.32
IDCG@2 = 1.0 + 0.5 * (1 / log_2(3)) = 1.0 + 0.5 * (1 / 1.585) = 1.32
NDCG@2 = DCG@2 / IDCG@2 = 1.32 / 1.32 = 1.0
</code></pre></div></div>
<p>For Query 2:</p>
<div class="language-plaintext highlighter-rouge"><div class="highlight"><pre class="highlight"><code>DCG@2 = 1.0 + 0.7 * (1 / log_2(3)) = 1.0 + 0.7 * (1 / 1.585) = 1.45
IDCG@2 = 1.0 + 1.0 * (1 / log_2(3)) = 1.0 + 1.0 * (1 / 1.585) = 1.62
NDCG@2 = DCG@2 / IDCG@2 = 1.45 / 1.62 = 0.89
</code></pre></div></div>
<p>For Query 3:</p>
<div class="language-plaintext highlighter-rouge"><div class="highlight"><pre class="highlight"><code>DCG@2 = 1.0 + 0.4 * (1 / log_2(3)) = 1.0 + 0.4 * (1 / 1.585) = 1.25
IDCG@2 = 1.0 + 1.0 * (1 / log_2(3)) = 1.0 + 1.0 * (1 / 1.585) = 1.62
NDCG@2 = DCG@2 / IDCG@2 = 1.25 / 1.62 = 0.77
</code></pre></div></div>
<p>In this example, the ranking for Query 1 has an NDCG@2 score of 1.0, which means it is a perfect ranking. The ranking for Query 2 has an NDCG@2 score of 0.89, which means it is a good ranking but not perfect. The ranking for Query 3 has an NDCG@2 score of 0.77, which means it is a lower quality ranking.</p>

<h2 id="mapk---mean-average-precision-at-k">MAP@k - Mean average precision at k</h2>

<p>Mean Average Precision at k (MAP@k) is a metric used to evaluate the performance of a ranking model, particularly in information retrieval tasks such as search engines. It measures the average precision of the top k items in the ranking, taking into account both the relevance of the items and their order in the ranking.</p>

<p>Precision is a measure of the proportion of relevant items in the ranking. For example, if a ranking contains 4 items and 2 of them are relevant, the precision of the ranking is 0.5.</p>

<p>To calculate MAP@k, the precision of the top k items in the ranking is first calculated for each query. The precision is calculated as the number of relevant items in the top k portion of the ranking divided by k. Then, the average precision is calculated by taking the mean of the precision values across all queries.</p>

<p>The formula for MAP@k is:</p>

<div class="language-plaintext highlighter-rouge"><div class="highlight"><pre class="highlight"><code>MAP@k = 1/Q * ∑ (Precision@k of query q) for q = 1 to Q
</code></pre></div></div>

<p>Where:</p>

<ul>
  <li><code class="language-plaintext highlighter-rouge">Q</code> is the number of queries</li>
  <li><code class="language-plaintext highlighter-rouge">Precision@k of query q</code> is the precision of the top k items in the ranking for query q</li>
</ul>

<p>The MAP@k score ranges from 0 to 1, with a higher score indicating a more useful ranking.</p>

<h3 id="example-2">Example</h3>
<p>Let’s say we want to calculate MAP@2 for each query, using a relevance threshold of 0.5. First, we need to calculate the precision@2 for each query.</p>

<p>For Query 1:</p>
<div class="language-plaintext highlighter-rouge"><div class="highlight"><pre class="highlight"><code>precision@2 = (number of relevant items in top 2) / 2
= (2 relevant items) / 2
= 1.0
</code></pre></div></div>
<p>For Query 2:</p>
<div class="language-plaintext highlighter-rouge"><div class="highlight"><pre class="highlight"><code>precision@2 = (number of relevant items in top 2) / 2
= (1 relevant item) / 2
= 0.5
</code></pre></div></div>
<p>For Query 3:</p>
<div class="language-plaintext highlighter-rouge"><div class="highlight"><pre class="highlight"><code>precision@2 = (number of relevant items in top 2) / 2
= (0 relevant item) / 2
= 0.0
</code></pre></div></div>
<p>Then, the MAP@2 score is calculated as the mean of the precision@2 values:</p>

<div class="language-plaintext highlighter-rouge"><div class="highlight"><pre class="highlight"><code>MAP@2 = 1/3 * (1.0 + 0.5 + 0.0)
      = 1/3 * 1.5
      = 0.5
</code></pre></div></div>

<h2 id="precisionk">Precision@k</h2>

<p>Precision@k measures the proportion of relevant items in the top k items of the ranking, relative to the total number of items in the ranking.</p>

<p>The Precision@k score is calculated by dividing the number of relevant items in the top k portion of the ranking by k. The Precision@k score ranges from 0 to 1, with a higher score indicating a more useful ranking.</p>

<p>The formula for Precision@k is:</p>

<div class="language-plaintext highlighter-rouge"><div class="highlight"><pre class="highlight"><code>Precision@k = (number of relevant items in top k) / k
</code></pre></div></div>

<p>For example, suppose we have a corpus containing 10 documents, and we want to calculate the Precision@5 score for a given query. If the top 5 documents in the ranking contain 3 relevant documents, the Precision@5 score would be calculated as follows:</p>

<div class="language-plaintext highlighter-rouge"><div class="highlight"><pre class="highlight"><code>Precision@5 = (number of relevant items in top 5) / 5
            = 3 / 5
            = 0.6
</code></pre></div></div>
<p>In this example, the Precision@5 score is 0.6, which means that 60% of the top 5 documents in the ranking are relevant.</p>

<p>The Precision@k metric is defined even when there are no relevant documents in the corpus, whereas the Recall@k metric is not defined in this case. This makes Precision@k a useful evaluation metric when the number of relevant documents in the corpus is small or when the relevance threshold is set very high.</p>

<h3 id="example-3">Example</h3>

<p>Let’s say we want to calculate Precision@2 for each query, using a relevance threshold of 0.5. First, we need to count the number of relevant items in the top 2 items of the ranking for each query.</p>

<p>For Query 1:</p>
<div class="language-plaintext highlighter-rouge"><div class="highlight"><pre class="highlight"><code>number of relevant items in top 2 = 1
Precision@2 = (number of relevant items in top 2) / 2
= 2 / 2
= 1.0
</code></pre></div></div>

<p>For Query 2:</p>
<div class="language-plaintext highlighter-rouge"><div class="highlight"><pre class="highlight"><code>number of relevant items in top 2 = 1
Precision@2 = (number of relevant items in top 2) / 2
= 2 / 2
= 1.0
</code></pre></div></div>

<p>For Query 3:</p>

<div class="language-plaintext highlighter-rouge"><div class="highlight"><pre class="highlight"><code>number of relevant items in top 2 = 0
Precision@2 = (number of relevant items in top 2) / 2
= 0 / 2
= 0.0
</code></pre></div></div>

<p>In this example, the Precision@2 scores are 0.5, 0.5, and 0.0 for Query 1, Query 2, and Query 3, respectively. This means that 50% of the top 2 documents in the ranking are relevant for Query 1 and Query 2, and none of the top 2 documents in the ranking are relevant for Query 3.</p>

<h2 id="recallk">Recall@k</h2>

<p>The Recall@k score is calculated by dividing the number of relevant items in the top k portion of the ranking by the total number of relevant items <strong>in the corpus</strong>. The Recall@k score ranges from 0 to 1, with a higher score indicating a more useful ranking.</p>

<p>The formula for Recall@k is:</p>

<div class="language-plaintext highlighter-rouge"><div class="highlight"><pre class="highlight"><code>Recall@k = (number of relevant items in top k) / (total number of relevant items)
</code></pre></div></div>

<p>For example, suppose we have a corpus containing 10 documents, and we want to calculate the Recall@5 score for a given query. If the top 5 documents in the ranking contain 3 relevant documents and there are a total of 5 relevant documents in the corpus, the Recall@5 score would be calculated as follows:</p>

<div class="language-plaintext highlighter-rouge"><div class="highlight"><pre class="highlight"><code>Recall@5 = (number of relevant items in top 5) / (total number of relevant items)
         = 3 / 5
         = 0.6
</code></pre></div></div>
<p>In this example, the Recall@5 score is 0.6, which means that 60% of the relevant documents in the corpus are included in the top 5 documents of the ranking.</p>

<h3 id="example-4">Example</h3>
<p>Let’s say we want to calculate Recall@2 for each query from the top, using a relevance threshold of 0.5. First, we need to count the number of relevant items in the top 2 items of the ranking for each query, and the total number of relevant items in the corpus.</p>

<p>For Query 1:</p>
<div class="language-plaintext highlighter-rouge"><div class="highlight"><pre class="highlight"><code>number of relevant items in top 2 = 1
total number of relevant items = 2
Recall@2 = (number of relevant items in top 2) / (total number of relevant items)
= 1 / 2
= 0.5
</code></pre></div></div>

<p>For Query 2:</p>
<div class="language-plaintext highlighter-rouge"><div class="highlight"><pre class="highlight"><code>number of relevant items in top 2 = 1
total number of relevant items = 1
Recall@2 = (number of relevant items in top 2) / (total number of relevant items)
= 1 / 1
= 1.0
</code></pre></div></div>
<p>For Query 3:</p>
<div class="language-plaintext highlighter-rouge"><div class="highlight"><pre class="highlight"><code>number of relevant items in top 2 = 0
total number of relevant items = 0
Recall@2 = (number of relevant items in top 2) / (total number of relevant items)
= 0 / 1
= 0
</code></pre></div></div>

<p>If the total number of relevant documents in the corpus is 0, the Recall@k score is not defined. This can happen when there are no relevant documents in the corpus for a given query, or when the relevance threshold is set too high such that no documents in the corpus meet the threshold.</p>

<h2 id="r_capk---capped-recall">R_cap@k - Capped Recall</h2>

<p>The R_cap@k metric is a variant of the Recall@k metric. It measures the proportion of relevant items in the top k items of the ranking, relative to the total number of relevant items in the corpus, but caps the total number of relevant documents to k.</p>

<p>The formula for R_cap@k is:</p>

<div class="language-plaintext highlighter-rouge"><div class="highlight"><pre class="highlight"><code>R_cap@k = (number of relevant items in top k) / min(k, total number of relevant items)
</code></pre></div></div>

<p>Measuring Recall@k can be counterintuitive, if a high number of relevant documents (&gt; k) are present within a dataset. For example, consider a hypothetical dataset with 500 relevant documents for a query. Retrieving all relevant documents would produce a maximum R@100 score = 0.2, which is quite low and unintuitive. To avoid this we cap the recall score (R_cap@k) at k for datasets if the number of relevant documents for a query greater than k. <sup id="fnref:beir_paper" role="doc-noteref"><a href="#fn:beir_paper" class="footnote" rel="footnote">1</a></sup></p>

<h3 id="example-5">Example:</h3>

<p>Suppose we have a corpus containing 10 documents, and we want to calculate the Recall@5 and R_cap@5 scores for a given query. If the top 10 documents in the ranking are ranked as follows:</p>

<div class="language-plaintext highlighter-rouge"><div class="highlight"><pre class="highlight"><code>Rank 1: Relevant document
Rank 2: Relevant document
Rank 3: Relevant document
Rank 4: Non-relevant document
Rank 5: Non-relevant document
Rank 6: Relevant document
Rank 7: Relevant document
Rank 8: Relevant document
Rank 9: Non-relevant document
Rank 10: Relevant document
</code></pre></div></div>

<p>There are a total of 7 relevant documents in the corpus, the Recall@5 and R_cap@5 scores would be calculated as follows:</p>

<div class="language-plaintext highlighter-rouge"><div class="highlight"><pre class="highlight"><code>Recall@5 = (number of relevant items in top 5) / (total number of relevant items)
         = 3 / 7 
         = 0.43

R_cap@5 = (number of relevant items in top 5) / min(k, total number of relevant items)
        = 3 / min(5,7)
        = 3 / 5
        = 0.60
</code></pre></div></div>

<h2 id="mrrk---mean-reciprocal-rank-at-k">MRR@k - Mean Reciprocal Rank at k</h2>

<p>Mean Reciprocal Rank (MRR@k) measures the average reciprocal rank of the first relevant item in the ranking, where the reciprocal rank of an item is defined as <code class="language-plaintext highlighter-rouge">1/rank</code>.</p>

<p>The MRR@k score is calculated by summing the reciprocal ranks of the first relevant item in the top k items of the ranking for each query, and dividing the sum by the number of queries. The MRR@k score ranges from 0 to 1, with a higher score indicating a more useful ranking.</p>

<p>The formula for MRR@k is:</p>

<div class="language-plaintext highlighter-rouge"><div class="highlight"><pre class="highlight"><code>MRR@k = sum(1/rank of first relevant item in top k) / number of queries
</code></pre></div></div>

<p>For example, suppose we have a corpus containing 10 documents, and we want to calculate the MRR@5 score for a set of queries. If the top 5 documents in the ranking for the first query contain the first relevant document at rank 3, and the top 5 documents in the ranking for the second query contain the first relevant document at rank 1, the MRR@5 score would be calculated as follows:</p>

<div class="language-plaintext highlighter-rouge"><div class="highlight"><pre class="highlight"><code>MRR@5 = (1/3 + 1/1) / 2
      = (0.33 + 1.00) / 2
      = 1.33 / 2
      = 0.67
</code></pre></div></div>

<p>In this example, the MRR@5 score is 0.67, which means that on average, the first relevant document in the ranking is at rank 3 for the first query and rank 1 for the second query.</p>

<h3 id="example-6">Example</h3>
<p>Let us again assume the threshold for a document being relevant is a score of greater or equal than 0.5.</p>

<ul>
  <li>For Query 1, the first relevant document (Document 1) is at rank 1, so the reciprocal rank is 1/1 = 1.0.</li>
  <li>For Query 2, the first relevant document (Document 2) is at rank 1, so the reciprocal rank is 1/1 = 1.0.</li>
  <li>For Query 3, the first relevant document (Document 3) is at rank 3, so the reciprocal rank is 1/3 = 0.33.</li>
</ul>

<p>The MRR@2 score is then calculated as the mean of the reciprocal ranks:</p>

<div class="language-plaintext highlighter-rouge"><div class="highlight"><pre class="highlight"><code>MRR@2 = (1.0 + 1.0 + 0.33) / 3
      = 2.33 / 3
      = 0.78
</code></pre></div></div>

<h2 id="references">References</h2>
<div class="footnotes" role="doc-endnotes">
  <ol>
    <li id="fn:beir_paper" role="doc-endnote">
      <p><a href="https://arxiv.org/abs/2104.08663">BEIR: A Heterogenous Benchmark for Zero-shot Evaluation of Information Retrieval Models</a> <a href="#fnref:beir_paper" class="reversefootnote" role="doc-backlink">&#8617;</a></p>
    </li>
  </ol>
</div>]]></content><author><name>Fabian Hertwig</name></author><category term="blog" /><category term="Information Retrieval" /><category term="Evaluation" /><category term="Metrics" /><summary type="html"><![CDATA[A practical guide to NDCG, MAP, Precision, Recall, and MRR—the metrics used to evaluate search systems and neural retrieval models, with worked examples.]]></summary></entry><entry><title type="html">Feedback Loops are the Key Concept to build awesome Data Products</title><link href="https://fabianhertwig.com/blog/awesome-data-products/" rel="alternate" type="text/html" title="Feedback Loops are the Key Concept to build awesome Data Products" /><published>2022-01-04T14:00:00+01:00</published><updated>2022-01-04T14:00:00+01:00</updated><id>https://fabianhertwig.com/blog/awesome-data-products</id><content type="html" xml:base="https://fabianhertwig.com/blog/awesome-data-products/"><![CDATA[<p>A useful product attracts more users which generate data that can be used to improve the product. That is the concept of the virtuous circle of AI. Tesla uses it to improve the Autopilot, Netflix to show the right movies to each user and even startups to validate their idea or to train robots to sort trash. In this post I will explain the concept and show how these companies implement it.</p>

<h1 id="the-virtuous-circle-of-ai">The Virtuous Circle of AI</h1>

<p><img src="/assets/images/virtuous_cycle.png" alt="the virtuous cycle" /></p>

<p>The first time I heard of the virtuous cycle of AI was in this presentation from Andrew Ng, where he briefly describes it. Short enough so that you understand it, but too short to understand the significance of it. If you like, watch it from 14:40 to 16:40.</p>

<!-- Courtesy of embedresponsively.com -->

<div class="responsive-video-container">
    <iframe src="https://www.youtube-nocookie.com/embed/NKpuX_yzdYs?start=870" frameborder="0" webkitallowfullscreen="" mozallowfullscreen="" allowfullscreen=""></iframe>
  </div>

<p>The circle states that a useful product will attract users. These users generate data and that data can be used to improve the product. That is a positive feedback loop and if you run that for some time, you have such valuable data, that your product evolved to be the best of its kind. It becomes very hard for others to reproduce your product or compete with you. Because if your product is so far ahead then it is hard for them to attract new users so that they create the needed data. To explain that further, let us look at some companies that implement the virtuous circle.</p>

<h1 id="the-tesla-data-engine">The Tesla Data Engine</h1>

<p>The company that implements the circle top-notch is Tesla. The most famous one is the Tesla Autopilot<sup id="fnref:tesla_ai" role="doc-noteref"><a href="#fn:tesla_ai" class="footnote" rel="footnote">1</a></sup> and there are even more circles, for example the data driven safety program<sup id="fnref:data_driven_safety" role="doc-noteref"><a href="#fn:data_driven_safety" class="footnote" rel="footnote">2</a></sup>. Tesla’s Autopilot is self driving car features, which allows the car to steer itself. Right now it needs constant supervision from the driver, but the vision is that the car can drive completely on its own.</p>

<p>Tesla builds electric cars, which is a useful product by itself to many people. To make the autonomous driving features useful from the beginning, Tesla integrated the Intel Mobile Eye system into their early cars before building their own self driving car system. That system powered lane keeping and traffic aware cruise control<sup id="fnref:tesla_hw_1" role="doc-noteref"><a href="#fn:tesla_hw_1" class="footnote" rel="footnote">3</a></sup>. So Tesla has a useful product, which attracts users. Because there are millions of Tesla cars driving around, Tesla can effectively use the fleet to collect data about the Autopilot system. For example, they once observed the problem, that bikes attached to the back of a car get recognized as bikes traveling along the street, but should be recognized as a part of the car. So they issued commands to the fleet to collect images of bikes on cars. The fleet sends these images back to Tesla, they can then label these images correctly and use this dataset to retrain their self driving Neural Networks, e.g. improve their product. Tesla calls this system the Data Engine and presented it for the first time at the Tesla Autonomy Day, see the video below from 2:05:18 to 2:12:50. If you want to also get a good explanation of how Neural Networks work, then start at 1:52:00.</p>

<!-- Courtesy of embedresponsively.com -->

<div class="responsive-video-container">
    <iframe src="https://www.youtube-nocookie.com/embed/Ucp0TTmvqOE?start=7518" frameborder="0" webkitallowfullscreen="" mozallowfullscreen="" allowfullscreen=""></iframe>
  </div>

<p>Tesla built the data feedback loop very intentionally into the cars. The Autopilot Hardware has additional computational capacity which allows Tesla to run Neural Networks in shadow mode, where they run in parallel to the networks in control, but are just observing the world or the system that is in  control. Tesla also uses shadow mode to deploy triggers on the fleet, for example to send back video sequences where bikes are attached to the car or when the driver had to intervene<sup id="fnref:triggers" role="doc-noteref"><a href="#fn:triggers" class="footnote" rel="footnote">4</a></sup>. Or they deploy the next version of a Neural Network in shadow mode and send back all the predictions that turned out to be wrong, for example when a model predicted that another car would cut into the line, but it did not.</p>

<h1 id="spotify-netflix-youtube-tiktok-and-other-recommenders">Spotify, Netflix, YouTube, TikTok and other Recommenders</h1>

<p>Streaming services like Spotify, Netflix, YouTube, and TikTok made the virtuous cycle their whole business model. Because their main business is not streaming media, but recommending media. If they were not able to recommend you the next good song to listen to, or series or video to watch, you would probably move to another streaming service that is able to do that. And to be able to recommend every user what they probably like, they use the data of the preferences of other users.</p>

<p>TikTok takes being a recommender to the extreme. TikTok is a platform where users can upload short videos and remix them with music or other user’s videos. When you open the app, you land on the <em>#ForYou</em> screen and a video that TikTok recommends you starts playing. The video will play on repeat until you scroll down to jump to the next video. If you double tap the screen you like the video. Over time TikTok will learn what interests you based on videos you liked previously, watched until the end or repeatedly or skipped. From time to time the app will throw in a video that is not in your interests either to challenge what they know about your interests or to get a sense of what is interesting to a broader user range<sup id="fnref:tiktok_for_you" role="doc-noteref"><a href="#fn:tiktok_for_you" class="footnote" rel="footnote">5</a></sup>. So TikTok is continuously running the virtuous cycle of AI. The App is useful, because you can endlessly watch videos that entertain you and therefore it attracts more users. These users interact with videos and TikTok can learn which videos fit into which interest group and improve their recommendation engine. This improves the product as users get to see even more entertaining videos and the loop continues.</p>

<p><img src="/assets/images/netflix.png" alt="Netflix Mainpage" /></p>

<p>When a user opens the Netflix main page and does not find anything intriguing in 90 seconds, she will loose interest and move on to do something else<sup id="fnref:netflix_ab_testing" role="doc-noteref"><a href="#fn:netflix_ab_testing" class="footnote" rel="footnote">6</a></sup>. If so Netflix has failed to deliver: A user wanted to watch something, but could not find anything and left. That is why Netflix personalizes the complete homepage to the user. On the page are rows of grouped videos, for example recommendations based on previously watched movies or genres. Inside the groups the videos are ranked by how interesting a video might be to the specific user<sup id="fnref:netflix_homepage" role="doc-noteref"><a href="#fn:netflix_homepage" class="footnote" rel="footnote">7</a></sup>. Netflix even adapts the cover image of each video to the user<sup id="fnref:netflix_artwork" role="doc-noteref"><a href="#fn:netflix_artwork" class="footnote" rel="footnote">8</a></sup>. As an image says more than a thousands words the cover image is the most important evidence for a user to decide if a movie or show might be interesting to her. Therefore the image should show which of the user interests the movie could satisfy: Is there an actor that the user likes, is there an action loaded chasing scene in it, a romantic relationship or is it about a mysterious sighting? To select a good image, Netflix sources multiple cover artworks that show different aspects of the movie. A system then learns which of these artworks is a good choice for each user by showing the different artworks to the user base and observing which image/movie/user combination led the users to select the movie and watch it. Before Netflix personalized the artworks, they simply showed the same artwork to every user. To make sure, that the new system leads to a better user experience, Netflix ran A/B test. In an A/B test the users a split up into groups. One is the control group which gets to see what the current system produces, the static artworks. Then there are also one or more experimental groups, where the users get to see the new system, the personalized artworks. Then different metrics are tracked for each group to see if the new system improves the user experience. The metrics could be the streaming hours or user retention. Netflix found that personalized artworks are a meaningful improvement and rolled it out to the whole user base.</p>

<!-- 
- Netflix greenlighting house of cards
-->

<h1 id="a-butcher-running-tests-on-customers">A Butcher Running Tests on Customers</h1>

<p>When you want to use the virtuous circle and you already have <strong>users</strong> that use your product, then you simply need to become data driven. That means inform your decisions with data, for example what features to develop or remove and in which direction to move on. Bernard Marr tells in his book Big Data in Practice<sup id="fnref:_big_data_in_practice" role="doc-noteref"><a href="#fn:_big_data_in_practice" class="footnote" rel="footnote">9</a></sup> the wonderful story of a butcher becoming data driven because of the threat of a supermarket chain that opened nearby. They installed cheap small sensors near the display window, sandwich board and inside the shop. These sensors are able to pickup smartphone signals and can therefore measure how many people stopped at the window, board and hopefully went into the shop. That allowed them to run tests on what to display in their window and what to write on the board and measure how that affects customer numbers. <strong>Think about that, a butcher running A/B tests!</strong> They found out that a recipe fitting the current time of year was more effective in attracting customers than a message advertising a cheap price. They also found out that a lot of foot traffic passed their shop in the late evening, when their shop was long closed, because there were two pubs nearby. Opening the shop in the late evening to sell sandwiches to the pub dwellers turned out to be a lucrative additional business.</p>

<h1 id="buffer-testing-the-product-idea">Buffer Testing the Product Idea</h1>

<p>Buffer is a company that allows you to prepare Twitter posts and schedule them to be posted in the future. Even before they had built the <strong>product</strong> and it was merely a good idea, they started the virtuous cycle. <strong>They created to most minimum valuable product you can imagine and tested the value of their idea</strong>.</p>

<p><img src="https://buffer.com/resources/content/images/4dLL/Buffer-MVP.png" alt="Buffer MVP" /></p>

<p><sub>Source: <a href="https://buffer.com/resources/idea-to-paying-customers-in-7-weeks-how-we-did-it/">Idea to Paying Customers in 7 Weeks: How We Did It</a></sub></p>

<p>They created a landing page which described the the product in a few lines of text. Next to it was a button <code class="language-plaintext highlighter-rouge">Plans and Pricing</code>. When visitors clicked the button they landed on the next page that stated: <em>Hello! You caught us before we are ready. If you’d like us to send you a reminder once we are ready put your email in below</em><sup id="fnref:buffer_idea_to_product" role="doc-noteref"><a href="#fn:buffer_idea_to_product" class="footnote" rel="footnote">10</a></sup>. From the number of people that clicked the <code class="language-plaintext highlighter-rouge">Plans and Pricing</code> button and left their E-Mail, they got a pretty good idea of how useful the product would be to users. To be able to measure the value of their idea, they added a new second page after the <code class="language-plaintext highlighter-rouge">Plans and Pricing</code> button that actually showed some plans and pricing. When visitors then clicked on one of the plans, then they got to the page where they can leave their E-mail. This is probably a better example for <em>Lean Startup</em> than for the virtuous cycle of AI, but I wanted to include it to show with how little you can start collecting data. Here, Buffer does not even have a product or users, but just the idea that there might be a product in the future is already useful to some people. And if they click through your landing page they give you data on which you can base your decision.</p>

<h1 id="collecting-data-to-be-able-to-train-robots">Collecting Data to be able to Train Robots</h1>

<p>To get back to a example where AI is actually the key component, let us look at AMP Robotics who started with a unique <strong>dataset</strong>. They build robots that can sort trash to revolutionize recycling. Therefore a computer vision system must be able to detect which kind of trash is on a conveyor belt so  the robot arm can pick it up and throw it in the right bin.</p>

<!-- Courtesy of embedresponsively.com -->

<div class="responsive-video-container">
    <iframe src="https://player.vimeo.com/video/342840855?dnt=true" frameborder="0" webkitallowfullscreen="" mozallowfullscreen="" allowfullscreen=""></iframe>
  </div>

<p>When they started they setup a small demo conveyor belt at their lab. The CEO went dumpster diving on the weekends to find an assortment of bottles and cans for their dataset<sup id="fnref:amp_robotics_spotify" role="doc-noteref"><a href="#fn:amp_robotics_spotify" class="footnote" rel="footnote">11</a></sup>. Once the janitor even thought they threw a big party and was about to throw away all the trash that they collected, luckily he called in first. With the small dataset and the lab setup they were able to built a compelling demo and got to talk to recycling site operators. But they knew that the demo only really worked in their lab setup and would struggle under different lighting conditions and trash types. On site, they were allowed to record more video of the actual conveyor belts that transport trash which they annotated to improve their system. Once they felt ready to put a trash sorting robot arm on site they purposefully set it up somewhere, where it could not create a lot of harm, as they knew they need to collect and label more data before their robot could detect the different types of trash accurate enough to be valuable. Their robots are connected to their cloud infrastructure and send back images. These get annotated, added to the dataset and new computer vision models are trained, that the robots can then download and use. This is how AMP Robotics runs the virtuous cycle of AI and continuously improves the system over time.</p>

<h1 id="conclusion">Conclusion</h1>

<p>The virtuous circle of AI: A useful product attracts more users which generate data that can be used to improve the product. Tesla uses it with their data engine to collect data from the fleet to train new versions of Autopilot Neural Networks. TikTok uses it to learn which videos are most entertaining to each user. Netflix improves the user experience by showing cover art that explain to users if a movie is interesting to them. A butcher used it to find out how to contact users in and around their shop. Buffer started without users, data or a product but tested the product idea. And at last the CEO of a robotics company goes dumpster diving to collect assets for their dataset. These were just a few examples, but I hope they showed a good range of applications and entry points.</p>

<p>If you want to implement to virtuous circle then think about how you could learn from users, how you can test product improvements, what is your dataset and can you improve it from user interactions.</p>

<hr />
<h2 id="references">References</h2>
<div class="footnotes" role="doc-endnotes">
  <ol>
    <li id="fn:tesla_ai" role="doc-endnote">
      <p><a href="https://youtu.be/hx7BXih7zx8?t=423">YouTube: Andrej Karpathy - AI for Full-Self Driving at Tesla</a> <a href="#fnref:tesla_ai" class="reversefootnote" role="doc-backlink">&#8617;</a></p>
    </li>
    <li id="fn:data_driven_safety" role="doc-endnote">
      <p><a href="https://www.youtube.com/watch?v=9KR2N_Q8ep8">YouTube: Tesla Crash Lab Data-Driven Safety</a> <a href="#fnref:data_driven_safety" class="reversefootnote" role="doc-backlink">&#8617;</a></p>
    </li>
    <li id="fn:tesla_hw_1" role="doc-endnote">
      <p><a href="https://en.wikipedia.org/wiki/Tesla_Autopilot#Hardware_1">Wikipedia: Tesla Autopilot Hardware 1</a> <a href="#fnref:tesla_hw_1" class="reversefootnote" role="doc-backlink">&#8617;</a></p>
    </li>
    <li id="fn:triggers" role="doc-endnote">
      <p><a href="https://youtu.be/g6bOwQdCJrc?t=890">YouTube: [CVPR’21 WAD] Keynote - Andrej Karpathy, Tesla</a> <a href="#fnref:triggers" class="reversefootnote" role="doc-backlink">&#8617;</a></p>
    </li>
    <li id="fn:tiktok_for_you" role="doc-endnote">
      <p><a href="https://newsroom.tiktok.com/en-us/how-tiktok-recommends-videos-for-you">How TikTok recommends videos #ForYou</a> <a href="#fnref:tiktok_for_you" class="reversefootnote" role="doc-backlink">&#8617;</a></p>
    </li>
    <li id="fn:netflix_ab_testing" role="doc-endnote">
      <p><a href="https://netflixtechblog.com/selecting-the-best-artwork-for-videos-through-a-b-testing-f6155c4595f6">Netflix Tech Blog: Selecting the best artwork for videos through A/B testing</a> <a href="#fnref:netflix_ab_testing" class="reversefootnote" role="doc-backlink">&#8617;</a></p>
    </li>
    <li id="fn:netflix_homepage" role="doc-endnote">
      <p><a href="https://netflixtechblog.com/learning-a-personalized-homepage-aa8ec670359a">Netflix Tech Blog: Learning a Personalized Homepage</a> <a href="#fnref:netflix_homepage" class="reversefootnote" role="doc-backlink">&#8617;</a></p>
    </li>
    <li id="fn:netflix_artwork" role="doc-endnote">
      <p><a href="https://netflixtechblog.com/artwork-personalization-c589f074ad76">Netflix Tech Blog: Artwork Personalization at Netflix</a> <a href="#fnref:netflix_artwork" class="reversefootnote" role="doc-backlink">&#8617;</a></p>
    </li>
    <li id="fn:_big_data_in_practice" role="doc-endnote">
      <p><a href="https://bernardmarr.com/books/">Bernard Marr: Big Data In Practice</a> <a href="#fnref:_big_data_in_practice" class="reversefootnote" role="doc-backlink">&#8617;</a></p>
    </li>
    <li id="fn:buffer_idea_to_product" role="doc-endnote">
      <p><a href="https://buffer.com/resources/idea-to-paying-customers-in-7-weeks-how-we-did-it/">Idea to Paying Customers in 7 Weeks: How We Did It</a> <a href="#fnref:buffer_idea_to_product" class="reversefootnote" role="doc-backlink">&#8617;</a></p>
    </li>
    <li id="fn:amp_robotics_spotify" role="doc-endnote">
      <p><a href="https://open.spotify.com/episode/2FzwkL7p2EJWomncgkVKVI?si=SZwqxsS_SheUX8O3yeqBRA&amp;t=1502&amp;dl_branch=1">Spotify: The Robot Brains Podcast: AMP Robotics @25:00</a> <a href="#fnref:amp_robotics_spotify" class="reversefootnote" role="doc-backlink">&#8617;</a></p>
    </li>
  </ol>
</div>]]></content><author><name>Fabian Hertwig</name></author><category term="blog" /><category term="Machine Learning" /><category term="Data Engine" /><category term="Data Products" /><summary type="html"><![CDATA[How Tesla, Netflix, TikTok, and even a local butcher use the virtuous circle of AI—where users generate data that improves the product, creating an unstoppable competitive advantage.]]></summary></entry></feed>